It’s not uncommon for photographers to get stuck in certain mindsets that images have to be perfectly lit, subjects must be placed in shadows and lit with strobes, backgrounds can’t be blown out, and so on. As a result, we end up creating sterile images born of trying to flex technique as opposed to shooting with purpose. While these images may demonstrate plenty of technique, they often lack emotion and other qualities that make portraits impactful.
I’m here to tell you that it’s okay to blow out the highlights. In fact, in this article/video, we’ll show you how and when to use natural light for high key portraits that balance imperfect lighting with a refined, authentic look. We cover these concepts and more in our natural light engagement photography and flash photography workshops, all of which are available to stream as part of a Premium subscription.
Video: How and When to Use Natural Light for High Key Portraits
When SHOULD You Blow Out the Highlights?
Lighting plays a crucial in creating compelling imagery, but it doesn’t have to be perfect. In fact, there are instances when imperfect lighting can be used to add authenticity to portraiture. Such is the case with shooting high key portraits. It’s important to remember that other elements, such as composition, posing, and expressions all work together with lighting to create mood and allow the imagery you create to match your vision.
We’ll use the CAMP framework (Composition, Ambient Exposure, Modify or Add Light, Pose & Photograph) to outline the steps we took to compose, light, and capture the final image.
Step 1. Decide on Your Composition

For this image, I placed the subject in a sitting pose in front of a window with a lot of hard light coming in through the window. I chose this location because of its potential for creating a beautiful, bright and airy high key portrait. The hard light falling across her shoulder accentuates the dress and adds visual interest to the photograph.
Lens choice also factors into the composition and artistry of this shot. Using a wide angle lens in such a close proximity to the subject, such as the Sigma 24mm f/1.4 DG HSM lens that I used for this semi-closeup portrait, adds lens distortion, which can be used for artistic effect. If you want to avoid (or at least minimize) lens distortion when shooting on a wide angle lens, you’ll need to place the subject in the center of the frame and/or move farther away form the subject.
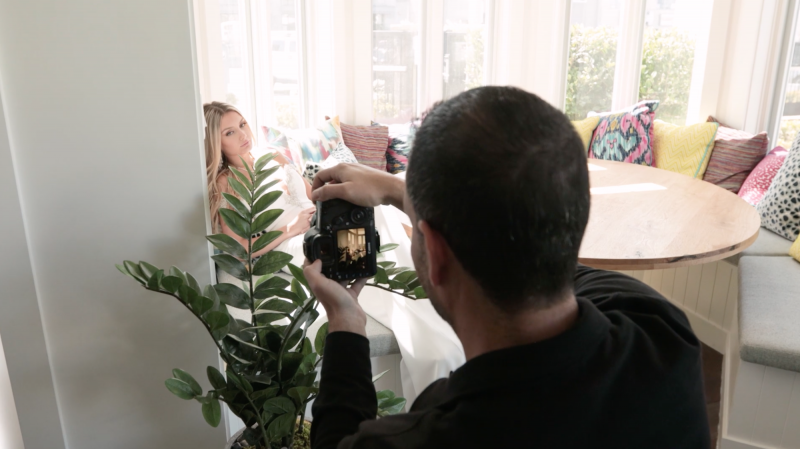
Finally, after working through some of the other steps, I realized the frame still left something to be desired, so I added a plant that was sitting on the opposite side of the room to add visual interest to the foreground (see the image above).
[Related Reading: 5 Natural Light Techniques Before You Flash]
Step 2. Dial in Your Ambient Exposure

The first two steps go hand in hand, really, when setting up this shot. You can start dialing in your baseline exposure as you move your subject into position so that you don’t have to recompose the photo due to an unforeseen issue with lighting. I chose not to underexpose the image in this instance because saving details of objects outside of the window (such as cars, buildings, trees, people, etc.) would only add more distractions to the scene. I want to keep the focus on my subject.
Instead, I opened the aperture all the way to f/1.4 to let in light and blur out the background with shallow depth of field, further minimizing any distracting elements.
Step 3. Modify or Refine the Exposure
While I didn’t necessarily add any light, I decided to further refine the ambient light after taking a series of test photos so that I could retain as much detail as possible in the subject’s dress, knowing I can blow them out more in post if necessary.
In order to do this, I simply brought up the histogram and enabled the highlight alert. This reveals any clipped shadows and highlights and lets me know how much further I can push my exposure before losing too much detail in the image.
Step 4. Cue Your Subject to Capture the Perfect Expression
With composition and lighting dialed in, simply direct your subject into a pose and give cues for capturing the perfect expression. Watch how light is falling on your subject’s face and make adjustments until the resulting light pattern flatters your subject’s facial features.
[Related Reading: 5 Primary Light Patterns and Their Purposes]
Final Image

This represents what we call a perfectly imperfect portrait, where we’ve utilized imperfect lighting to give the image a natural feel. It serves as evidence that it’s okay to blow your backgrounds and create bright and airy portraits. This technique works especially well for bridal portraits, which look amazing when captured in a bright and airy style.
Conclusion
We hope you enjoyed this video and lesson on how and why to blow out your background in your portraits. For more education on natural light engagement photography and flash photography techniques, be sure to check out our workshops and Premium subscriptions at slrloungeworkshops.com.


Get Connected!