Outdoor family portraits are a fantastic way to capture genuine, heartfelt moments that families will print for the walls of their homes, send with their holiday cards, and cherish forever. The beauty of natural environments and availability of natural light allow photographers to focus on posing and capturing the emotion and interactions of the family members. However, outdoor photography comes with its own set of challenges, from fluctuating lighting to unpredictable surroundings. With these six tips, you can create memorable and visually captivating portraits while ensuring a great experience for your family photography clients.
Choose the Right Time of Day
Lighting is one of the most critical factors in family photography, and natural light is ideal for outdoor sessions. To achieve soft, flattering illumination, schedule your shoots close to the “golden hour”—shortly after sunrise or an hour before sunset. The session does not have to be exactly at golden hour, and the ideal time will depend on the photographer’s vision for the overall aesthetic. The main lighting requirement is to have directional light to avoid harsh lighting scenarios.
Also, the ideal lighting can vary based on the location. Settings with tall mountains, dense tree canopies, or towering buildings may block light, even during golden hour. To ensure you get the best results, scout the location in advance to understand how light interacts with the environment, and consider using apps like Sunseeker to help you understand the position of the sun.
Scout the Right Location
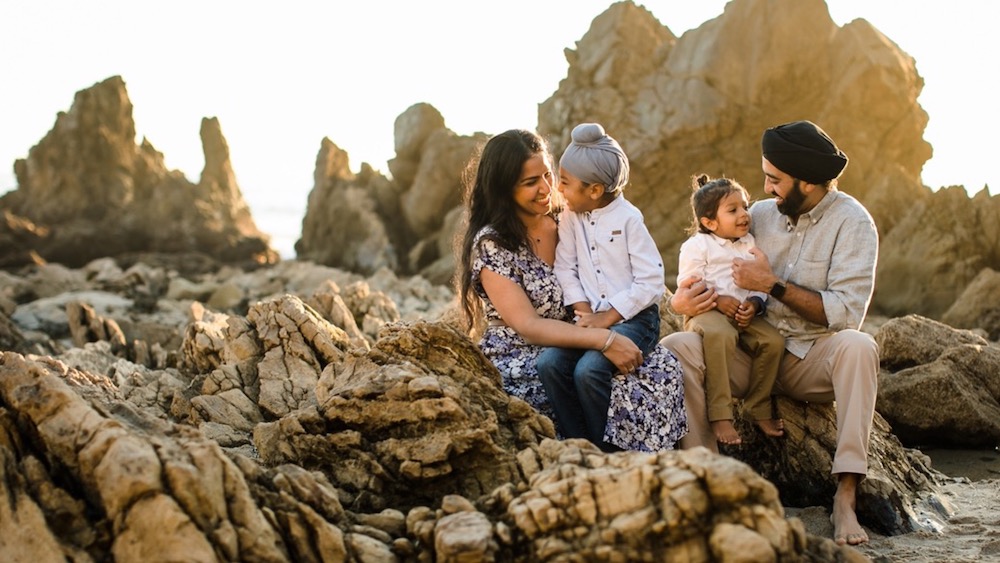
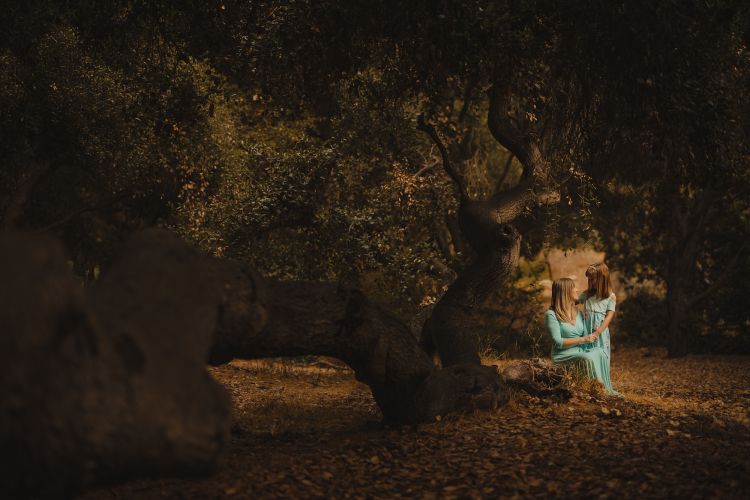
The location of your shoot serves as both the backdrop and a key element in telling the family’s story. It’s essential to find a spot that aligns with the family’s vision and desired aesthetic, whether that’s a park, a forrest, a beach, or a urban setting.
Here are a few characteristics of the ideal outdoor family photography locations:
- Not Crowded – A crowded or busy area can make families feel self-conscious and increase post-processing time due to background distractions.
- Ideal Lighting – The best locations also have favorable lighting for the time of day you plan to shoot.
- Interesting Scenery – Scenic elements like blooming flowers, tall grasses, or interesting architectural features can provide additional framing and texture, elevating the overall look of the portraits.
Understand Family Photography Poses
Posing is the foundation of great family portraits. Follow these three quick tips on outdoor family photography posing.

- Start with Traditional Poses – Start your outdoor family portrait session with classic foundation poses where everyone is positioned traditionally and looking into the camera. These timeless shots are often the ones families choose to frame or share widely.
- Incorporate Movement – Once you’ve captured these staples, introduce variety by incorporating movement and candid interactions. Encouraging the family to walk hand-in-hand, lift and toss children, hug in tight, and try other dynamic movements.
- (Optional) Add in Activities – Activities like a picnic, tossing a ball, or blowing bubbles not only create a more relaxed atmosphere but also naturally generate interactions that look and feel genuine. These moments are often the most cherished because they reveal the unique bonds within the family.
Learn more about family photography poses in this article.
Tell a Story with Wide, Medium, and Tight Photos
To create a well-rounded and engaging set of images, vary your angles and compositions throughout the outdoor family portrait session. Think of your outdoor family portraits as telling a visual story. Here are the 3 magic angles to help you achieve this.
- Wide – Wide shots can capture the family in their environment, providing a sense of place and setting the scene.
- Medium – Medium shots allow you to focus on the group without losing the context of their surroundings.
- Tight – Tight shots, meanwhile, zoom in on the details—like a parent holding a child’s hand or siblings sharing a laugh—adding intimacy and emotion to the story. This combination of perspectives helps create a comprehensive narrative and gives the family a diverse selection of images to cherish.

Keep Your Gear Minimal and Your Lighting Simple
Outdoor shoots often require you to move around quickly to adapt to changing conditions and capture spontaneous moments. Keeping your gear light and portable can make all the difference. A versatile zoom lens or a prime lens with a wide aperture is often sufficient to handle a variety of scenarios. Rely on natural light as much as possible, as it provides a beautiful, authentic look.
If additional lighting is necessary, use a single flash with a lightweight modifier like an umbrella or softbox to maintain a simple and unobtrusive setup. This streamlined approach allows you to focus on engaging with the family and capturing their best moments without being bogged down by cumbersome equipment.
On-Camera Lighting for Family Portraits Caste Study
In this case study from our Lighting 101 workshop, we’ll share a quick lighting tip for capturing family portraits outside that will help you work quickly when photographing kids.
When location scouting for outdoor family portraits, a beautifully framed patch of grass was selected as the starting point for the session, featuring hanging tree branches overhead. Positioning the subjects to face the sun would have resulted in harsh shadows and strong highlights due to the direct sunlight. Instead, the sun was used as a backlight, which created a new challenge with shadows. With the family’s back to the sun, the overall ambient exposure of the scene became too dark.
A highly effective flash photography technique for outdoor family portraits in shaded areas involves using the white side of a reflector to bounce light onto the subjects. This approach helps retain more details in the background. To achieve this, the flash is mounted on-camera and angled toward the white reflector. This setup avoids the harsh highlights that might result from the silver side of the reflector, instead creating a soft, diffused, and directional fill light. Under ideal lighting conditions, a fast recycle time can be achieved by using the flash at 1/4 or 1/8 power, though this varies depending on the ambient light exposure.

Be Decisive and Efficient!
When photographing children, we’re never too far, one way or the other, from experiencing cooperation or temper tantrums. Because of this, it’s important to make the most of our time during family photography sessions.
Conclusion
Outdoor family portraits combine the beauty of nature with the joy of capturing genuine connections. By thoughtfully planning your timing, location, and posing while keeping your gear simple, you can create a stress-free experience for your clients and deliver images that truly resonate. Remember that the best portraits don’t just document faces—they tell stories of love, laughter, and togetherness. With these tips in hand, you’ll be well-prepared to elevate your outdoor photography and create cherished memories for the families you work with.


