When it comes to lighting and flash photography, multi point lighting setups can seem complicated and intimidating. Not being able to see the light before taking the photo requires photographers to rely on their experience and their understanding of lighting concepts. So we’re here to help you break down these concepts into simple, digestible steps to demystify 3 point lighting and 2 point lighting setups in the following tutorial.
Before we get started, it’s important to understand that more is not always better when it comes to the number of flashes. In fact, one light setups or simple two point setups are often all you need to get incredible photography. Of course, this depends on the style and mood you’re trying to achieve. In addition, “points” or “lights” do not have to be flashes. You can achieve a multi-point lighting setup by bouncing light off of a v flat or a reflector. The sun can also be a light source. So you can achieve a 2 point lighting or even 3 point lighting setup with a single flash or without any flashes at all.
To break down these concepts, we’ll be combining the following tutorials from our website:
- Multi-Point Light Setups with 1 On Camera Flash
- The 3-Light Setup That Only Requires One Light
- 3-Light OCF Setup With Magmod Modifiers
- Simple 3 Light Set-up For a Fitness Photo Shoot | BTS With Miguel Quiles
- Arid Amore’ – Tackling A Difficult Three Light Setup With Clay Cook
- Three Portrait Lighting Styles Using Two-Light Setups by Patrick Hall
Tutorial 1: Multi-Point Light Setups with 1 On Camera Flash
Utilizing a multi-point light setup is a practical exercise that will help you build an understanding of two and/or three light setups. In this tutorial, we use a single on-camera flash to create images that look like they were made with a four or five light setup. So without further ado, here are three tips on how to properly execute a multi-point light setup.
Tip 1: Always Start With One Light
Starting with one light enables you to have a framework in understanding how to properly set up your lighting. Depending on which main light modifier you utilize first, will determine how the second or third modifiers will act.
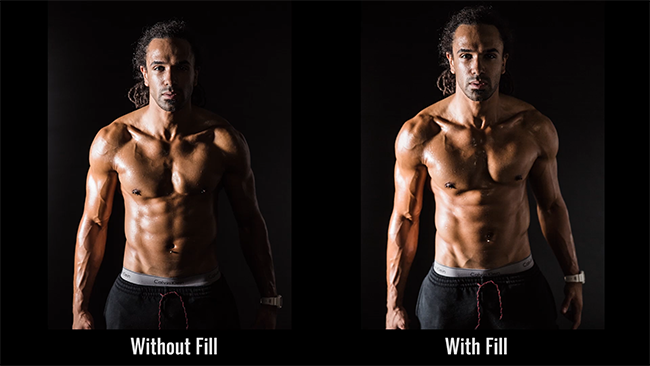
Tip 2: After Setting Up, Look And See If Any Additional Lights Are Required
As previously mentioned, after your key light is set up, and your camera settings are in place, analyze and observe your image and determine how additional light modifications can improve the quality of your photo.
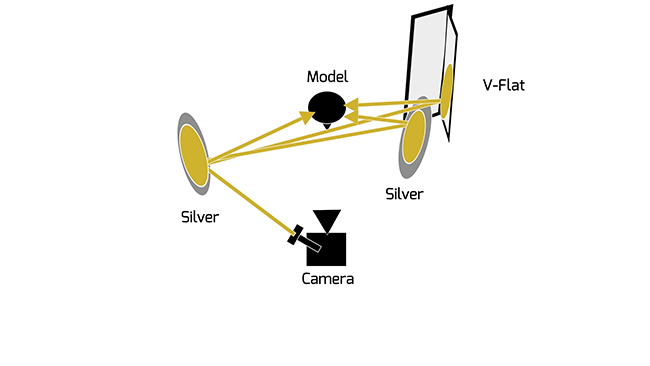
By utilizing a bounce flash and various light modifiers, we were able to compose a beautiful picture that balances perfectly between highlights and shadows.
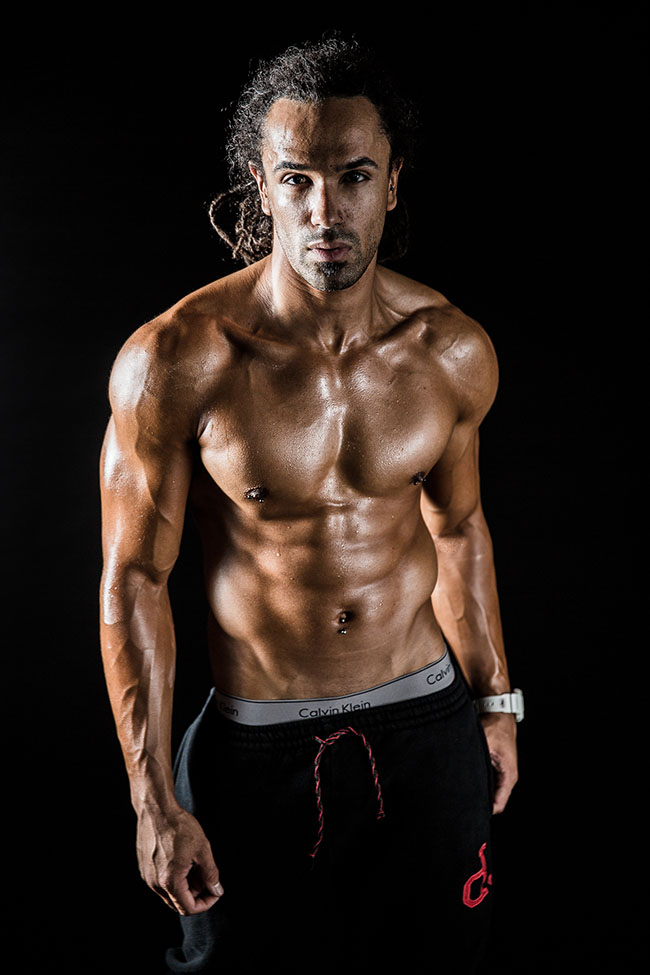
Tip 3: Just Because You Can Add More Light, Doesn’t Mean You Have To Or Should Add More Light
A compelling image needs to have both highlights and shadows. If you open up all the shadows and everything is in the mid-tones, it’s not going to look dramatic or any good. On the other hand, if you leave too much in the shadows, it won’t look great either. Practice learning to find that balance.
Tutorial 2: The 3-Light Setup That Only Requires One Light
If you are coming to this party, you better B.Y.O.L (bring your one light), this will most likely only make sense once you watch the intro to this video, but you get the general idea.
Carrying multiple light stands, strobes, and modifiers can be cumbersome, and most times you may not have the help to set it all up in an efficient manner. In our Lighting 101 & 201 workshops, we’ve discussed a diverse selection of lighting tools and modifiers that can be used to create unique & dynamic images. In this specific instance, we use one off-camera light source and position our model just so, to replicate a 3-light setup.
Find your Light Direction
What was working for us in the scene above was the location of the sun and direction of light. Ideally, we place our subjects with their back facing the sun to get a rim light around the edges of their bodies, in doing so, however, this forces us to bump up our settings up to compensate for the dark scene, eventually blowing out detail in the background. We situated our model in a way that her back was to the sun which gave us this edge light surrounding her.
Although the front of her body is completely underexposed, there is still a slight amount of fill light being brought into the scene coming from the ground, essentially acting like a reflector. These are our two light sources, one from the back and one from the front, giving us the best use of natural light for our scene and composition.
The One Light We Chose To Bring
We needed major power in order to combat the heavy shadows – enter the Volt DB22’s. We used two of them, triggered by a PocketWizard Plus III to overpower the sun in the scene, setup with a single battery pack on my BoomStick. Since we didn’t want harsh, specular highlights on our model, we modified the light with a Profoto 3′ RFi Octa Softbox. Obviously, this isn’t the only option available for a shot that requires this much power here are some alternatives:
- Profoto B1 500 AirTTL
- Profoto B2 250 Air TTL
- AlienBees™ B800 Flash Unit
- Phottix Mitros+ TTL – You will most likely need 3-4 of these to reach the same amount of power as the alternatives listed.
- With two Volt DB22s, we’re shooting at around 1/2 power. If you’re using the Profoto B2, you’re going to be shooting 1/1 power unless you have two of them stacked. Either way, you’re going to need roughly 250 to 500 watts second of light for a shot like this, especially since we are using it in conjunction with the Softbox, diffusing our light power.
Camera Gear & Settings
The question may arise as to why we chose to use more light power instead of adjusting our exposure settings. In order to get a highly compressed background we chose to use the Sigma 120-300mm f/2.8 DG OS lens, however, this type of compression can easily be achieved using a Canon, Nikon, or Tamron 70-200 f/2.8 telephoto lens as well. The front lens opening of the Sigma 120-300mm was a bit too large for the ND filters in our stock (recently we have been using the Tiffen 4 x 4″ Full Spectrum IRND 1.5 Filter) and therefore high-speed-sync wasn’t an option. After stopping down to f/7.1, we reached our sync speed and achieved great sharpness while maintaining the illusion of compression.
Dropping our ISO down to 50 gives us the dynamic range we require out of the ambient light and background of the image, while still retaining 1/200th of a second to retain sync speed. Ambient light exposure looked great. Again, I’m shooting kind of down on her just a little bit, so that I’m not getting any of the sky behind her. We’re not blowing out the highlights and we’re letting the existing shadows remain exactly how they appear in the scene.
Tutorial 3: 3-Light OCF Setup With Magmod Modifiers
Always start with one light and then see how your scene can benefit with additional light sources. In Lighting 101 we gave you the fundamentals of how to modify and shape light with your flash on-camera, but the potential and capabilities of taking it off-camera are unlimited.
See how we used three off-camera flashes to create the editorial couples portrait you see above in just 4 simple steps.
1. Dial in your camera settings
For this location we were aiming for a more editorial look to our imagery. The architecture helped create the frame for this shot but we needed to match our settings and light to compliment the scene. I wanted to under expose the background a bit so that the subjects popped out for when we added flash.
Since our flash sync speed needed to be at 1/200th or slower and we are shooting in broad daylight we need to arrive at a darker overall exposure to get the drama we are trying to achieve. At ISO 100 we are maintaining the dynamic range of the image but ambient exposure of the image is still too bright which is why we chose to bump our aperture to f/7.1.
2. Place your first light source
It is crucial to start with one light first and then work in other light sources depending on what look you are trying to achieve. In this scene, there was a spot of sunlight coming through from camera left. In order to amplify that sunlight and balance the light in the scene we used an off-camera flash (#1) with a MagGrid and CTO gel coming from the same direction as the sun. The grid was used to control the light spill and the CTO gel was used to match the warmth of the sunlight.
3. Add in additional light sources to make subjects pop

To push light in her direction we doubled up and placed another flash (#2) adjacent to the other flash angled more towards her face. To help carve her out of the background we added another gridded CTO gelled flash (#3) on camera right held by our assistant Sean to add a rim/hair light. to them.
4. Select a flash modifier to help mold your light
Since we didn’t want our light to spill onto the background we chose to use MagGrids to help pin the light on our couple. In order to match the temperature of the natural sunlight hitting the subjects we then balanced our additional light sources with Color Temperature Orange gels.
Tutorial 4: Simple 3 Light Set-up For a Fitness Photo Shoot | BTS With Miguel Quiles
Recently, I was hired to shoot some images for a boot camp instructor who was looking to create some images to market her business. I thought it would be a perfect opportunity to take some behind-the-scenes (bts) video of how easy it can be to light this type of work.
I used a very simple 3 light setup throughout the entire session which consisted of the following:
- Main light: Photoflex FlexFlash 400w inside of a medium (5ft) Octodome
- Rim light camera left: PhotoFlex FlexFlash 200w inside of a medium Halfdome (gridded)
- Rim light camera right: Photoflex FlexFlash 200w inside of a medium Litedome (gridded)
With the lights all set up and ready to go, I started taking shots. I quickly settled on 1/125, f9, ISO 100 for my camera settings and didn’t change them for the entirety of the photo shoot. Not having to mess with the settings allowed me to work with my subject to get the most interesting poses and expressions possible.
Below you’ll find my Photoflex-sponsored behind-the-scenes video showing the entire process from beginning to end. My hope is that you’ll see how easy it is to replicate these results in your own business.
Tutorial 5: ‘Arid Amore’ – Tackling A Difficult Three Light Setup With Clay Cook
Lighting can be a tricky beast to tackle. Yes, the basics of lighting can be easy to master and not as intimidating as most new photographers may think it is. But if you’re well versed with light, you know that sometimes to get the look you are envisioning in your head, it takes time, talent and creativity (and likely some tears of frustration) to get the lighting exactly right.
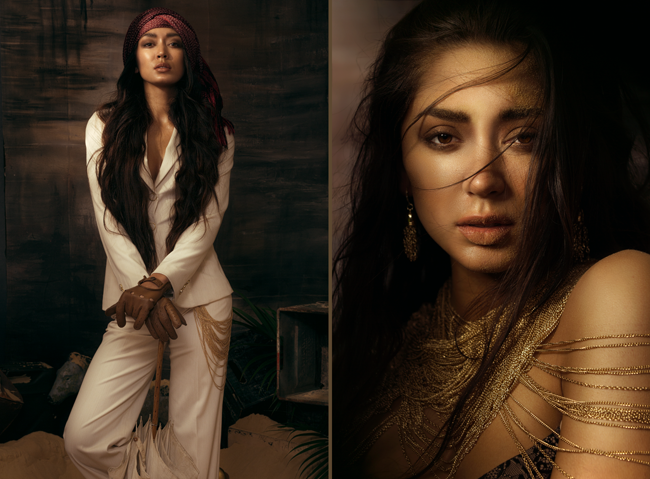
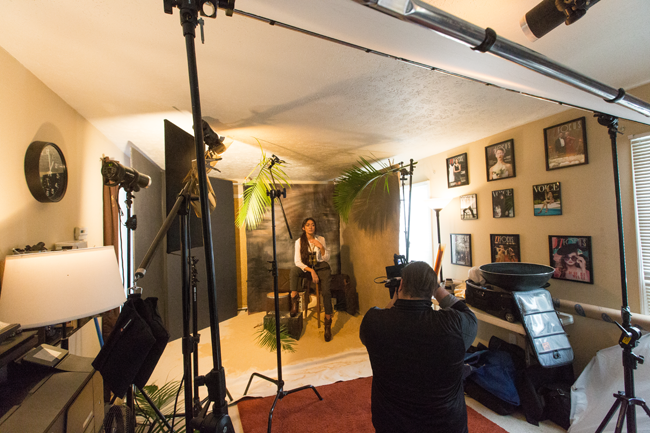
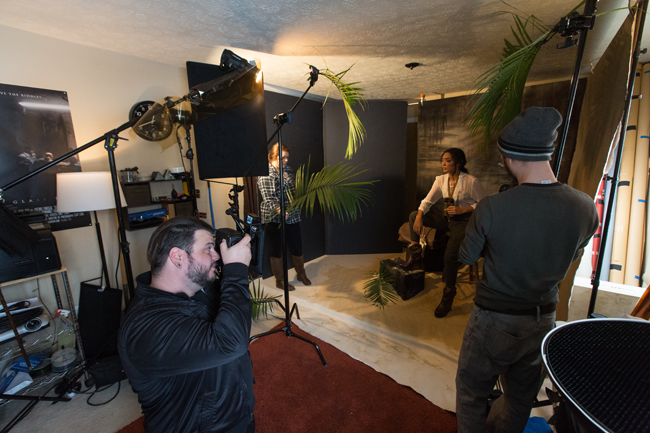
Advertising, fashion and commercial photographer, Clay Cook has a solid handle on lighting. He has an impressive list of publications and clients, is an educator and writes for Fstoppers in his free time. So when Clay himself says that this lighting setup was “one of the most difficult lighting scenarios” that he’s had to tackle, I shudder in fear. The setup itself took nearly two hours. One would think that using only 3 lights, the setup would be simple and quick, but Clay explains, “all of my normal “go-to” setups failed miserably. I didn’t have much room to work with; I shot this right in my living room, so all the pre-lighting looked like senior portraits. It took a CTO, a Matthews flag and a palm tree to make everything fall into place. All of those things I have never really had to work with.”
Shooting through the palm tree branch for the gradients on the edge of the frame, he diffused the key light using the branch as a gobo.
The images were a concept that Clay had been thinking of for a while. In the “lusterless world of commercial photography,” (and any photography really) working with new, fresh concepts, stretches our creativity and helps us fall in love with photography again. In this series, ‘Arid Amore,’ Clay recharged his creative batteries and came out with some incredible images.

Gear List
- Canon 5D Mark III
- Canon 50mm f/1.2L
- f/4.5
- 1/180
- ISO400
- Key: Profoto D1 | 6.0 Power | Rosco CTO Gel
- Background: Profoto D1 | 4.5 Power | Matthews 18×24″ Flag
- Fill: Profoto D1 | 4.2 Power | Lastolite 3×6′ Skylight Rapid
Watch the Behind the Scenes Video
See more of Clay’s work on his site here.
CREDITS : Photographs by Clay Cook have been used with permission for SLR Lounge. Do not copy, modify or re-post this article or images without express permission from SLR Lounge and the artist.
Tutorial 6: Three Portrait Lighting Styles Using Two-Light Setups by Patrick Hall
You might be surprised at how versatile a two-light setup can be. We teamed up with Lee Morris and Patrick Hall from Fstoppers to bring you quick and easy lighting techniques that you can start using right away. In this video, we’re going to walk you through three easy two-light setups that are wonderful for studio portraiture.
Watch the Video for 3 Easy 2-Light Setups Below
Portrait Lighting Style 1: Flat Lighting with Depth
You can change light direction as you see fit when working with flash and strobes, but having a general fill and adding light directly to your subject helps create a bit more depth in your scene, especially when you’re working in a studio. Flat Lighting is one of the most flattering light directions, adding in light to fill in shadows on the face and bringing an overall brightness to the image.
Step 1 – Position Your Lights
To create natural, pleasant shadows just under the nose and chin, simply place the light just to the side of your camera position and elevate your light source. If the light source is placed too low in relation to your subject, you can get shadows in unnatural places. Think “campfire scary” uplighting.
Step 2 – Minimize Light Spill
If you find that the light is falling all over the place, you can focus your light direction by adding a grid and zoom dish. For this image, we used a Profoto B10 with a zoom reflector and a 60-degree grid.
Step 3 – Adjust Your Flash Power Settings
After you’ve positioned your light source where you want it, take a few test shots to dial in your power settings.
Step 4 – Add Fill Light
While the main or key light will be used to chisel out your subject’s face, we’re going to add a second light source in a large soft box to fill in the shadows a bit and balance out the light that’s falling on our subject. I placed the second light source near the first light so that the light and shadows would fall in a similar fashion. The fill light should only add a touch of light to the scene and not add distracting new shadows and highlights.

Portrait Lighting Style 2: Seamless Beauty Dish Style Flat Light with Two Strip Boxes
This next setup uses two soft light sources with two Profoto strip boxes.
Step 1 – Position Your Lights
Patrick has placed both strip boxes close to the subject to minimize shadows and create a nice light fall off, leaving a nice highlight on the front of the face with a soft shadow gradient toward the back of the face.
Step 2 – Test Your First Light & Adjust Settings
Our first shot with a soft light just to the left of our subject creates a pleasant, soft-lit portrait, but adding the second light will really knock out the shadows for a soft, seamless portrait. The final result looks almost like we used a beauty light.

Step 3 – Add in Second Light Source & Adjust Settings
To achieve this look, the power ratio between the two light sources will typically be set 1:1 (assuming your using two light sources with the same power output).
Portrait Lighting Style 3: Standard Clamshell Lighting
Like the previous setup, this portrait lighting style will use two light sources side by side, but this time above one another in a clamshell setup.
Step 1 – Position Your Lights
While the previous light achieved uniformity and symmetry, this set up will look a bit different. Lee positioned two Profoto Softbox RFi 3′ Octas (reflective umbrellas) next to each other, or rather one over the other, and placed them close to the subject. Here’s what it looks like using just the top light.

As you can see, using a single light overhead creates plenty of dark shadows. While the light direction looks okay, the detail beneath the subject’s chin has been lost in the darkness. By adding a second light below the original light source, we can fill in those shadows.
Step 2 – Vary the power output between the two light sources
If the power is set to the same level for both lights, we’re left with more uplighting than downlighting (see the image below).

Instead, when we lower the bottom light source by four additional stops of light, we get a much more pleasant looking portrait (see the image below). You can still see the shadows under the nose, but we’ve opened them up and created more depth with directional lighting as opposed to the seamless lighting style shared in setup #2.


