Creating a watermark directly in Lightroom will help protect your images from “portfolio thieves” looking to use your images without your permission. This video teaches you how to create a watermark in Lightroom! Another question commonly asked is this: “How do I stamp my images in Lightroom?” If you’ve wondered this yourself, then you’re in the right place.
We’ll show you how to create and customize your watermarks so that you can see your own studio or business logo when you export your photos. We’ll also show you how to resize it, place it where you want it in the frame, and save it as a preset. This will work for both simple text watermarks or adding your own graphic logo over your photos!
Alright, let’s dive in.
Lightroom Watermark Video Tutorial
While Pye is demonstrating how to create a watermark in Lightroom 4, the process has remained relatively unchanged in later versions. NOTE: This version of Adobe Lightroom is equivalent to the current “Lightroom Classic” version. However, in Lightroom CC (Creative Cloud), there is a very similar watermark interface! Whichever version of Lightroom you’re using, you should be able to follow along.
In the video below, we go through the following Lightroom concepts:
- How to create a text watermark in Lightroom
- How to create an image watermark in Lightroom
- How to change the position of a watermark in Lightroom
- How to change the opacity of the watermark in Lightroom
- How to apply watermarks to batch images in Lightroom
For the most up-to-date education in Adobe Lightroom, plus all of photography from clicking photos to how to start a profitable photography business, be sure to visit SLRLoungeworkshops.com
Lightroom Watermark Settings
To begin, you’ll want to bring up the export interface. That is the only place where you can create/edit watermarks.
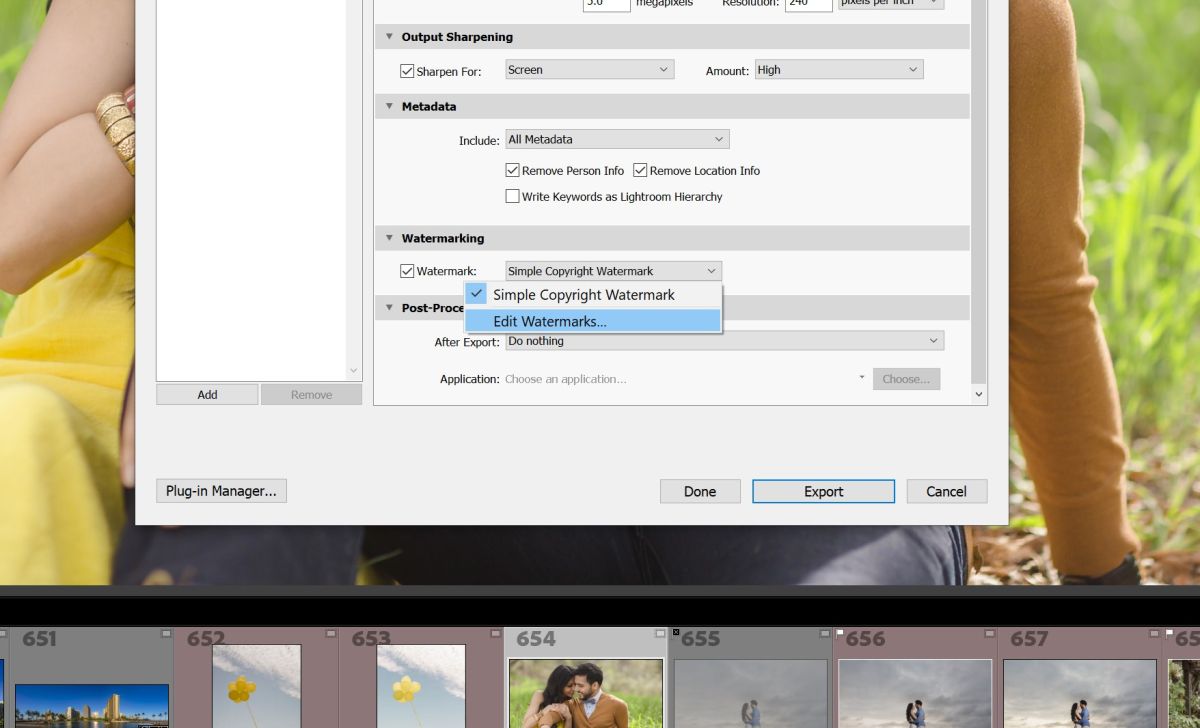
In the “Edit Watermark” interface, you’ll be able to choose whether to use plain text or a graphic. Then, if you’re using plain text, you’ll choose a font and style. There is an “Align” option for text; however, this is only the alignment within the text box. It is not relative to the whole image. More on this in a second! Next, choose a color for the text.
How To Create A Plain Text Watermark In Lightroom
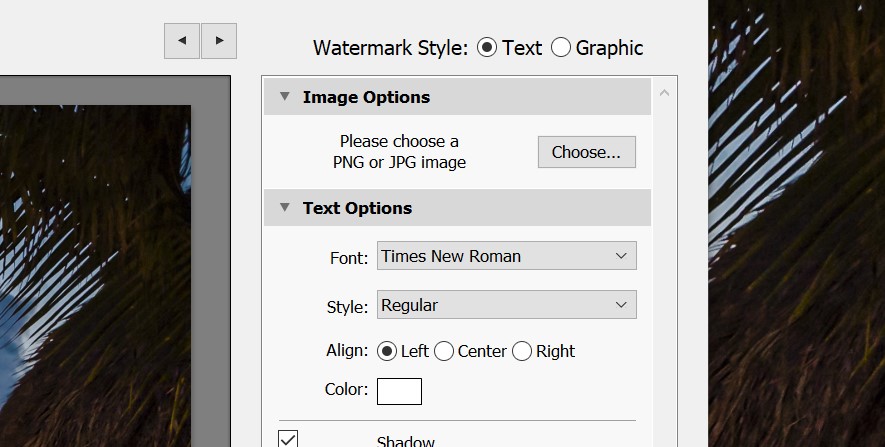
If you’d like to add what is known as a “drop shadow” to your text, the next settings will allow you to turn that option on, and control options for Opacity, Offset, Radius (size), and Angle.
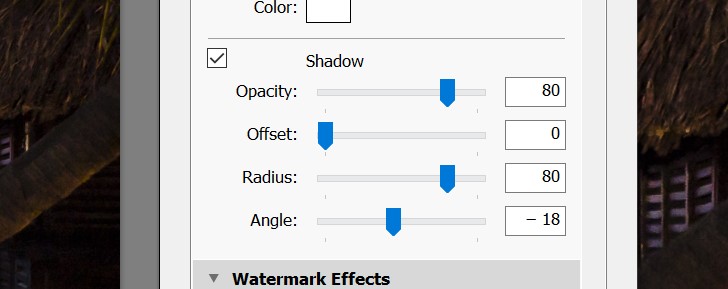
The next category of settings are very important. You’ll control the overall opacity of the entire watermark, plus its size. Alternatively, the Fit and Fill options will force the watermark size to either stretch across the image, or cover it entirely. (We don’t necessarily recommend these options, unless your watermark opacity is very, very low!)
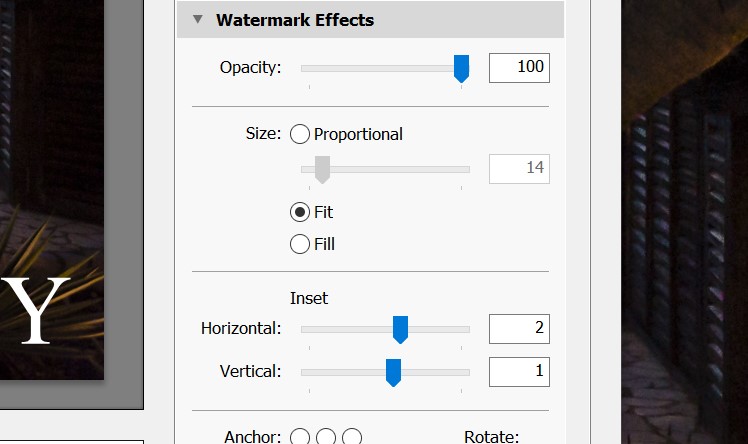
The Inset options, Horizontal and Vertical, will control the amount of space between the edges of your photo and the watermark. These options may change depending on if your size is set to Proportional, Fit, or Fill.
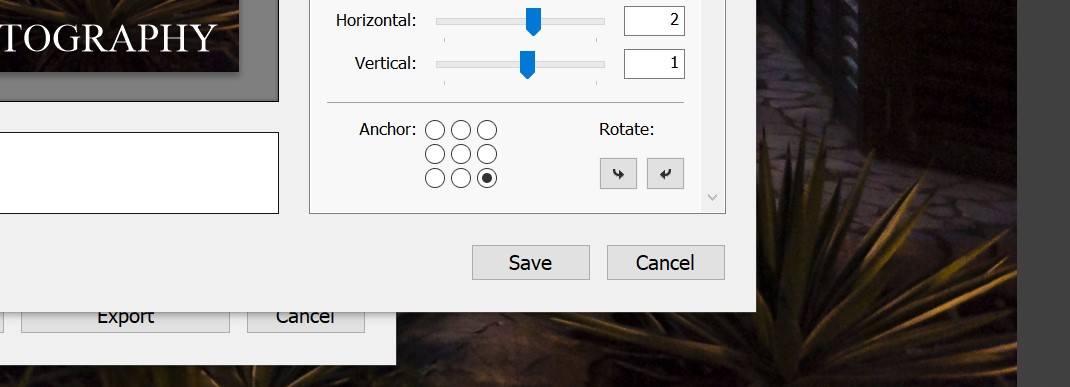
Last but not least is the Anchor setting. This is where you get to actually control where your watermark goes; simply select any of the nine different anchor points, and then fine-tune the Size and Inset settings again.
How To Create a Graphic Watermark in Lightroom
Thankfully, the process is nearly identical if you want to switch from simple text to a graphic!
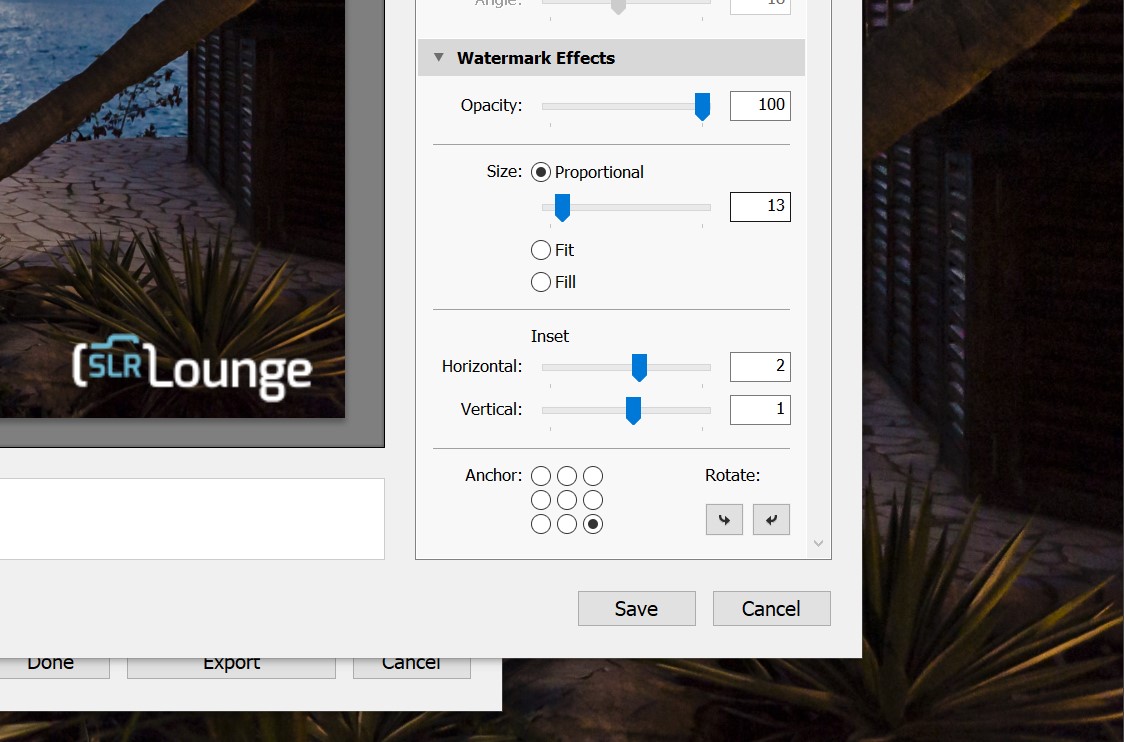
The only important things to note are these two items: First, if you want your graphic watermark to include a drop-shadow, you’ll have to make that part of the graphic because the options become greyed out in LR.
Secondly, make sure that when you save your logo graphic, it is saved with transparency, as PNG file instead of JPG. Otherwise, it will show white in between any empty spaces of your logo.
That’s all there is to it! If you have any additional questions, please leave a comment below.
For the most up-to-date education in Adobe Lightroom, plus all of photography from clicking photos to how to start a profitable photography business, be sure to visit SLRLoungeworkshops.com! To see the latest free Lightroom tutorials on SLR Lounge, click here.


