
If you shoot with a camera that is not a high ISO demon (Sony a7S), then a noise reduction plug-in may be for you. I’ve recently been delving into the world of product photography (reviewing the Photigy.com membership), and it was through this that I came across Topaz DeNoise. Topaz was kind enough to provide me with a copy of their program to review.
If you do a search for “best noise reduction plug-in,” or something similar, you will come across quite a few differing opinions. Some will loudly proclaim that whatever they use is the best (in the classic obnoxious photographer manner). While others take a more measured approach stating that the current range of programs have all come a long way and are very good.
I looked into noise reduction plug-ins years ago. Back then, I was not too impressed and quickly reverted to using the stock Lightroom and Photoshop options. I’m glad to report that things have progressed. Let’s start with the positives.
Topaz DeNoise Positive – Effective Algorithm
Who knew, or cared enough to research, that noise reduction plug-ins used a sophisticated algorithm to analyze that nasty grainy rubbish we see in our photos? It’s obvious, of course, but I never really paid much attention to this. It’s this reason that fuels the fire of passionate debates over this plug-in or that; each algorithm is different.
The most important thing for those that don’t tend to delve into the technical (and dull) side of things is whether the noise reduction achieved is better than Lightroom or Photoshop. The answer? Yes, it is.
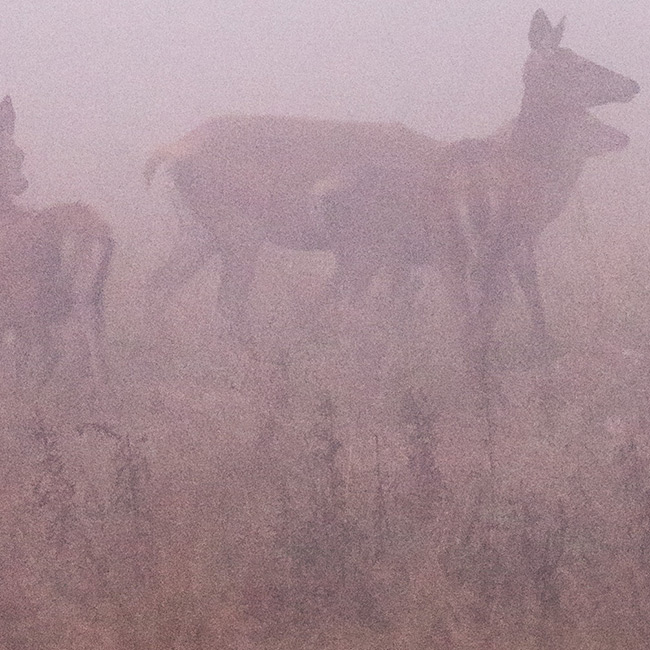
I shoot with the noise hungry (aka my camera loves producing noise) Canon 5D Mark II. I love it, don’t get me wrong, but go over ISO 800 and be prepared for a mess. Because of that, I avoid anything over ISO 800 like the plague. I dug around in my archive and found a few photos to test this on. You’ll find a few 100% crops throughout this article.
BEFORE
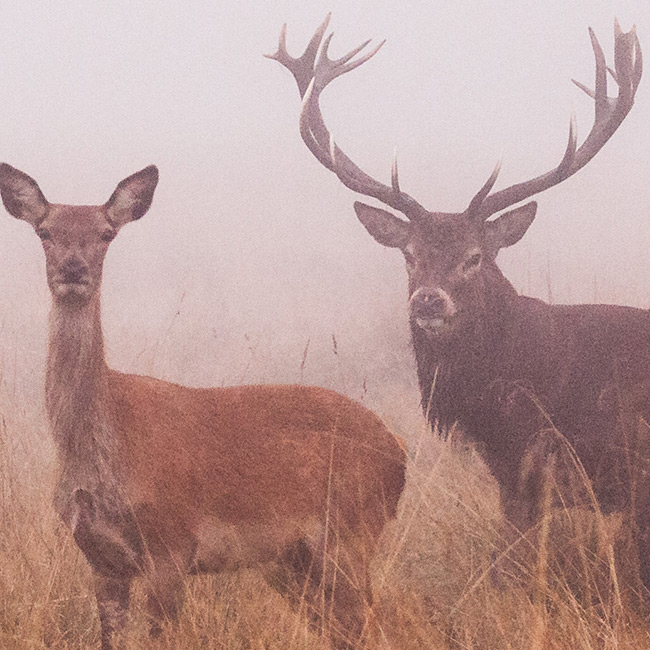
AFTER

Topaz DeNoise Positive – Intuitive Controls
The title says it all. It’s pretty obvious how this thing works. In fact, it’s so obvious I got it wrong! (Only joking, kind of). If you decide to purchase this plug-in, make sure you watch these two videos. While the sliders are all very clear, the designers have a good workflow for going through it all, which I originally did not adhere to.
[REWIND: SHARPENING AND NOISE REDUCTION IN THE DETAIL PANEL IN LIGHTROOM 3]
Characteristically, I was going to write more and more positives turning this article into a lengthy essay, but let’s be honest. All we really need to know is:
1) Is it easy to use?
2) Does it do a good job?
The answer to both of those questions is, yes. It’s easy to use, does a better job than what is possible inside of Lightroom and Photoshop, and it doesn’t kill all the detail in your photos. Positives aside, let’s move on to the negatives.
BEFORE
AFTER

[REWIND: AN EXCELLENT WAY TO REMOVE/REDUCE NOISE FROM YOUR IMAGES]
Topaz DeNoise Negative – Batch Processing
This is my biggest issue with the program. I don’t shoot weddings, but if I did, and I had a whole load of noisy images from a dimly lit dance floor, then it would be a little annoying using this. You can use the plug-in directly from either Lightroom or Photoshop. However, you can’t apply a preset to lots of images at the same time. Not from Lightroom anyway. In Photoshop, you can create an action and then batch process your images but it’s still a little laborious compared to using the noise reduction tab in Lightroom or ACR.
Let’s be realistic, though. The only times you’ll have lots of noisy images that all need processing quickly like this is for event photography. With that type of photography, using the stock Lightroom and Photoshop options are, in my opinion, the way to go. However, if quality is of the utmost importance, then it’s always useful to have this option. No, I would not process every photo through this but those special ones that deserve my full attention, definitely.
Topaz DeNoise Negative – It’s a Little Slow
This is more of an annoyance than anything else. If we’ve ruled out using it to batch process lots of images, then it’s only being used on the “special ones.” The ones we’re spending lots of time on anyway. A few extra seconds isn’t the end of the world.
I have been using this plugin quite extensively in my product photography, and it’s here that the slow speeds are highlighted. If you have a large Photoshop document, it will take a long time to apply. I guess that’s what you sacrifice for a useful tool like this.
Topaz DeNoise – Bonus
The astute amongst you will have no doubt noticed my referrals to using Topaz DeNoise in my product photography. This is not because I’m shooting at high ISO’s, compensating for pitiful lights. It is, in fact, a very useful tool for cleaning.
As mentioned, I was first turned on to this by Alex Koloskov and Photigy.com. Alex regularly uses this to polish metal. I’m sure there are many other creative uses for this plug-in that I may one day come across, but for the moment, it’s a pretty cool bonus.
Topaz DeNoise – Summary
This is not an essential plug-in, but that doesn’t detract from its usefulness. I love that I now have this extra option should it be needed. I don’t like that I can’t batch process images, but that’s not really what this is about.
Finally, for the bargain price of $79.99 you can’t really argue. Click here to be taken to the Topaz website to check it out for yourself.


Get Connected!