
In some of my recent articles, I’ve talked about an editing technique that I love, despite having become the bain of some photographers’ existence. It’s Frequency Separation, and it’s a technique that has been around for a long time. I started using it years ago and have changed my methods dramatically since then. There are so many videos and articles explaining this technique, but few of those tell you the correct way of doing it, nor delve into the philosophy that I feel is key. The result of this is a large number of photographers ruining their images. This article hopes to fix some of that.
[REWIND: REMOVING TRICKY COLOR CASTS ON SKIN + FREE FREQUENCY SEPARATION ACTION]
Brief Explanation Of Frequency Separation
As mentioned, I have spoken of this before so will keep this brief. Frequency Separation is the process of isolating the details of your image from the colors and tones, thus allowing them to be edited separately. The main benefits of this are that it becomes far easier to retain detail when doing in-depth edits and you have very precise control over color and tone.
Frequency Separation has, however, attained a bad name amongst many due to the way it is used. Simply put, people either do it completely wrong or they go too far. Our aim when using Frequency Separation is to create NATURAL looking, flawless skin (up to you how flawless). Ironically, by going too far, we get the opposite effect. When skin is too perfect, it ends up resembling plastic and loses its detail.
[REWIND: SKIN RETOUCHING | NO MORE PLASTIC SKIN…PLEASE]
An important point to note is that you DO NOT need to use this method on every image. Firstly, it takes some time when done correctly, and as such, it is simply not practical. Secondly, if we are operating within what I would call the “correct skin retouching philosophy,” then it is not necessary all the time. I’ll cover the philosophy side of things a little later.
Setting Up Frequency Separation In Photoshop
Rather than go into detail on how to set this up, there are quite a few steps, please download my own personal Photoshop action. You can find it here. This action will create all the layers you need and has some short explanations along the way. Please note, there are two separate actions that must be used depending on what bit-depth you are working in (8 or 16).
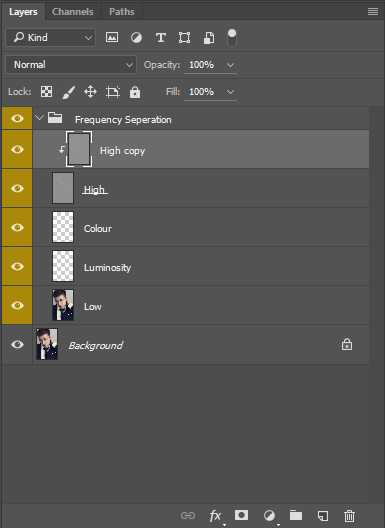
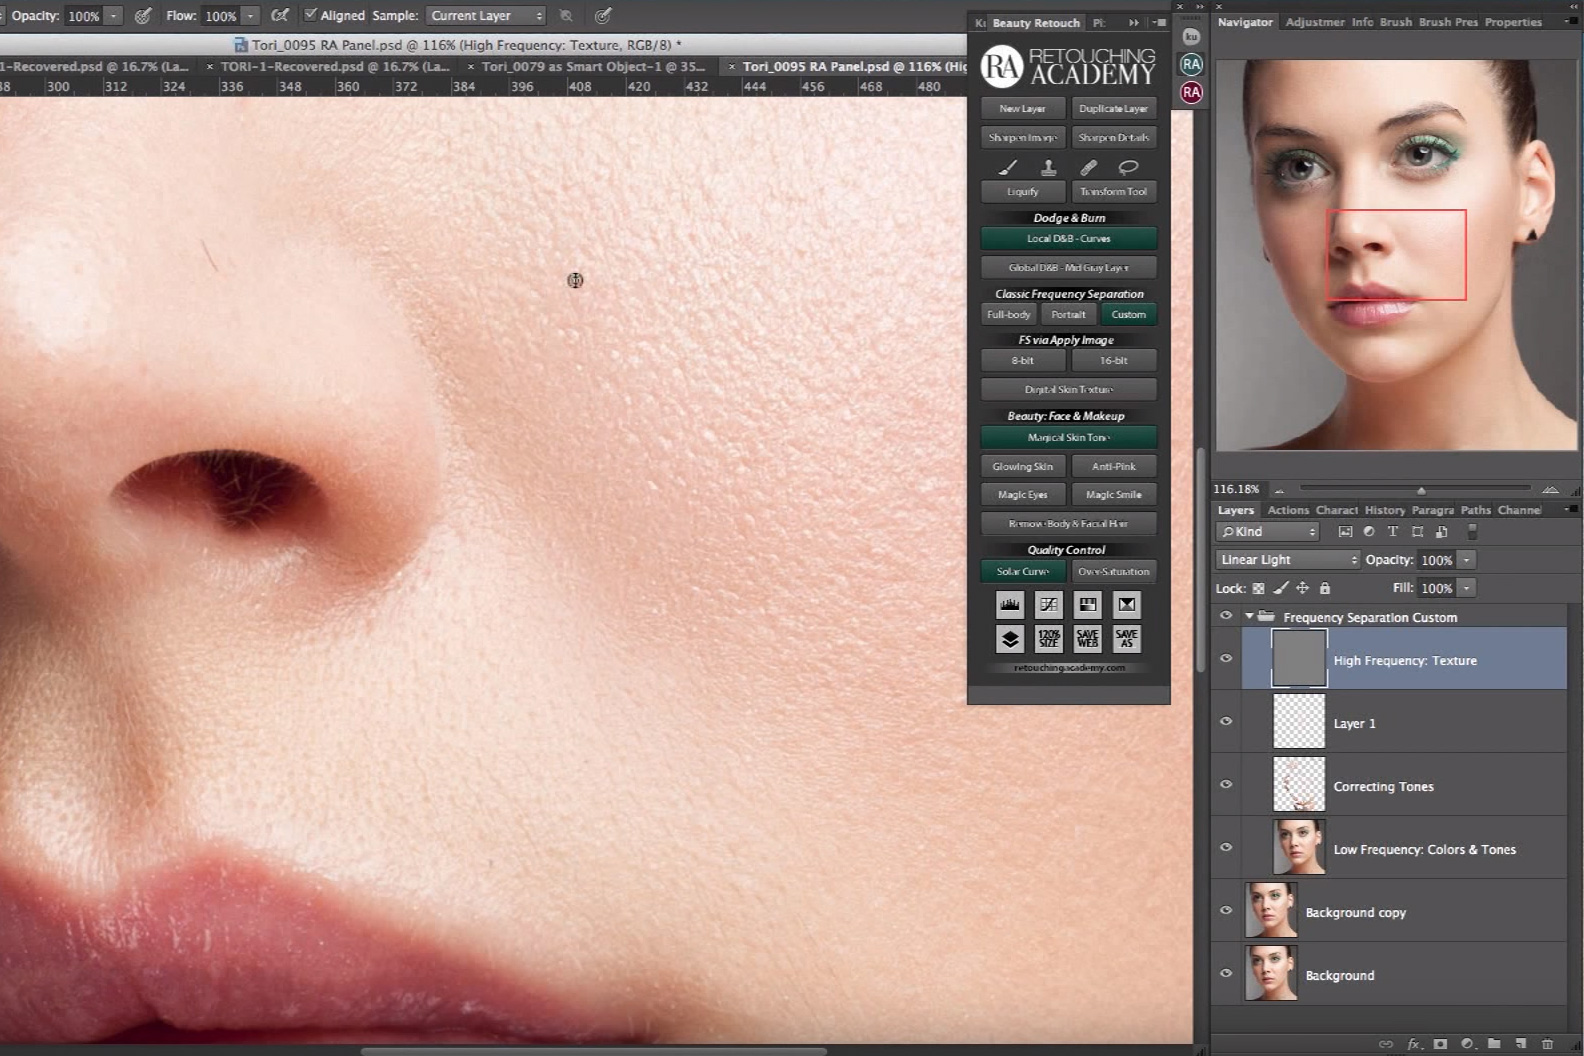
Once you run the action, you will be left with the layers you see above. As I said, everything is explained throughout the action, but there are a couple of things I would like to draw your attention to.
1) The “High Copy” layer is where you do all your detail editing. By working on this layer, you always have the “High” layer as a backup should you do something wrong
2) On the “Luminosity” layer, you would adjust the tones using the brush settings I advise in the action. However, it’s better to do this via some Dodge and Burn layers. Why? It’s more flexible and a little less destructive than Frequency Separation. Either method is ok, but I prefer to adjust Luminosity via Dodge and Burn.
The Many Faces Of Frequency Separation
So why has this fantastic editing method become so confused? Over the years, I have watched a lot of videos about this technique. I have gone from using it the wrong way (what I classify as wrong) to a more refined version. Frequency Separation has been sold to us incorrectly as an all-encompassing wonder technique, which is perfect for everything. Due to this, it’s become very popular. When something becomes popular everyone wants to create videos on it and write articles about it (like me). Sadly, many of these people do not know what they are doing and as a result, there has been an avalanche of misinformation.
Of the numerous videos I have watched over the years, they all start the same. The setup is usually the same. The best videos include a few extra steps; adding layers in between (Colour and Luminosity in my action) and have different techniques for working on the low layer; something that I now never do. All in all, there are two methods that I classify as correct.
In this video by Phlearn, Aaron Nace takes us through the more common version of the technique. As you’ll note, the setup is the same, but the key difference between this and what you will see below is how you work on the layers created. Aaron uses the Lasso Tool to select an area and then blurs that area using a Gaussian Blur. This has the effect of smoothing the transitions between the tones. This works and technically there is nothing wrong with it but, for me, it’s not giving us enough control. Doing it this way also has the added negative of very easily creating the plastic fantastic look that I (and most others) agree is not desirable.
[REWIND: PHOTOGRAPHY COURSES: 5 ESSENTIAL COURSES FOR EVERY BEGINNER]
This is the method that I used for a long time, and I got some pretty good results with it. I even developed my own version that was used when time was very tight; a method that would have retouchers shouting at their screens. Essentially, I duplicate the Low layer, add a Gaussian Blur and then selectively paint the effect on using a layer mask. This is not something that I advise you doing, but it just goes to show how many different ways this technique can be used. The big negatives of doing it that way are the lack of control and high risk of making someone look very plastic-like. However, used with an extremely light touch, I’m able to create some decent images. You may recognize the one below from a previous article where I used this method.

The next version of this method is shown in the following two videos by Michael Woloszynowicz and Julia Kuzmenko Mckim. Again, the main difference is the way the retoucher’s work once the layers are created. Rather than using the Lasso Tool and blurring, in these videos, you will see the brush tool being implemented. In my opinion, this technique is far superior as it allows you much greater control. In addition, you’ll see the extra layers being added in-between the High and Low layers. These added layers make the whole technique much more flexible. It’s far easier to go back and change your adjustments, AND we can use blend modes to be even more precise.
The Philosophy of Frequency Separation
This section is perhaps the most important part of this whole article. I absolutely love Michael Woloszynowicz’s editing style. Full credit goes to him and his videos for showing me how to correctly use this technique. Not only that but he has also spoken about the fact that he, too, overused this method, to the point where he ruined some of his old images.
Whenever retouching skin, you need to consider your aims. If it’s beauty retouching, then you will want a particular level of perfection whereas fashion, headshots, or portraits will be another. The overriding philosophy is to create something that appears to be natural. With beauty, it will undoubtedly be more “perfect”, and thus it could be argued to be less natural but either way, we want to retain detail, not destroy it, and produce something with a healthy appearance. Go into every edit knowing that:
1) You have Frequency Separation within my editing arsenal
2) It is not always appropriate to use and must be done with a light touch
3) Not every image needs to be “flawless.” ONLY use this when necessary
These days, when I need Frequency Separation, I will use one of the methods mentioned throughout this article. More often than not, I am working on images that either do not require it or are not paying me enough to devote the time. It’s so important, as professionals, to draw that line and make that distinction. The majority of my images are edited in Lightroom using the SLR Lounge Preset System and then taken over to Photoshop only if necessary. If you are on the hunt for a decent system for Lightroom, then I cannot recommend it enough. You can find the SLR Lounge Preset system in the store here.


Get Connected!