
Introduction
Network Attached Storage is one of the biggest areas of question for photographers, and rightly so. Professional photographers and cinematographers generate massive amounts of media and managing all of the data can get downright cumbersome. We have tried pretty much every solution in the book, and in this article, we are going to talk to you about our favorite small business NAS solution, Synology drives.
Past Solutions
When it comes to storage and data management, you name it, and we have probably tried it.
Inexpensive Western Digital drives from Costco are great, but extremely cumbersome when it comes to building large volumes of redundant data.
We have tried RAID devices like DROBOs. Honestly, they were great from the side of a consumer built product. They were simple to setup and quite easy to use. The only problem is that their software/hardware RAID systems just aren’t quite fast enough for professional use. Moving media back and forth on a daily basis simply takes too long. But, still it’s a decent solution for consumers, hobbyist photographers, and even possibly the “single photographer” studio shooting 15-20 jobs a year.
Today, we shoot 300-350 weddings a year, hundreds of portrait sessions, maternity shoots, newborn shoots, commercial shoots, etc. In fact, each year we are shooting nearly 1,000 client commissions as a studio. This forced us down the road of building our own internal server rack that could handle our daily data transfer needs.
But, when we were a growing studio, shooting around 100 to 200 weddings a year, we relied on the Synology DS2015xs (8-bay system) as well as the Synology DS1515 (5-bay system) and various other Synology models. In this article, we are going to nerd out a bit and tell you why these were our favorite out of box NAS solution and why you should look into them as a professional photographer.
In particular, we are going to do a full review and give you all the specs on the Synology DS2015xs, an investment that has a lot of growth potential for successful and growing photographers and photography studios.
To help me with my review, our internal “IT God” Joseph Wu is going to be aiding me with some of the more technical tests. So big thanks to Joseph for all of his help with this review.
Synology DS2015xs Review
Synology has always been our go-to when it comes to Network storage. We still have quite a few in operation here at our studio, ranging from the smaller DS211 all the way up to the DS1813+. As mentioned in the introduction, more recently, we had to move our production media from several DS1813+ onto a custom 10GbE FreeNAS based server, as our media workloads were simply outgrowing bonded 1GbE connections. Thus, when Synology announced the DS2015xs, we were very excited as it is the most affordable 10GbE NAS to date, with the same Synology 8-bay form-factor that everyone is accustomed to.
 It’s hard not to compare it to the many “enterprise” level offerings such as our own in-house developed 10GbE FreeNAS solution, or the other Synology rack stations. Needless to say, the DS2015xs has really blown us away with the performance per dollar it delivers.
Before we begin, we’d like to thank Marivel @ Synology USA in providing us with the review unit, along with Seagate for working with Synology to provide us with 8 of their latest Enterprise NAS drives.

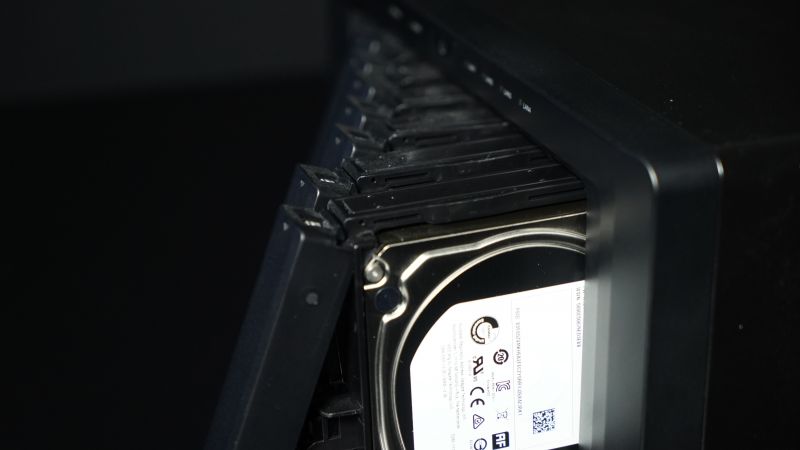
Synology has kept the same industrial design in the last generations of their 5 and 8 bay Small – Medium Business NAS’s. They’ve made several improvements in the last few years. Rounding off the drive bay latches, along with some small refinements such as different drive activity indicators, and tool-less drive caddies. The design is definitely quite good; in fact, it is above average, which is why we are giving it a 4-star versus a 3-star rating in terms of design.
Regarding its external design aesthetics, it doesn’t quite get the 5-star designation that we would save for a sultry piece of Apple technology, or a sexy Tesla Model S (not that we review cars, but dang, I want that car). But, it’s quite good and features a simple design approach. Not much else to say here other than, “if it ain’t broke, don’t fix.”
Perhaps where it stands out the most in terms of design is the design of its Operating System used to control the device. It is bar-none the most user-friendly and powerful NAS operating system that we have used. This is really the part of the value you receive when purchasing a Synology NAS solution. No other brand really delivers an experience comparable. It is incredibly powerful, yet easy to use.
I’ve had a few qualms about Synology’s DSM in the version 3 & 4 days, which have since been addressed with v5. More recently DSM v5.2 has been released, and instead of boring you with our take on it, I’ll just throw a link to their press version here.
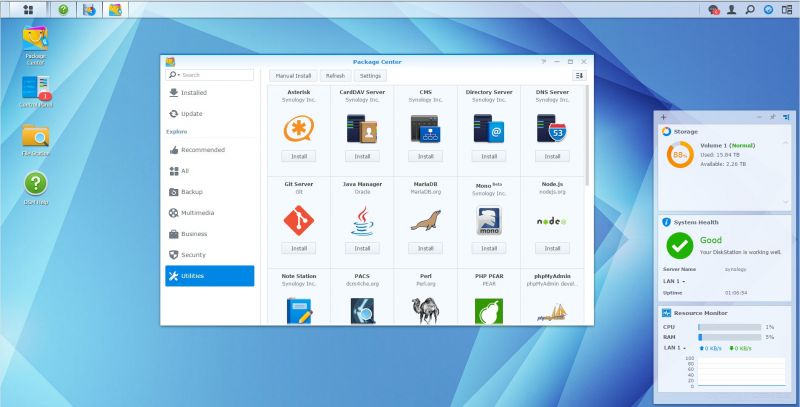
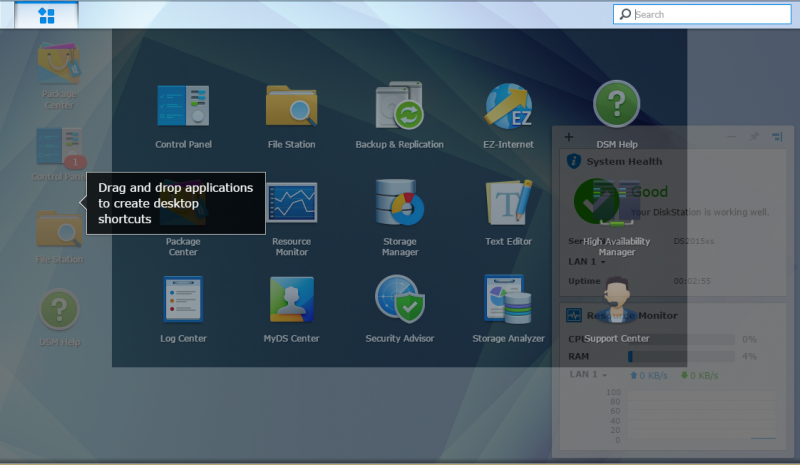
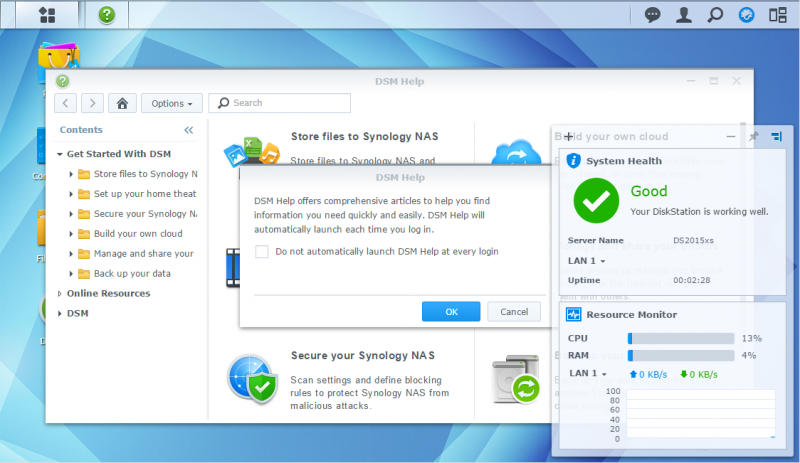
Here’s a couple quick pics of the beautiful and simple browser-based v5 DSM Operating System which you can use to control and tweak all of NAS settings.


When it comes to design, the main reason we gave it 4/5 stars is due to the fact that Synology kept it quite large in order to upgrade the memory or swap the fans. I really do wish that they improve upon this form-factor in their next generation Desktop NAS’s so one does not have to take apart half the unit to get to the memory. 4GB is simply not enough for NAS with such powerful features and performance.
So regarding its build design and upgrade-ability, we are giving it 3/5 stars and from the standpoint of the Operating System design and interface, we give the unit 5/5 stars, which averages to 4/5 total when it comes to the Design category.

As with any Synology product, it’s packed with features. The Synology DSM operating system has every bell & whistle you can possibly imagine. With the Synology package manager, you can load up on different software packages to play with. You can even install your own CMS or Mail server, along with different media servers available for use.
There is just too much to fully cover Synology’s DSM in one review, so we’ll save the time to go over the hardware features of the DS2015xs. The DS2015xs is packed with connectivity options.
You can add up to two USB 3.0 external drives as additional or backup storage. It also comes with an external expansion port that connects to a DX1215 12-bay drive expansion unit. So, in total, one Synology DS2015xs can control up to 20 drives.
 This really sets Synology’s units apart as you can start with one 8-bay unit, and expand as you go. If you initialize your drives with Synology’s Hybrid RAID technology, you can expand up to 20 drives, one drive at a time, without needing to destroy all of your existing data. It’s quite impressive needless to say.
If you didn’t know already, it comes with 2x SFP+ 10GbE ports. No other NAS in this price range comes even close to offering built-in 10-gigabit connectivity. These are SFP+ based ports so that you can attach copper based SFP+ cables, or like we did, connect 2x short-range 10GbE Fiber transceivers to hook up to our switch.
I’m fully confident providing this unit a 5/5 stars for features. With the expandability options along with dual 10GbE SFP+ ports, it has every bell and whistle that anyone could ever need.


There’s not much to say here regarding the quality of the DS2015xs unit. It performs extremely well and is built like a tank. It has traveled between different studio locations, and there were absolutely no issues with the data located on the drives.
Quality and reliability was one of the primary reasons we originally looked into Synology several years ago, and on this front, they don’t disappoint in the slightest. In fact, even when you have internal hard drives that are in the beginning stages of “failure,” it will report it to you via visual blinking. In fact, you can even set it up to send you emails if it notices that a potential drive may need to be replaced soon!
For these reasons, it easily earns 5 out of 5 stars for Quality and reliability.

Finally…the moment we’ve all been waiting for. How does the DS2015xs perform? For starters, it does wonderfully. While it’s not the fastest storage unit, it certainly doesn’t underperform. We’re going to skip the single gigabit numbers as the DS2015xs can easily saturate 1-2 GbE connections without any issues.
For those that may not be as geeky as me, well just know that if you have a Gigabit network connection, Synology systems can easily serve up enough info to utilize your network speed and far more!
For starters, let’s discuss our testing methodology. We don’t use synthetic benchmark numbers. Come on now, this is SLR Lounge. We base all of our testing on real world situations.
Since in our studio we regularly transfer large events ranging from H.264 Media files to small image files that come from Lightroom catalogs, speed is a great deal for us. The quicker a transfer/backup finishes, the more time our data manger or post-producers can get started on a new event. As I mentioned, we process nearly 1,000 client commissions a year! Speed & reliability are very key for us.
We only work with 2 drive + redundancy which means we can sustain 2 or more drive failures before data is lost. This gives us plenty of time and redundancy to pop in a new drive if one drive begins to have issues.
So for testing, we will be using RAID-10 for the most optimum balance between performance and redundancy. RAID-10 should also provide close to the best results as there is minimal parity overhead as compared to SHR-2 or RAID-6 but not as fast as RAID-0. (Yeah, that was super geeky).

For this review, we’ve setup a custom test bench consisting of the following:
- Synology DS2015xs w/ 8x Seagate ST5000VN0001 5TB drives in SHR-2
- Juniper EX3300 switch for SFP+ termination on the Synology DS2015xs
- Netgear XS712T uplinked to the EX3300 for 10Gbase-T termination
- Promox on Dual E5-2670 acting as hosts for the 10GbE Windows VirtualMachines
- 4x Crucial M4 512GB SSD’s in RAID-0 w/ RAM based file cache to prevent storage bottlenecks
Crystal Disk Mark
First, let’s start with Crystal Disk Mark numbers, which should be representative of best case performance under the specific testing workload.

SLRLounge Wedding Photo/Cinema Benchmark
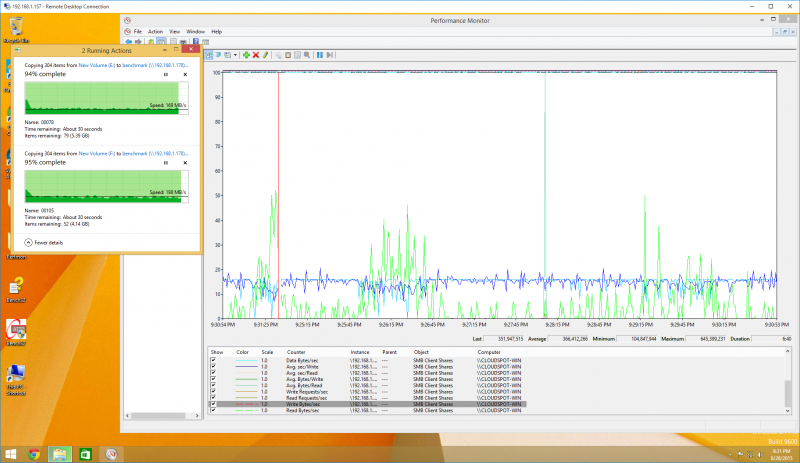
To test real-world performance of the Synology NAS, we’ve gathered a combination of images and video files to simulate what most photographers/cinematographers would use the NAS for. We’ve benchmarked several different scenarios such as single client accessing the NAS at once, or multiple clients at once.
Some NAS’s also behave slightly different when writing or reading from device, so we’ve made sure to specifically test and log the results
Single Client PC -> NAS
- Average transfer rate: 359.54MB/s
- Minimum transfer rate: 150.84MB/s
- Maximum transfer rate: 613.64MB/s

Single Client NAS -> PC
- Average transfer rate: 370.55MB/s
- Minimum transfer rate: 219.25MB/s
- Maximum transfer rate: 505.30MB/s

Dual Client PC -> NAS
- Average transfer rate: 366.41MB/s
- Minimum transfer rate: 104.85MB/s
- Maximum transfer rate: 645.40MB/s
Dual Client NAS -> PC
- Average transfer rate: 412.36MB/s
- Minimum transfer rate: 105.09MB/s
- Maximum transfer rate: 533.90MB/s

Remember, this is a NAS device; so all of your computers attached to your network can share the drive and benefit from its performance. Regarding performance, let me just put all of these numbers into perspective for those of you that are thinking of how other hard drives can stack up to this.
The first average number that we provide you is the average transfer speed based on the typical files transferred by photographers (images/videos). The second rating is a Crystal Disk Mark rating that measures “optimal” transfer speeds based on large sequential files.
Synology DS2015xs w/ 8x Seagate ST50000VN00001 5TB HDs
360MB/s real world average read/write times (Random small non-sequential files).
438MB/s read and 631MB/s write times (Crystal Mark/Large Sequential Files).
Western Digital Passport Drives (USB3)
60MB/s real world average read/write times (Random small non-sequential files).
110MB/s read and write times (Crystal Mark/Large Sequential Files).
Western Digital MyBook (4TB USB3)
90MB/s real world average read/write times (Random small non-sequential files).
134MB/s read and write times (Crystal Mark/Large Sequential Files).
The last Drobo we used was over five years ago, so we are going to defer to some numbers from Storage Review on the latest Drobo 5D/5N. From our experience, their numbers and the Drobo’s lack of performance is similar to our experience with the devices as well. The software-based BeyondRAID system simply has too much overhead to compete with something like a Synology.
Drobo 5D/5N
21MB/s read and 143MB/s write (Random large-block transfers)
203MB/s read and 155/MBs write (Crystal Mark/Large 5GB Sequential Files)
Here’s another competing product from Storage Reviews:
LaCie 5big RAID (RAID 10)
154MB/s read and 170MB/s write (Blackmagic Disk Speed/Large Sequential Files)
The Synology DS2015xs and sister products outpace every other competing product we have tested, as well as products we have seen tested. It simply is one of the best-in-class NAS units, and a perfect unit for media professionals as it outpaces most products by anywhere from 200 – 500%. That’s huge!
To put it into perspective, a 100GB transfer of images from a photo shoot that would normally take 21 minutes on a regular external hard drive would take just over 4 minutes with the Synology NAS and a 10GbE network. Keep in mind, you will need to invest in a 10GbE network to get these types of speeds, but it is well worth it if you are a growing studio.
Now, I feel a little guilty for this part. Because even though Synology is blazing fast when it comes to performance, I think it may be worth giving the Synology a 4 stars out of 5 stars for Performance. We noticed that during benchmarking, it appears the Synology is capable of more than the numbers we see.
The problem is that the Synology is physically bottlenecked by the CPU speed because of the onboard ARM processor, as Windows CIFS/SMB is single threaded. What this means is that if Synology were able to have a unit with faster onboard CPUs, the performance could be better. That said, 360MB/s + read/write times is not slow either and it far exceeds other options on the market.

When you consider the outstanding performance, quality, design, and features, then the result is an outstanding value. The Synology DS2015xs can do everything you’d expect a NAS server to do, and more. For a small and growing studio that needs an entry level professional server, this is the one for you.


If you’re looking into NAS systems, and you want your investment to be worthwhile, then you should definitely consider the Synology DS2015xs. This is a NAS server that can grow with a small studio, and with all its features it’s an easily justifiable purchase. If you need something that is a little easier on the budget, keep in mind that you can get similar Synology performance in smaller NAS units. They have 2-bay units starting at $150 (DS214se) on B&H.
If you’d like to see a little more on how easy the Synology DS2015xs is to use, I’ve included a personal “Getting Started” tutorial at the bottom of this article which shows a brief overview of the Operating System procedures to setup the device.
I hope you enjoyed this review. If you’re interested in purchasing a Synology DS2015xs, then click on any of the links above, or right here. Have any questions about the Synology DS2015xs? Or maybe you want us to review something else? Let us know in the comments!
Getting Started With the Synology DS2015xs
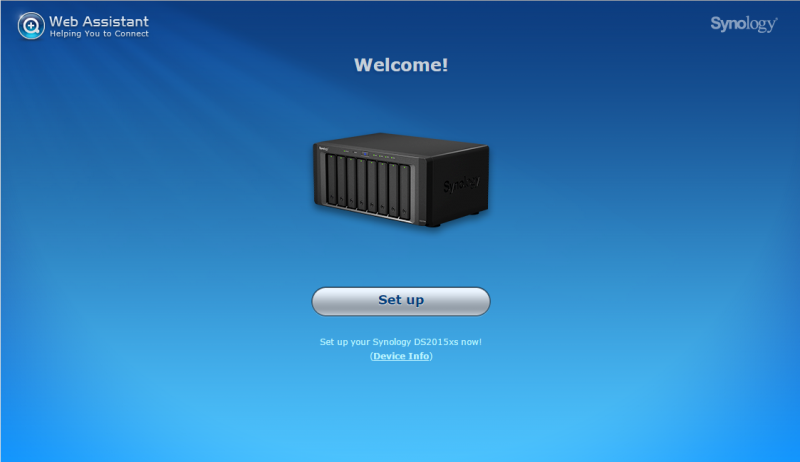
Synology has made it quite simple to get the DS2015xs going. You simply pop in the hard-drives, connect your network cable, then give it some power. Once it’s booted, you will be able to use the Synology Assistant in order to locate the IP address of the DS2015xs.
By default, a Synology does not come with DSM installed; you have two main ways of installing DSM. You can do this via the web manager or using the Synology Assistant. We opted to go with the Web-Based installation.

After the Synology has been found, you can then proceed to your browser ( via the Synology IP Address ) to run through the DSM installation process.


Once it is fully installed, you will land at the login page. The default username is admin, with no password. After you’ve logged in, there’re some additional setup questionnaires. Make sure you don’t skip the step where you set your Synology Name, Username, and Password.


Afterward, you will be taken on a guided tour through the web interface.

Now you’re wondering, how does one connect to the Synology via Windows File Explorer or Apple Finder? If you opted out of installing DSM with its default SHR provisioning scheme, you will need to head into the Storage Manager to create a volume before setting up a Shared Folder. Volumes is the local file system of where your Shared Folders will belong on. Shared Folders allow you to transfer files over the network. You can create multiple Shared Folders on a single volume. We’ll walk you through that now.
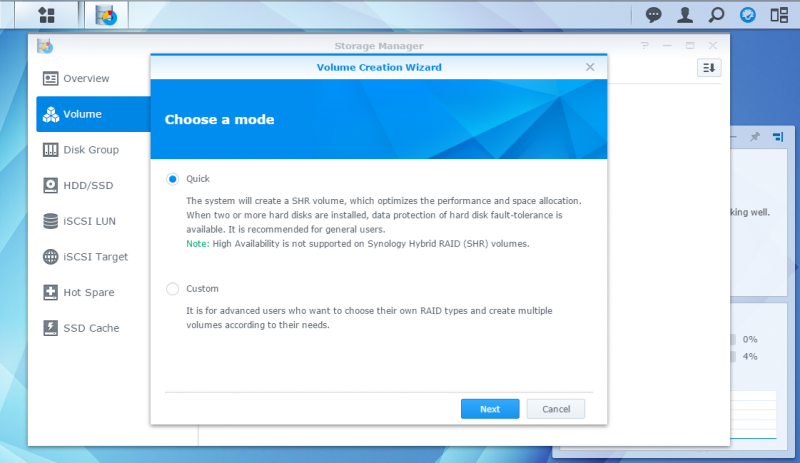
Volume & Shared Folder Setup
Synology has quite a few different disk redundancy schemes. You have your options of traditional RAID 0/1/5/6/10 or Synology’s Hybrid RAID technology. Synology’s Hybrid RAID technology allows you to mix-n-match drive capacity, or expand the volume as you purchase additional drives. It also works with expansion bay units, so you do not need to create a new volume or destroy your existing volume in order to add additional space. Internally, we will be using RAID-10 as this will be the sole primary data store for some of our media projects at the studio. However, in the case of this review, we will opt for Synology Hybrid Raid with 2 drive protection setup as that is what we feel most photographers will be using, and should represent the lower denominator when it comes to performance.
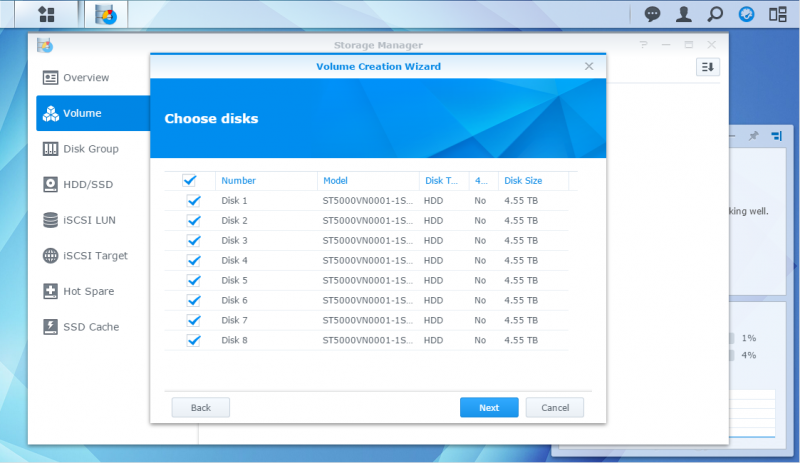
Here you can select the number of drives that you want to use for this specific volume. You can create multiple volumes on one unit. However, only 1 volume can reside on a disk at a time. We’ll be using all of the disks for maximum performance and capacity with 2 disks for data protection.

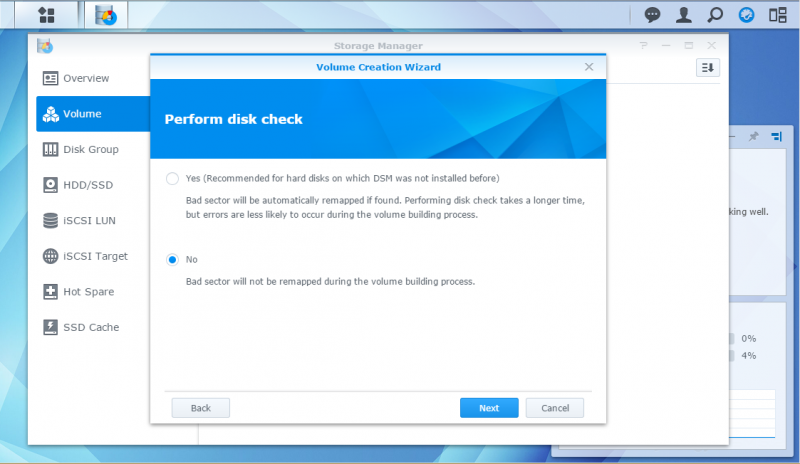
Here the Synology asks if you wish to do a disk check as we’re formatting the drives. Due to the fact that we’ve already created a volume before on these drives with sector scanning enabled, we’ve opted not to chose the option this time around. It’s highly recommended to do this on a fresh set of drives as any potential bad-sectors that may have occurred from the factory will be mapped out in this process. It does add quite a bit of time before you can start using the Synology however.

After that is all done, you will then be able to create shared folders on your brand new raid protected volume. This is a very simple process. 1) Name the volume, 2) assign users/permissions to who you want to allow access to the volume.
All done!


Get Connected!