There are a lot of reasons to love a Fuji X-system body and shooting experience, and aside from the small form factor and throw-back styling, Fuji’s built-in film emulations are likely the next talking point. Love or disparage them, they are popular and broadly used. The thing is though, if you don’t shoot Fuji but like the stylistic nature of those emulations, you can have it (a bit different) with a DSLR.
Most modern Nikon cameras, especially their upper tier (both DX and FX) have a menu option called Picture Control, and what Nikon Picture Control system does is allow you a certain variety in personalization of your shots sort of how old film emulsions used to. There’s a standard bevy of them which are Standard, Neutral, Vivid, Monochrome, Portrait, Landscape, and Flat, and within each you can further adjust parameters for clarity, sharpening, contrast, brightness, saturation, and hue (coloration). Monochrome allows for adjustments to sharpening, contrast, brightness, filter effects and toning (I use this a lot when shooting in-camera B&W).


But if the popularity of VSCO and Fujifilm cameras and other presets are any indication, people want film stock simulations in-camera. Now, you can make your own, but if that’s not your cup of tea, there are already good free ones to download and you can find them at Nikon Picture Control Editor, and there’s a long list of them from Fuji Provia, Tri-X, Portra 160, and on and on. They are also dead easy to install on your camera and you can have them up and running in, no joke, about 2 minutes. Here’s how:
[REVIEW: NIKON D750 REVIEW | IT’S ACHILLES, LESS HIS HEEL]
How-To Steps:
- Go to https://nikonpc.com
- Select the ones you want and download them
- Connect a memory card to your computer and do the following:
Create a folder on the card and name it NIKON - Create another folder called CUSTOMPC within the NIKON folder you previously made. Drag the NPC files you downloaded into that CUSTOMPC folder.
- Eject card and put into your Nikon.
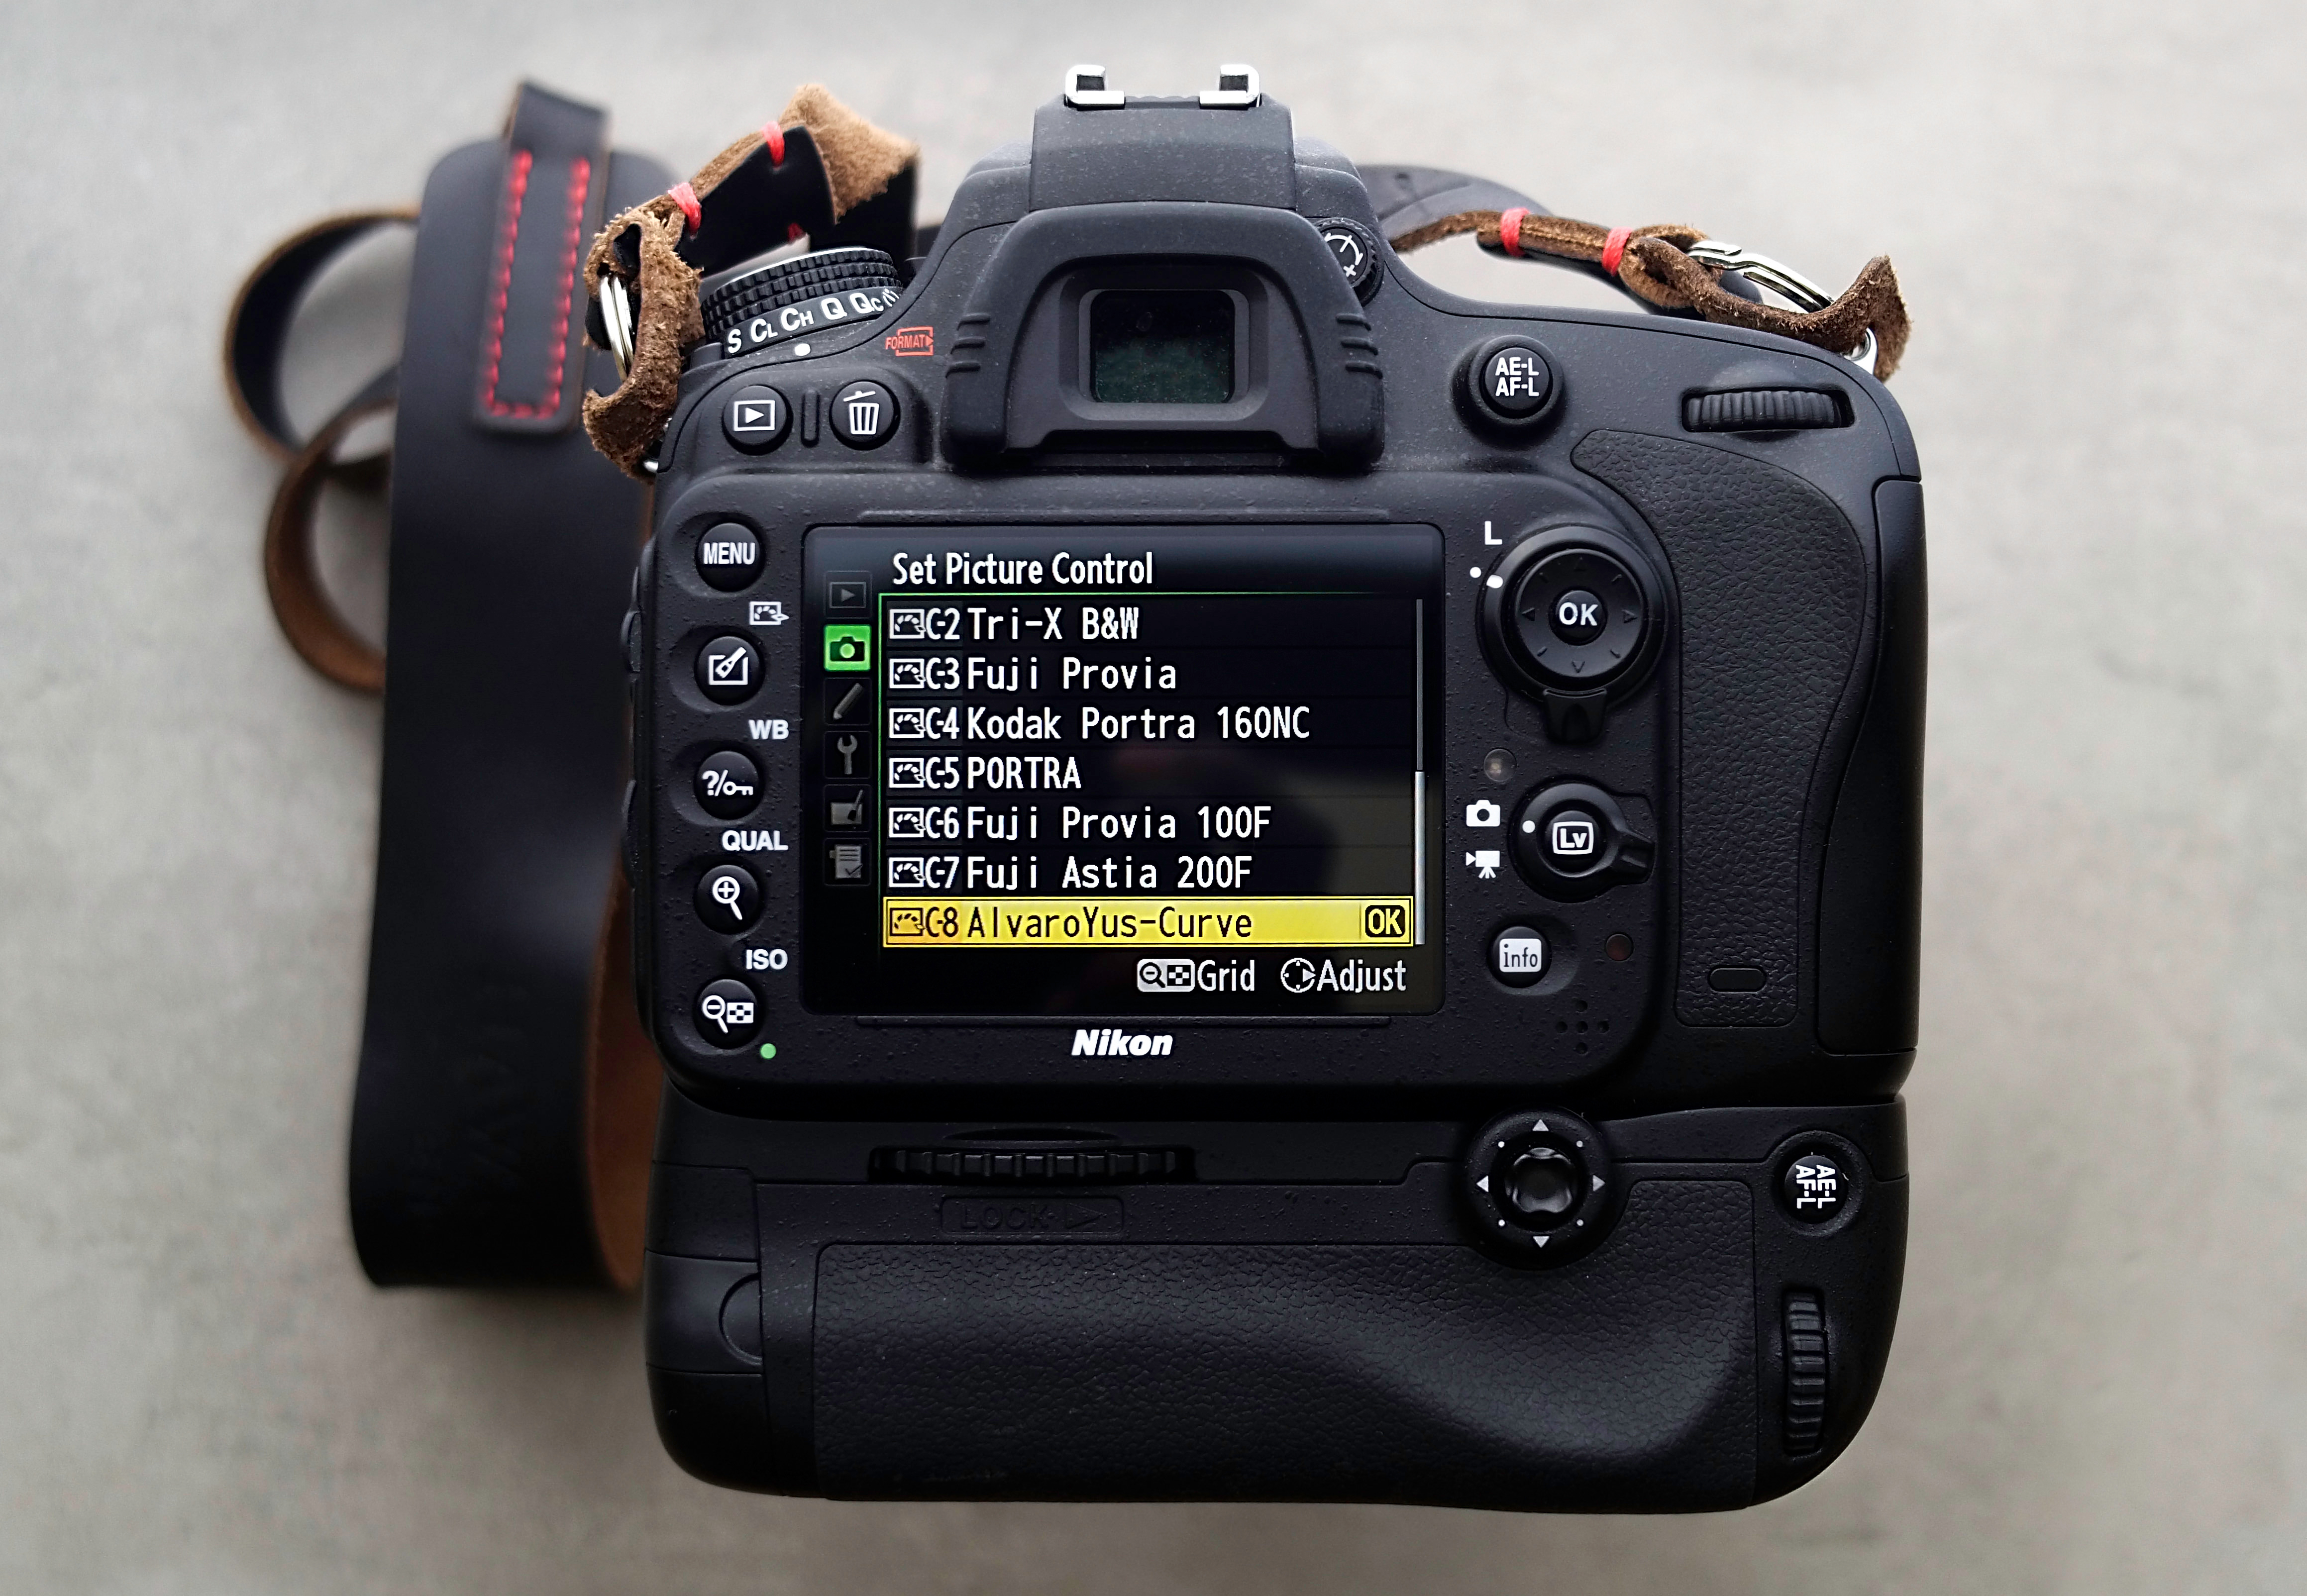
- Under the Shooting menu, select Manage Picture Control > Load/Save > Copy To Camera. The selections in your CUSTOMPC folder should be shown and you can load however many your camera can take (varied, most give you 9 slots).
- Connect a memory card to your computer and do the following:

And that’s it, and you can change as you wish. As per Nikon:
Custom Picture Controls can be edited and registered in the camera. You can change their names, delete them, and copy them to a memory card. You can also freely share files between cameras or photographers using a memory card, as well as importing custom Picture Controls created with Picture Control Utility and registering them in your camera. Moreover, you can import custom Picture Controls created in your camera to a computer via Picture Control Utility, then apply them to images using ViewNX 2 or Capture NX 2 software (and with newer cameras, launched after June 2014, using Picture Control Utility 2, which launches from within ViewNX-i or Capture NX-D).
A few things to note, it’s a bit annoying but you have to click through to load each one, and you are limited in how many you can store. If you use the Nikon Picture Control Utility you can store 150 or something like that, but again that’s not on the camera.
Also, when on Nikonpc.com you’ll see previews of the emulations and they don’t look good. Worry not, they don’t look like that once you get them in camera. Do I think there as good as Fuji’s? No. But I haven’t tried them all. Give them a shot and let us know what you think.


Get Connected!