Overview
I recently was commissioned to photograph a house based in the Richmond area here in the UK. The property is over 2700sqft and is selling for £1.7m. The property has 5 bedrooms and is absolutely stunning.
Most people have a perception that real-estate photography is very easy, and that a simple bounce flash into the ceiling will suffice. In a lot of cases, they’re probably right. I have photographed many properties and have had satisfactory results with a simple bounce flash mounted to the camera, pointing up, but slightly behind me. However, for this property I was commissioned to photograph, it deserved a little more attention than that for the photos.
Gear
– Nikon D7000
– Sigma 8-16mm f/4.5-5.6
– Nikon SB910 x 2
– Fotopro MGC-684 N+62 Q Tripod Carbon Black
How I Shot It
First off, I wanted to show how the camera in auto would expose the image with one flash.
I had my Nikon D7000 + Sigma 8-16mm f/4.5-5.6 on my FotoPro Tripod with the Nikon SB910 mounted on top and everything set to Auto and TTL. I composed the image, set it to self-timer for 2 sec to avoid any shake and this is the resulting image.

As you can see, the camera exposed the image to look pretty dark.

The next image is an example of the camera now set to Aperture Priority with +1 EV. Overall, the image does look brighter, but to me, looks quite flat and boring.


The left side of the image also looks very dull as not much light from the flash can reach down that direction.
The above image is an ‘acceptable’ base to work from and you could probably get away with dodging and burning the above file to get a proper exposure. However, as before, I felt this property deserved a little more attention than that.
With keeping the exact same composition, I took the Nikon SB910 off camera and added an additional Nikon SB910 around the left hand corner.
Both flashes were set to ½ power with the camera set to ISO400, f/5.6 and 1/30sec.
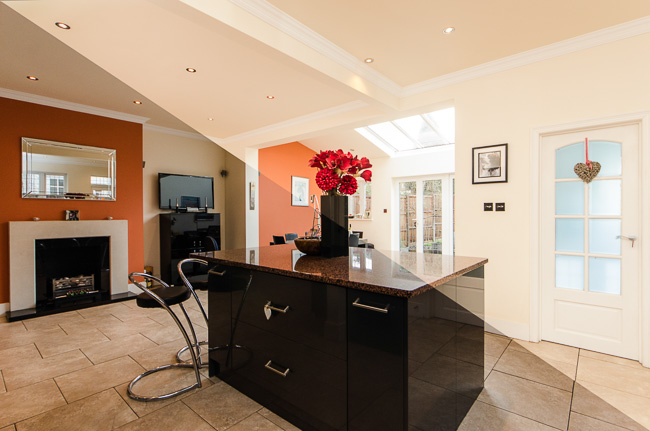
This is the result of that image.


The extra flash has allowed the room to be more brightly lit, creating a much more even tone and natural look.
After correcting the reflections, glare, and perspective, this is the final submitted image.

Conclusion
The whole process is much more time consuming than a simple one-light on-camera flash solution, however, for high end properties, the extra work definitely pays off and will hopefully separate their listings from the competitors.


