What happens when you are shooting a scene with natural beauty for miles, and your widest angle lens doesn’t come close to capturing the magnificent view that you see with the naked eye? Panoramic stitching solves this issue, allowing you to choose the beginning and end point of your landscape both horizontally and vertically. In this tutorial, we will teach you all about panoramic stitching, from combining basic landscape images to advanced techniques like wide aperture pano stitching, otherwise known as the Brenizer Method.
Note, The Brenizer Method of panoramic stitching, popularized in recent years by photographer Ryan Brenizer, uses a shallow depth of field in tandem with a wide-angle view. When shooting at a wide aperture, the rest of your background fades to blur directing the eye to the subjects in focus.
When Should You Consider Panoramic Stitching?
The benefits of panoramic stitching include the following abilities:
- Capture a wider view than your widest lens can capture in a single photo without distortion on the edges of the frame.
- Create large, high resolution prints by combining multiple images into one larger image.
- Also create environmental portraits with ultra shallow depth of field with the Brenizer method, which we’ll discuss later.
The Downsides of Panoramic Stitching
Panoramic stitching isn’t always necessary and it’s sometimes better to opt for a single image. Here are the drawbacks of panoramic stitching:
- The photo editing process for panoramas takes much longer than editing a single photo.
- The resulting file sizes are massive, so you need to have enough computing power to process large files and enough storage space to store them.
- The final results cannot be seen until after the final edits, so if any errors are made in the capture, then you will not know until you’re back at home in front of the computer.
The Basics of the Panoramic Stitching Process

Panorama stitching is fairly simple. To achieve this, follow these steps:
- Visualize your final image
- Turn your lens to manual focus and set your focus manually
- Turn all camera settings to manual, including aperture, shutter speed, ISO, and white balance. Consistency in each of the images is key.
- Optionally, place your camera on a tripod so that you can easily pan and stitch images together. Any major fluctuation in camera angle or focus from shot to shot will result in a skewed final image.
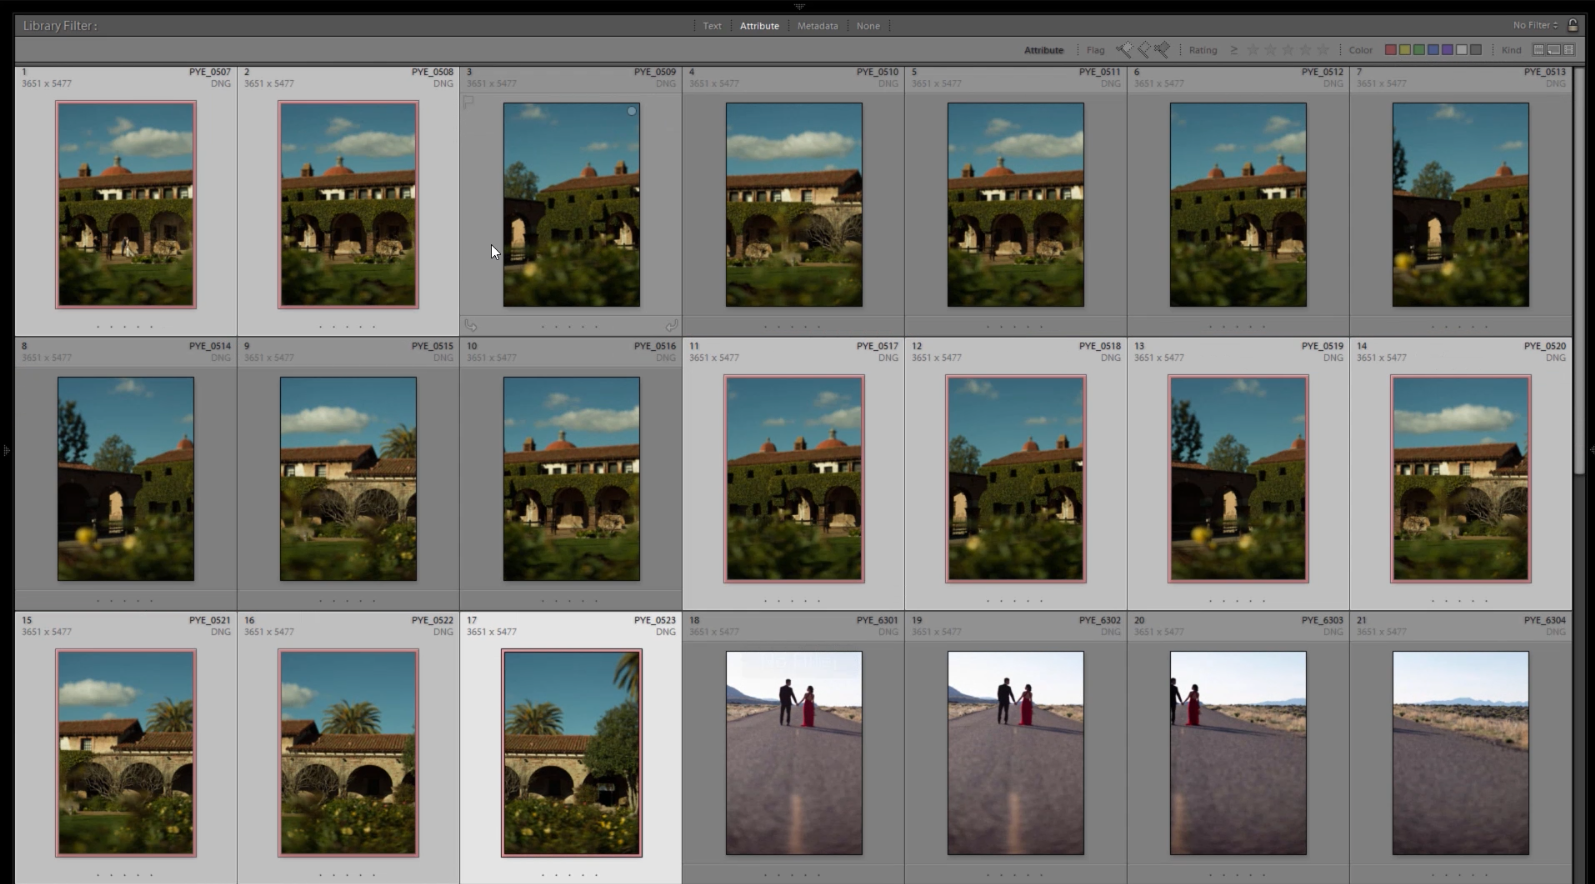
- Capture multiple photos with at least 30% overlap. Some photographers prefer to capture the middle image first and photograph the other images around the center while others prefer a left to right sequence.
- Combine the images in Lightroom or other panoramic stitching software. We’ll review this later.
The Wide Angle Panoramic Stitching Process (The Brenizer Method)

The Brenizer method is the same process as above except the photographer typically utilizes low apertures of f/2.0 and longer focal lengths at 85mm and up. The combination of the shallow depth of field with the compression effects of the longer focal lengths create a dreamy, surreal look to the images.


Brenizer Method Tips
Use Manual Focus – The key to maintaining a shallow depth of field is using manual focus. Lock in your focus on your subjects and then keep that focus as you pan. Position your subject anywhere in your frame because this does not make an actual difference for your image. For example, if your subject isn’t bullseyed in the center of the frame, use leading lines and your landscape to direct the viewer to see your subject.
Shoot in RAW for Panoramic Stitching
When you blend things together at wide apertures there will be lots of lens effects, for example vignetting, that are caused by shooting wide open. Always shoot RAW to have more capability in post to correct these things versus JPEG.
Get a Safety Shot
Ensure you get a regular safety shot in case the series of images you take didn’t work out in your stitch post production.
Consider Adding Flash for Additional Separation
Illuminating your subject and pulling them out of the background helps to emphasize the effect of using such a shallow depth of field.
To utilize flash in your pano stitches, follow the same steps as you would with a brenizer shot without flash. But have your light taken out after the first shot so that when you start panning, the landscape remains in its natural state and there is no light source to be seen.


Consider using a Tilt Shift Lens for Added Blur and Surrealism
Utilize a tilt shift lens, such as the Canon TS-E 90mm f/2.8 for added blur and surrealism. To achieve this effect, follow the same steps as above but use a tilt shift lens.


Follow these steps for panoramic stitching with a tilt shift lens:
1. Set exposure to desired effect/manual mode (use histogram/highlight alert)
2. ND Filter or HSS
3. Dial in flash power for ambient to flash balance
4. Pose couple (hold still)
5. Place camera on tripod (must have when using Tilt Shift)
6. Set Tilt Shift effect
7. Live view focus and lock
8. Decide on the look/effect: 3 to 9 frames with wider crop = Stronger DOF, single plane, simple stitch (prefer 5-7 frames)
9. Shoot with flash, remove flash, capture plate image
10. Pan, shoot, Pan (1/3 image overlap)
Panoramic Stitching FAQs
What Is the Best Focal Length for Panorama Stitching?
The best focal length for panorama stitching will depend on the look you are going for. If you’d like the ultra shallow depth of field, “brenizer method” look, then you’ll get the best results from more zoomed in, tighter focal lengths such as the 85mm or even 135mm. The shallow depth of field, combined with the lens compression gives your images a unique, surreal look.
What Is the Best Panorama Stitching Software?

While there are many software options for Panoramic Stitching, we recommend using Adobe Lightroom for its simplicity and power. Lightroom makes it effortless to stitch together a panoramic image in a matter of seconds. Simply select the grouping of images that make up the final shot as a whole, right click and select Photo Merge > Panorama. See our full Lightroom Panorama Tool tutorial for more info.

Stitch Post Production Tips:
- We recommend post-processing the images before synchronizing them if your computer is on the slower side. Otherwise, stitch the images together using raw files, and edit the fully stitched image afterward.
- Lightroom usually does a great job when stitching together images, but sometimes elements in the images don’t line up and Lightroom will be unable to complete the stitch. If it does work, after the images are stitched together, choose the projection, either Spherical, Cylindrical, or Perspective, and select “Merge.”
- Keep in mind, the image may look choppy, and editing beyond this point make take a while because you will be working with a very large image. Moving forward, we recommend using transformation to balance out the lines, and then adjust exposure and experiment with a radial burn to draw attention to the couple.
What Gear Do I Need to Do Panoramic Stitching?
- A camera with RAW capabilities
- Lens selection based on effect
- Tripod (recommended not required)
- Software capable of stitching (Lightroom recommended)
Bonus | BTS Video
To see a BTS video of the salt flats shoot where we utilize the panoramic stitching technique, see the Youtube video below:
More Information on Panoramic Stitching
For more behind the scenes footage where you can see this technique in action, be sure to check out the Unscripted Photo Shoot BTS Workshop, available to SLR Lounge Premium Subscribers. Find out how you can become a Premium member here!


