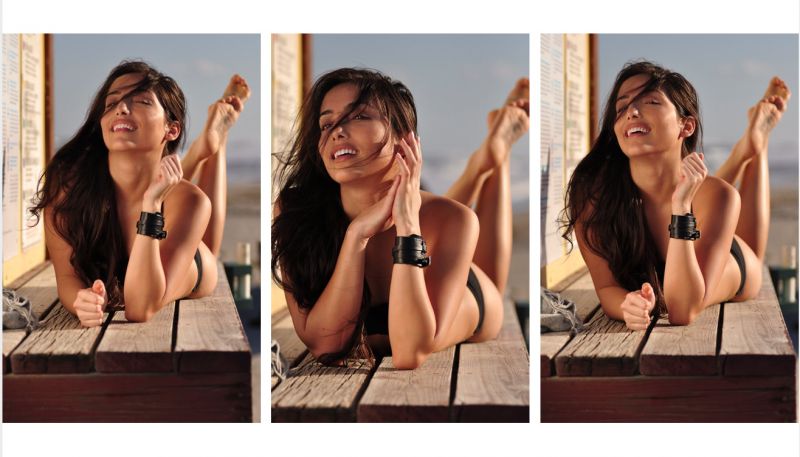
If you’ve ever photographed a wedding, styled shoot, or fashion shoot, you are all too familiar with the amount of planning, understanding, and tactics required and employed to make that session look as ‘natural’ as breathing. It’s the parts that no one else sees, the intangibles that make the difference. So while natural is the trend, and I like that, understand that it can actually be harder to achieve the natural look and look good, than to create pore-less, flawless, alabaster skin and so on. There are certain tricks-of-the-trade that all photographers would do well to know, and in this article, we’ll provide you with a full guide to makeup and styling.
The Purpose
Most clients – from brides, brides-to-be, models, model agents for whom you’re shooting tests, anyone – want to look their best but look like themselves. Essentially, you want to draw out of them the individual and be able to show them the best version of themselves, not a version that masks them. If you can do that, if you can photograph someone to look not as some altered representation but instead as their best-represented self, it’s extremely powerful. One massive piece of advice I can give you here is to do as much as possible outside of post.
Something like contouring, for example, is much debated whether to do more in post or not. I generally prefer to do this on the subject via make-up and lighting because an issue you’ll run into in post is the problem of continuity. It can be difficult to get the right balance of all lines and shadows in all images, and doing it in real just goes a long way to help.

If you have the budget to book an MUA, then they are often worth the investment. However, many people for most shoots aren’t going to have an MUA at hand, and that provides you a chance to be the hero. You should understand something, that when trying to get the best out of the subject, they must trust in your ability, and you can do that through certain credibility factors. If you’re shooting beautiful people all the time (or your name is Avedon or Weber), then that fame is your credibility factor right there, but if not, the ability to teach the client something, and show them little tricks that highlight you understand them, is huge.
I’ve found that being in tune with a few key makeup and styling methods goes a long way – especially being a man. Having family who were models and growing up in some of that atmosphere, some knowledge has transpired through osmosis and here are points to consider with the products that correlate.
Kill Oil & Tone Down Hotspots With Mattifying Gel
Oily isn’t dewy; there’s a difference, and no one wants to look oily. Living in Miami, this is more of a problem due to the heat, and countless times have I come to the aid of a subject by having some kind of topical mattifying gel to combat an oily forehead, bridge or nose or nostrils, whatever. It’s incredibly simple and the subject is grateful, but it also helps you later on in post. With lots of shine, especially in certain spots, comes the likelihood of having blown out hotspots, especially when in the sun or using strobes. Keep a bottle of Peter Thomas Roth Mattifying Gel with you at all times. It takes a tiny amount to cover a lot, can be used under or over makeup.
Retain Texture With Lipstick (As Blush)

That’s right, not for lips. I’m not a fan of powdered makeup since most of them tend to reflect a lot, but otherwise, they just don’t look natural. Powdered blush is some of the worst if you’re going for a natural look, so instead, get a regular stick of lipstick and draw some on the cheeks and have the subject rub it in where they normally would a blush. It mimics the texture of the skin, so in post, you actually have texture to work with also, which is great, and it just looks so much better. I know coral lipsticks are extremely popular but go for one that either a redder coral or just a red. Model Emily Ratajkowski is known for this, though it’s an old trick.
Define Bone Structure with Eyebrow Gel
For around $8, you can pick up some brow gel from your local drug store, and it’ll be some of the best money you can spend for your subjects. Eyebrows are so often overlooked but treated right they can really bring a face together. They lend a lot to the length and width of a face, and thus altering them can affect either dimension greatly. Generally, people want to elongate their face and not broaden it, and one way to achieve that with make-up is to have the eyebrows groomed a little upwards and organized. Take the brow gel, push off the excess, brush upwards and it makes the hairs congruent and keeps them in place. As a bonus, if your subject has any stray hairs on their head or you want to alter their hair a little, this can certainly be used for taming it. If you have some mascara or something, or your subject does as most women do, it’s also useful for filling in eyebrows better than pencil.
Bring Out The Eyes And Jaw-LIne With Concealer, Not Eyeshadow
I’m not suggesting that the two are mutually exclusive, just that eyes, as I referenced in a recent post, will make the biggest difference to your look. Sports Illustrated Swimsuit model and Victoria’s Secret Angel Daniela Pestova has gone on record saying that if she had to keep one piece of make-up, it’s something to take care of under the eyes since it really can transform faces. Not only does it make the face look more youthful but longer.
I mention jaw-line because it’s an often overlooked part of the face for make-up, but somewhere we focus on a lot during post retouching. Celebrity and VS makeup artist Jenna Anton has also stated that when looking to even out the skin tone, you want to match to the jawline area. Having it be consistent with under the eyes also, makes the whole face look a lot more consistent saving post editing time. I don’t keep concealer with me just because I don’t know what the skin tones will always be just like, but just tell your subject to bring some – even for the men.
Extras:
Dry Shampoo and Eucerin Aquaphor. Dry shampoo is great for toning down oil in hair, and giving hair manageable volume and style. I suggest actually getting dry shampoo and not using Baby Powder since it has talc which is a carcinogen. Aquaphor is something I grew up with always in the house, and I use it on my hands and face since I travel a lot and airplanes dry out your skin. For your subjects, it’s just good to keep if you want to add a dewy look to their lips or skin. Not essential.

Beware of SPF
This is an easily overlooked issue because SPF has found its way into almost everything these days, and despite its many merits, it has none in photography. Tell your client to make sure they do not use any products like foundation with SPF, and to look out for moisturizers with it also, as products with an SPF rating can really make someone look very washed out. If you’re shooting with certain lighting conditions, this becomes accentuated, and the SPF products also often have a habit of being highly reflective, so they’re not exactly good for flash.
Prep Is Key
Everything you do to the skin is generally best done on a blank canvas, and that doesn’t just mean devoid of products, but also of flaky skin, and so on. A good exfoliation the night before with a good moisturizer after can save you SO much headache in post.
Highlighting Powder/Cream
Highlighting powders and creams are great for women to accentuate certain bone lines, like the jaw, brow, and cheekbones. The will help add definition and structure to the face, and that is reflected in the images. But that’s common knowledge; what’s less common is something some runway and high fashion models do even when not strutting – they use the powder, along the center of their legs, however much is showing, to create a stronger appearance of angle and length.

It’s actually brilliant and works brilliantly in photos making your subjects look leaner and have more depth. Rosie Huntington is known for this, and it’s easy for a photographer to either do or to instruct. I just recommend having extra pads for hygiene and wipes to clean up.
Hair Creme For Definition & Visual Interest
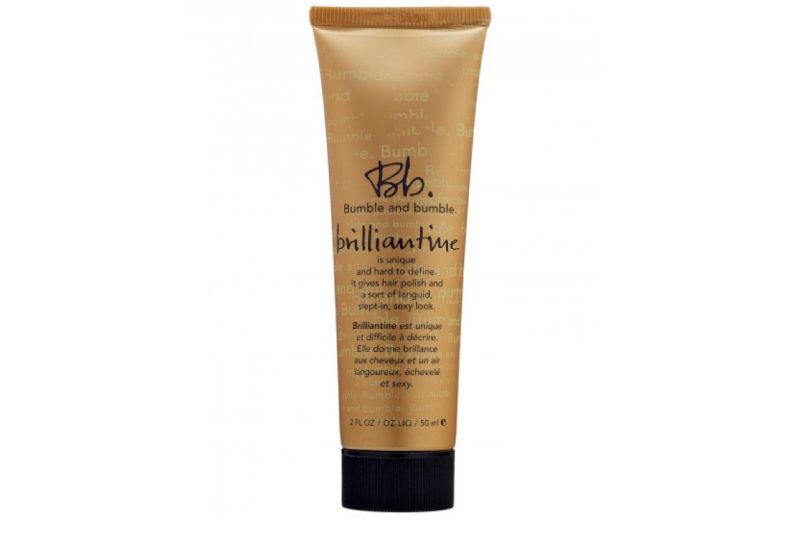
There’s literally one hair product I’ve always kept on hand for the past 15 years; it’s what I use for myself mostly and always have it on hand for shoots. It’s Bumble & Bumble Brilliantine, and it’s excellent. I love girls running their hands through my hair, so I never really use hard waxy stuff, and this gives some definition and hold without being hard.

Bumble & Bumble products on a whole are generally very good, and models and discerning subjects tend to be happy to give their stuff a go, but Brilliantine is the one I suggest to keep on hand, as with just a pea sized amount it can give hair a polish, give it definition and an all round languid “slept-in, sexy look.” I promise you I have no affiliation to B&B, but it works. So many images of mine even up on SLRL feature models using it.
Yesterday, I was testing out a new umbrella, and the subject’s hair was nice but flat, and being very dark it just was providing zero visual interest in the image. After deciding to go with a somewhat wetter look, I suggested using this, and it really turned the images around as the hair looked thicker, and the slight polish caught the light in a reflection adding the much needed visual interest. For this reason, it’s particularly good for darker hair. It’s a very light product, it’s only about $25 and lasts because you can use it so sparingly. Its other great use is for taming stray and dry hairs. Sure, you could use a dryer sheet, but this works better in certain instances.
Brightening & Adding Shine To The Cupid’s Bow & Philtrum
Want to make your portraits of women pop more and have your subjects look just a little bit better? Work on the cupid’s bow and philtrum. The philtrum is that groove or cleft between the lip and the nose.

In post, I will often brighten or lighten the crests of the philtrum, and the cupid’s bow to bring a sense of separation and definition to the lips and the shadowed under-nose area. It works wonders. It can be really nice to have a little glisten to that and using something I mentioned before, Eucerin Aquaphor, you can achieve it. Ask the subject to use their finger or a q-tip and lightly dab a little along those lines, and you can go a step further by highlighting them. Try it; it’s subtle, but worth it if you’re into details.

Once again, I’ll add that you should practice extremely good hygiene whenever handling these products or your subject, and always ask before touching your subject in any way. If you’re a guy, this stuff still applies, and as mentioned before, it will help your subject trust in your knowledge and help you build rapport when you can even teach them something.
The purpose of this article wasn’t to give you a major primer on primers or makeup, but to have little tricks up your sleeve that really can help out on a shoot, especially if you don’t have an on-set or on location MUA. Knowing this stuff always brings a few laughs since I’m a guy, but it tends to get subjects trusting my opinion. When they see you pay attention to the details, they believe you won’t make a fool out of them. If your subject is a woman, I’ve often found they don’t know all this either, so they are impressed.
The last word of caution is, do not, without expressly asking first and knowing the comfort zone of your subject, touch them. People are very guarded about their faces especially, but don’t do it unless you ask and they are okay with it. Generally, it’s best to direct them.


Get Connected!