Sunflares can add dynamic interest to a photo, but sometimes they aren’t present in a scene. Maybe the sun has already gone down past the horizon or maybe you’re indoors and the sun simply isn’t shining through windows. This is where Lightroom’s powerful editing tools come into play. In this article, we’ll dive into the process of adding a sunflare in Lightroom to add interest and appeal to your images. Whether you’re a budding photographer or a seasoned pro, learning how to add a sunflare in Lightroom can elevate your work to new heights.
Step 1: Find the Right scene
Light always has a direction, and the first step in learning how to add a sunflare in Lightroom is to identify it. Even when it’s overcast, you can expect there to be distinguishable direction of light, so our first step in post is to determine where your natural sunlight is coming from. From there, you can see if it is even possible to recreate it naturally and convincingly.
Example of The Wrong Scene for Adding a Sunflare

In the image you’re looking at, notice how the main natural light fills the face, instead of illuminating from behind. Typically, sunflare photography is characterized by strong light flares emanating from behind the subject. However, in this case, the sky didn’t allow for enough sunlight to peek through. If you attempt to add a sun flare using a local adjustment brush, you’ll find that the result might not be entirely convincing. This is because matching the light direction with the desired effect is crucial for authenticity. This mismatch is a common mistake photographers make when trying to enhance natural light in a scene or recreate sunlight.
Example of a Good Scene for Adding a Sunflare
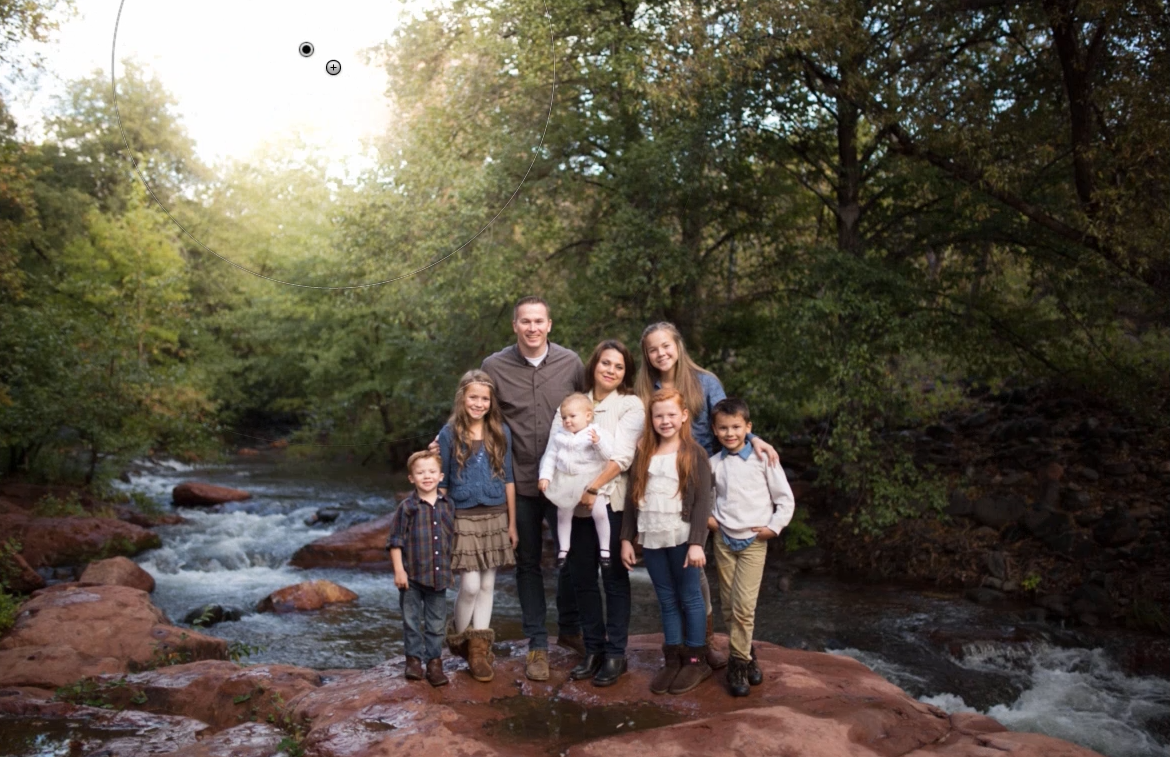
Now, turn your attention to the image below. Here, you can see a pocket of light filtering through the treetops, which could effectively act as a rim light to distinguish the subjects from the background. All we want to do is take that existing light, amplify it, and warm it up. This is an ideal scene for adding a sunflare in Lightroom.

Step 2. Create The Preset or Brush
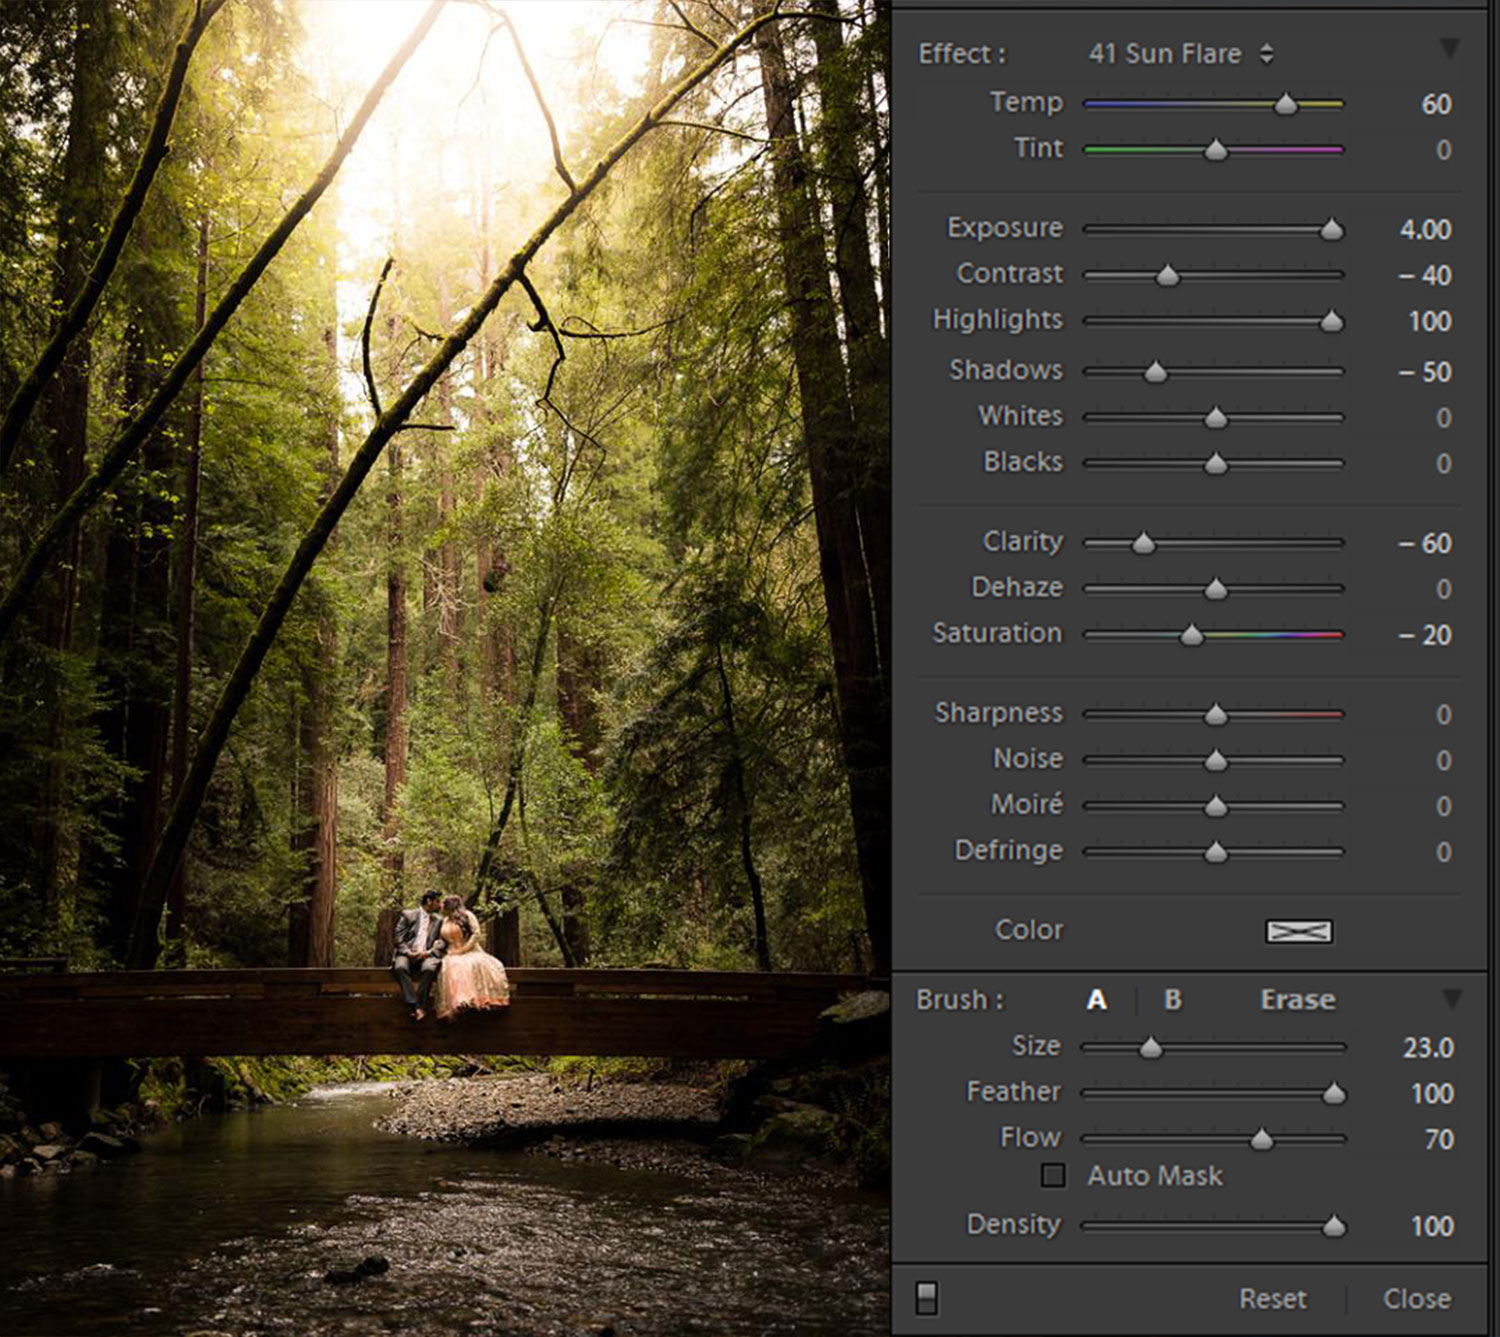
Now that you have seen it in action, let’s break down what exactly the local adjustment brush is doing. The image below shows you the exact settings. Dial these settings into a local adjustment brush to add a sunflare in Lightroom.

You can either create your own brush with the settings you see in the image above, or you can use the Retouching Toolkit by Visual Flow. With a quick drop of our Sun Flare Brush from the toolkit we were able to vamp up the scene and add a bit of life to the light. The beautiful part about the brush is that it’s adjustable to your liking and you can tone down the increments or decrease the size of the spot itself.

With a burst of Exposure and Highlights we are essentially creating, a mock golden hour sun, meant to enhance pre-existing sunlight but can also easily be used to transform a mundane sky when there is a clear direction of light. The brush is a decent size to create larger light spread and has a softer light quality due to the reduction in Clarity and Contrast.
Step 3: Use The Preset or Brush on More Scenes!
In the original file on the left, you can see that the direction of light is visible, highlighting the edges of the leaves but not powerful enough to create a rim light surrounding the subjects. We placed the preset brush in the top left corner to match the direction of light and, immediately, the image is subtly transformed and vastly more dynamic than its original state.
Although this image above is from the same photoshoot, we can see that the natural ambient light has become stronger, most likely because the sun finally peeked out from the clouds. You can see the existence of natural sunlight when you look closer at the highlights surrounding the subject’s head, a factor missing from our previous example.
The Sun Flare brush applied in this scene has the most realistic effect of the three due to the presence of existing natural light.
Conclusion
Capturing the enchanting essence of golden hour and sun flare photography carries a unique charm and allure. Replicating the depth and warmth of natural sunlight, complete with its rich orange tones and captivating flares, is no small task. However, with careful analysis of your scene and the appropriate techniques, achieving a believable effect is within reach. By following the steps outlined above, you can skillfully add a sunflare in Lightroom, elevating the beauty of your images. For more advanced techniques for recreating golden hour in your photography be sure to check out our latest course, or stream it in full as an SLRL Premium member.


