
While retouching and post processing are about as old as photography itself, there are corrections that are uniquely digital, and certainly more easily accomplished with digital photography. Adobe Lightroom can shuffle pixels around at your beck and call and one useful method is of pixel-pushing can be found in Lightroom’s Transform panel within the Develop module.
Sometimes you take a photograph from above or below and the perspective gets screwy. The most common subjects to suffer this malady are buildings. Often photographed by tourists and architecture photographers alike, straight lines in buildings have a way of shifting toward each other from the photographer’s point of view. Lightroom offers a selection of solutions, and we’ll take a look at them individually here.
To make the most of these tools, make sure lens correction is enabled before you begin.
[REWIND:] LIGHTROOM FASTER | MATCH TOTAL EXPOSURE VS. SYNCHING EDITS
Upright Modes – Automatic Perspective Correction
Depending on the image’s content, these can either work really well or completely make a mess of things. With experimentation, you’ll start to get a sense of how Lightroom will interpret a scene and will start to be able to guess which images will be good candidates for which modes for best results.
Auto
This applies basic balanced level, aspect ratio, and perspective corrections.
Guided
In this mode, you create guides along lines that are meant to be parallel. A maximum of four guides may be used. When you select this mode and hover over your image, a magnifying loupe will appear to help you create your guides along lines with precision.
Clicking and dragging on the image will result in a straight guide being created, and using the ‘loupe’ you can ensure that the guide stays along the line you’d like to straighten.
Upon creating the first guide, nothing will happen. When you create a second, however, your image will change, sometimes drastically. It works well to create two parallel guides, and then two more parallel guides perpendicular to the first set.

Level
This mode will look for a horizon line and attempt to straighten the image for you. If you find it difficult to straighten an image by eye, this tool can save you a headache. Vertical
This mode adjusts similarly to Level but favors vertical details.
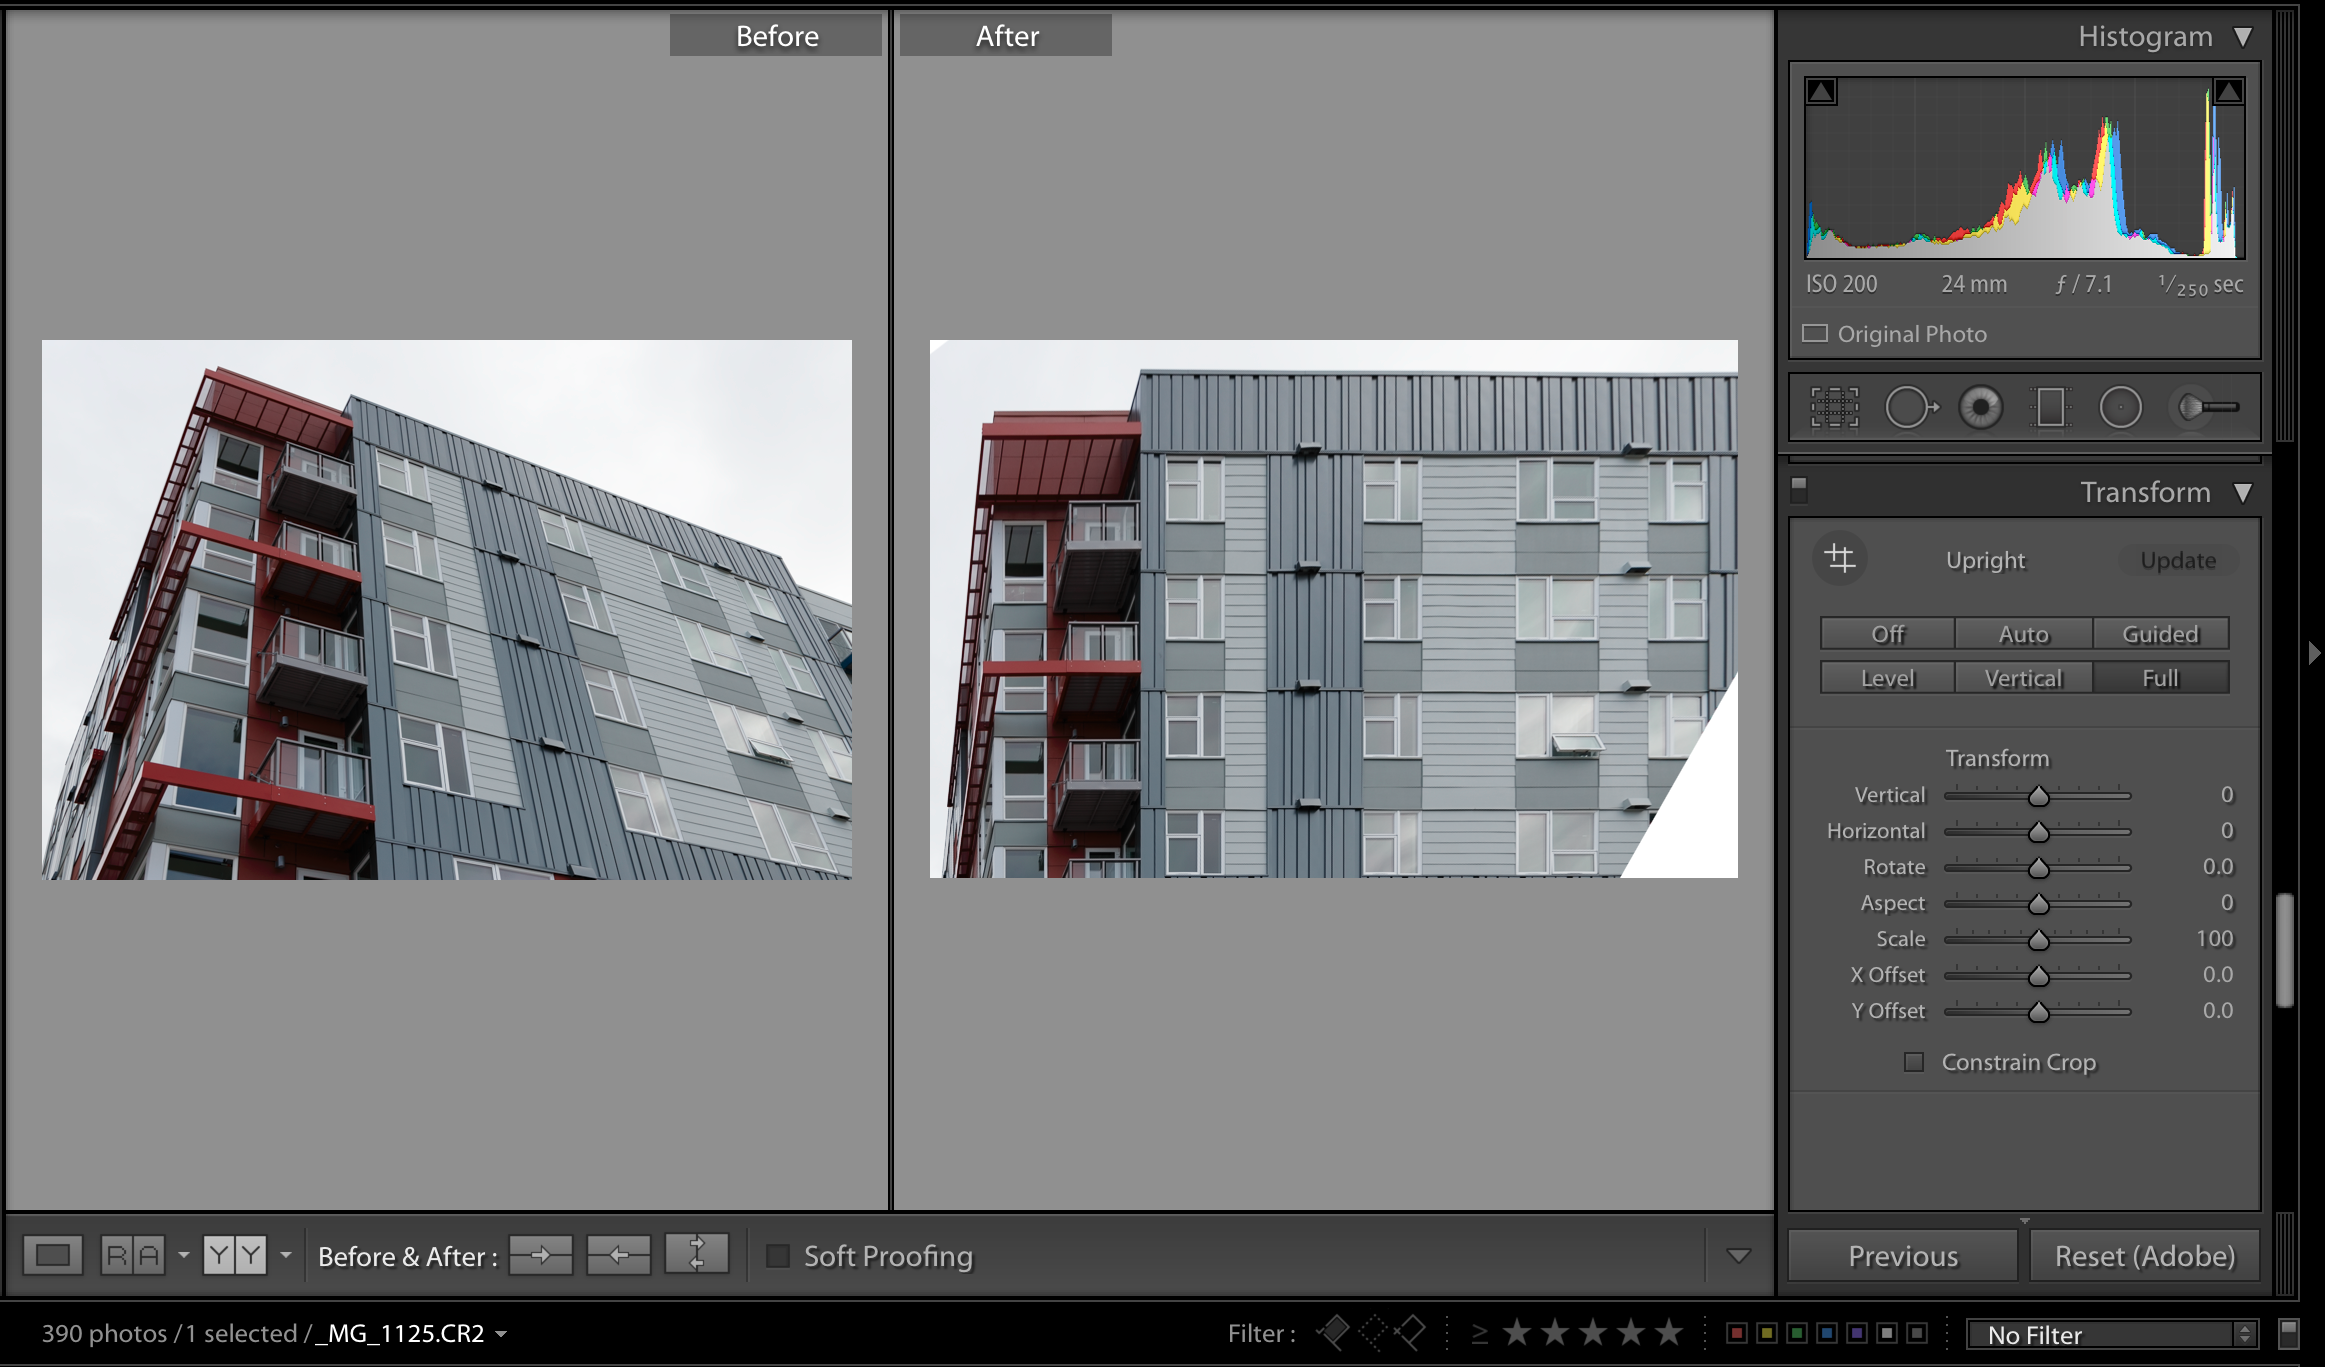
Full
This mode throws the kitchen sink of Upright modes at your image. It’s a combination of all the previously mentioned modes. It can be heavy handed and is very powerful. This mode had the greatest potential to go completely off the wall and become something entirely different than what came out of your camera. Sometimes that’s a good thing, and sometimes it’s not.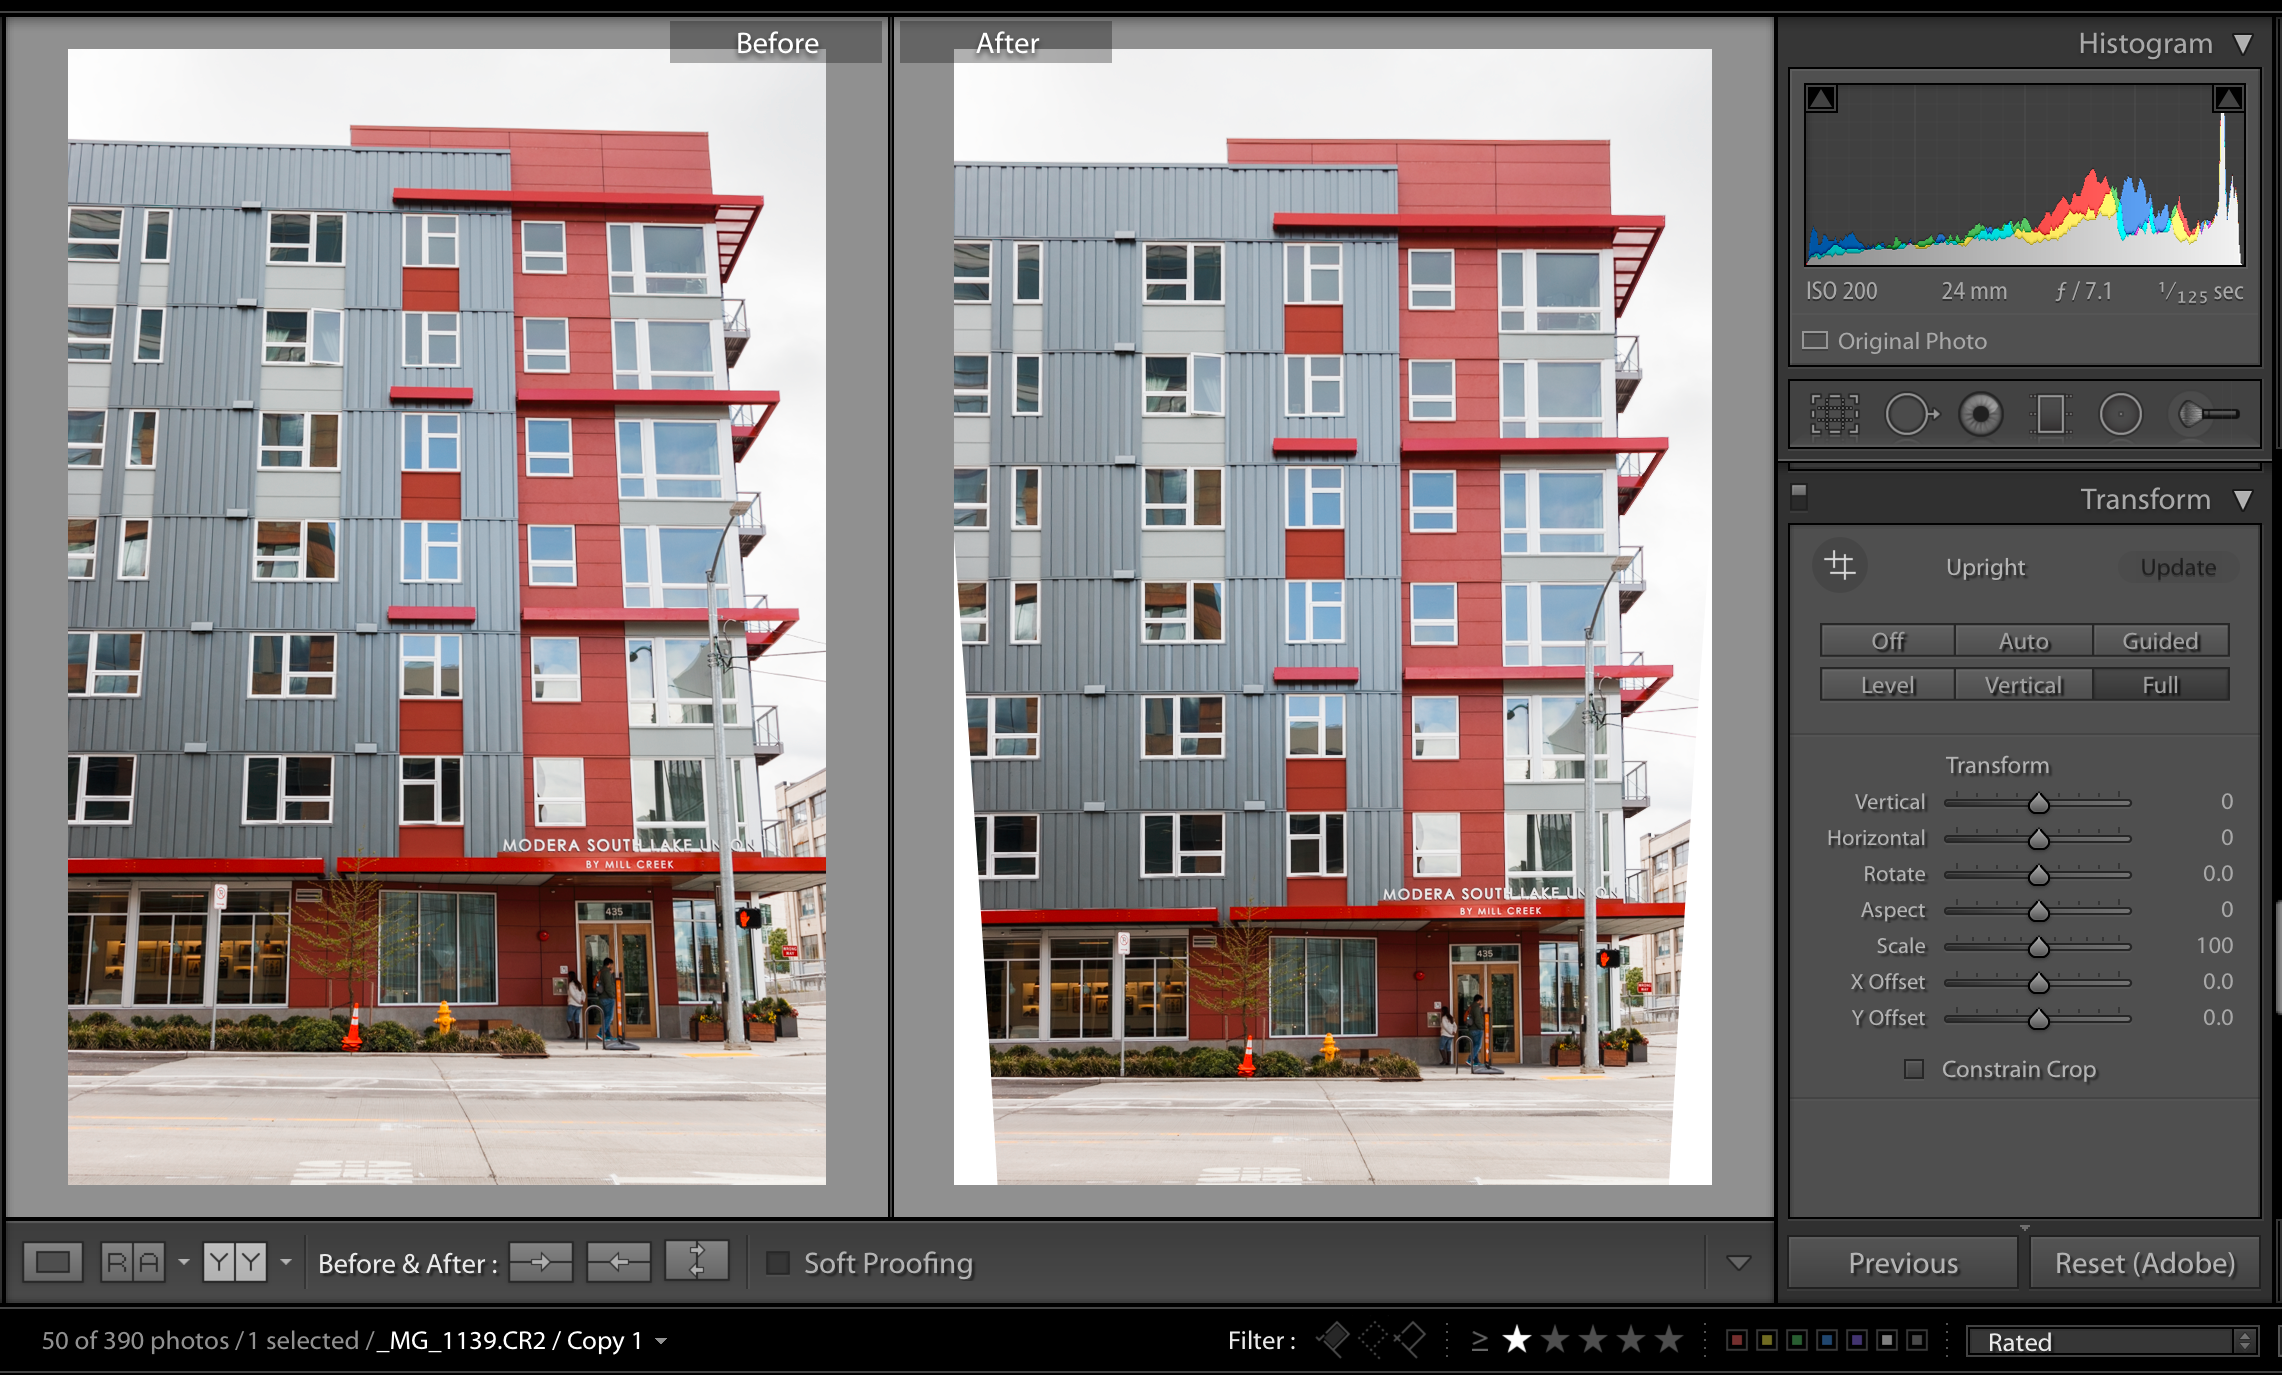
Constrain Crop
This is a check box located at the bottom of the Transform panel. Sometimes, using these tools will result in pixels being moved so much that blank spaces are left at the edges of the frame. Selecting Constrain Crop will automatically crop the edges where white space is left.
Manual Sliders
These can be used alone, but they also work well to fine-tune what the Upright Modes have given you – for better or for worse. Demonstrations are at the extreme end of the sliders for exaggerated examples. Remember, if you see white space, you can either select Constrain Crop for automatic cropping or manually crop to remove the area around the image.
Vertical
Use sliders to manually adjust vertical perspective in the image.
Horizontal
Sliders manually adjust horizontal lines.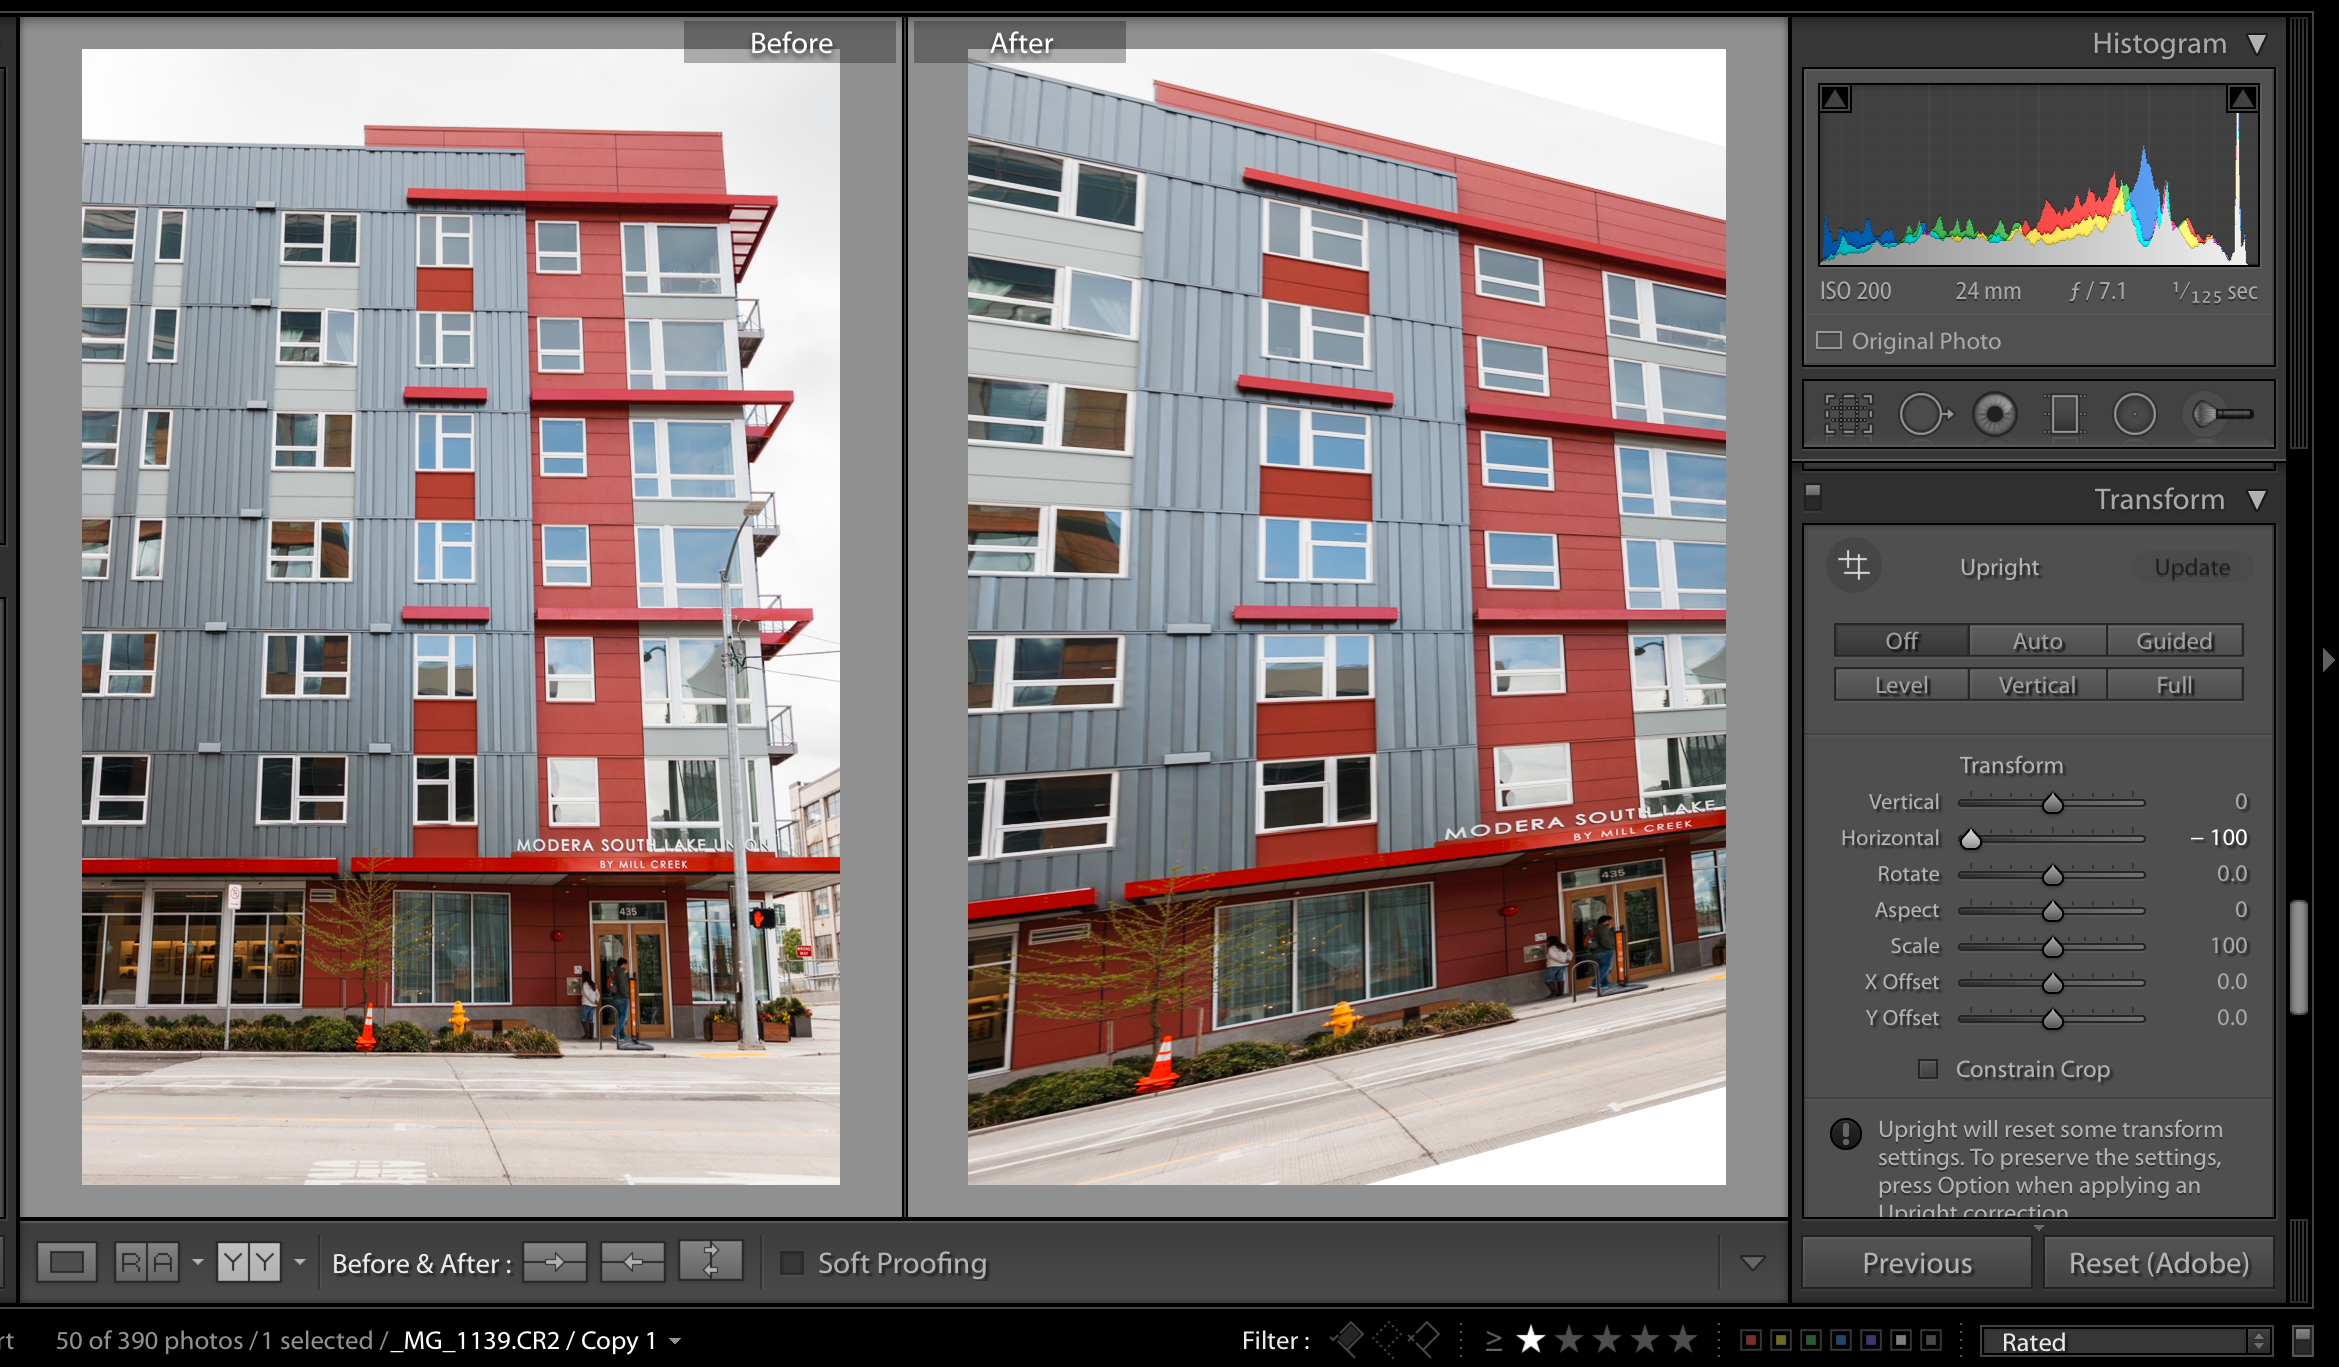
Rotate
This rotates the image within its canvas, leaving white edges where the image has been turned.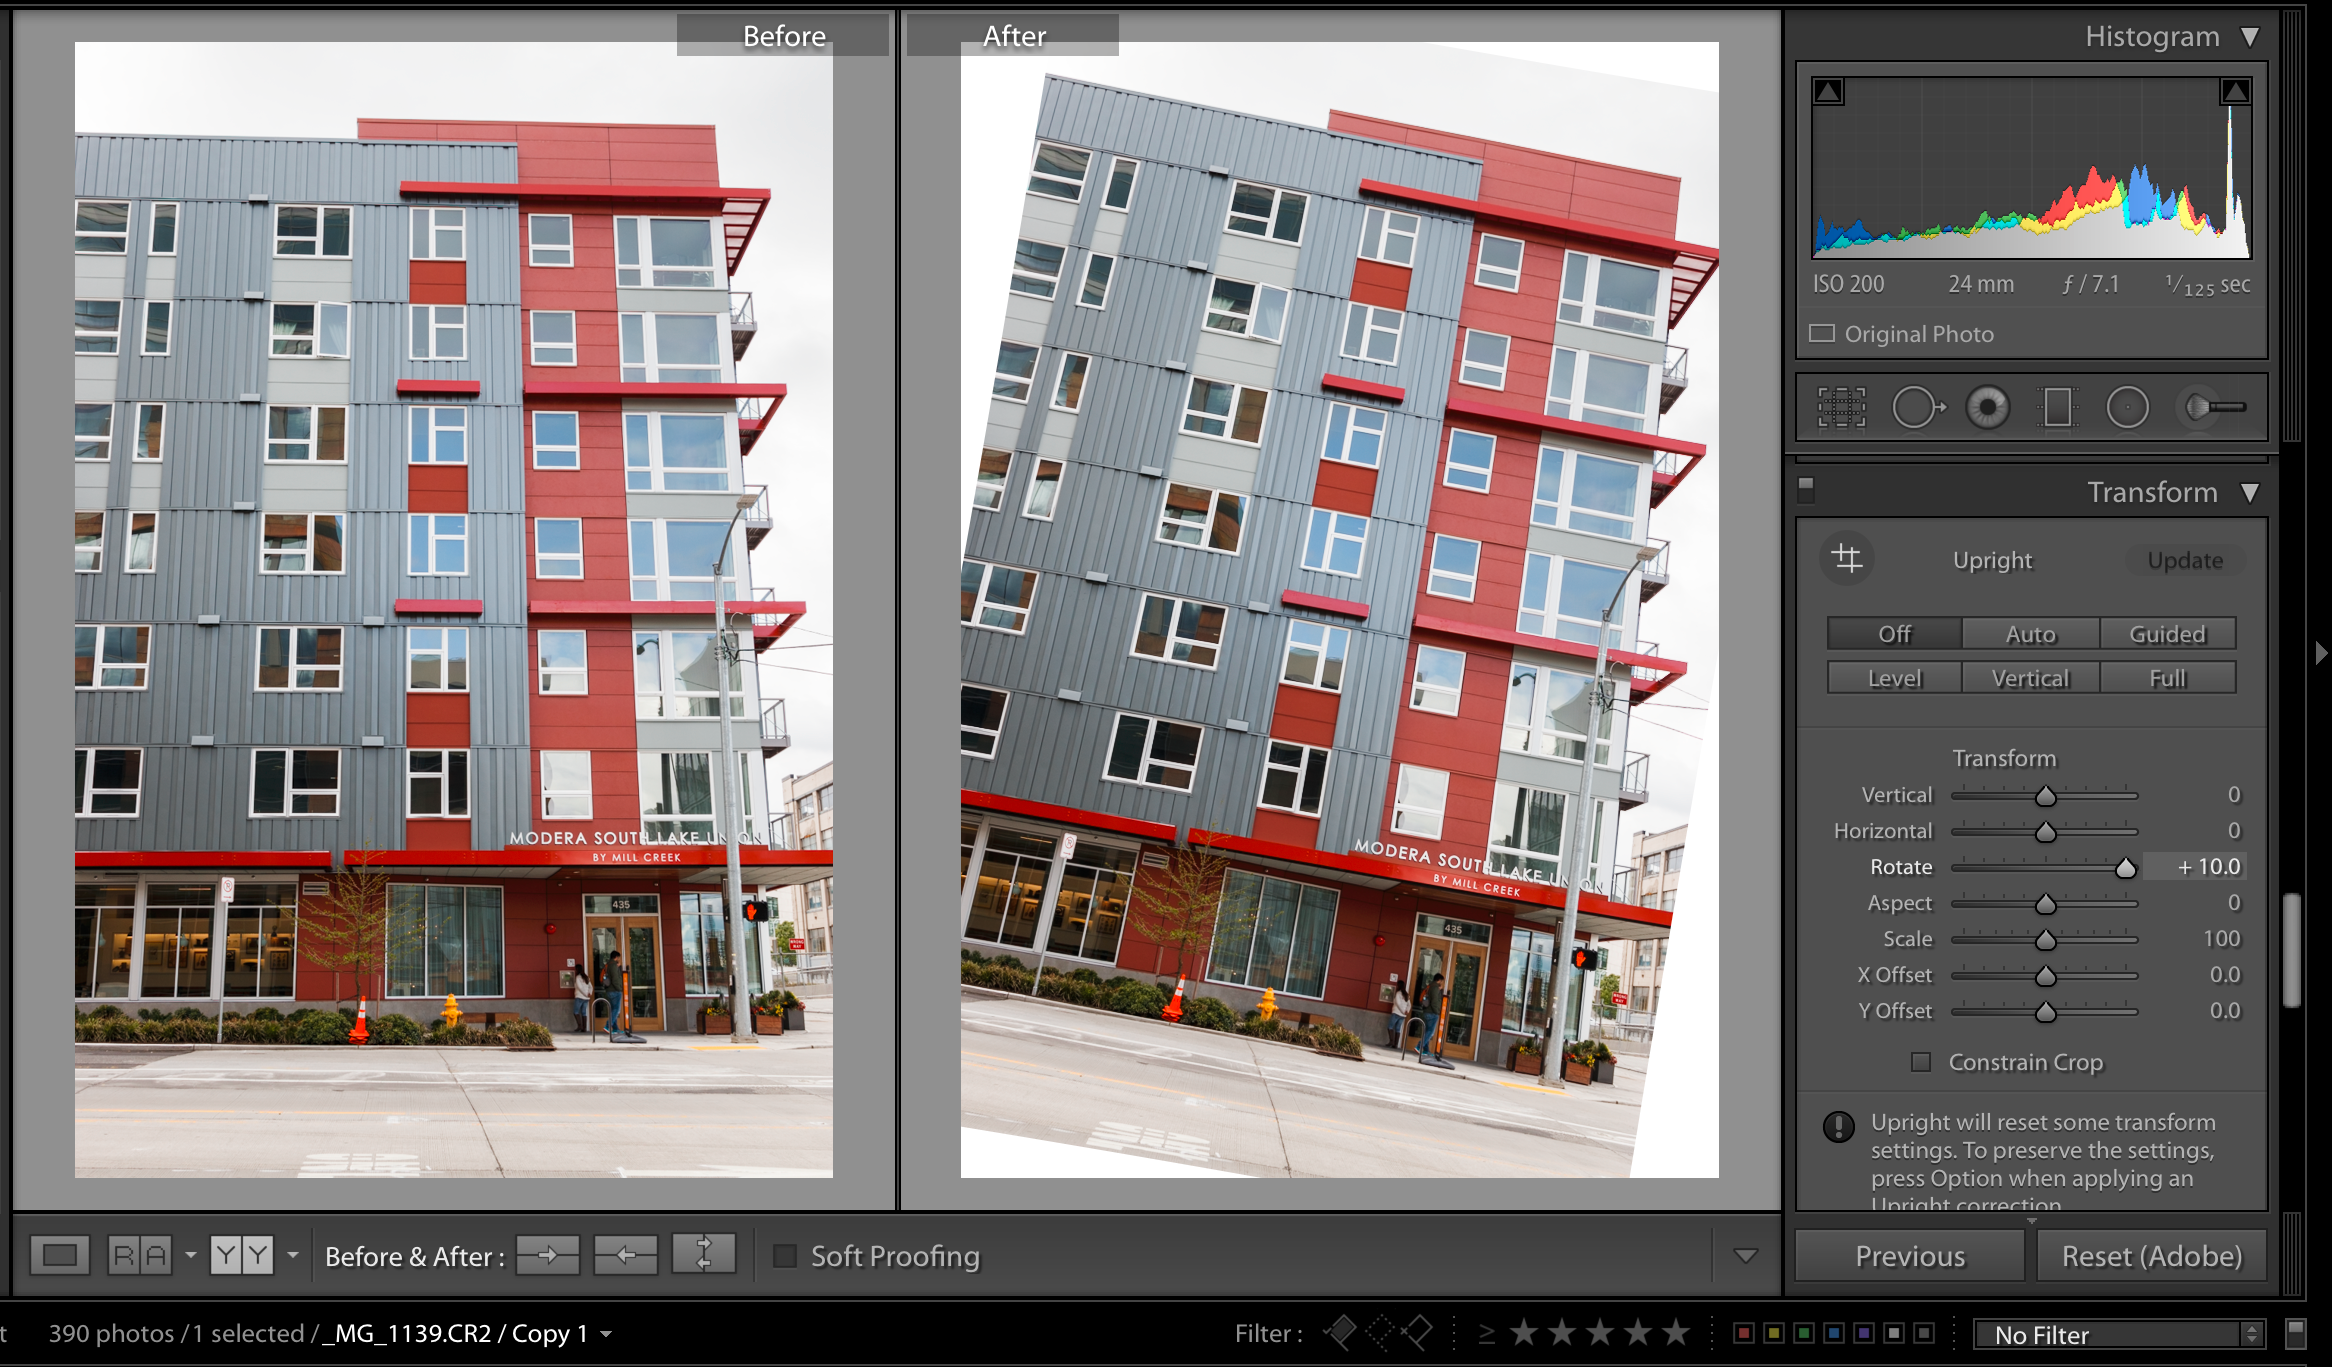
Aspect
This shifts and skews the image shape within its canvas – either to a thinner shape or a shorter, thicker shape.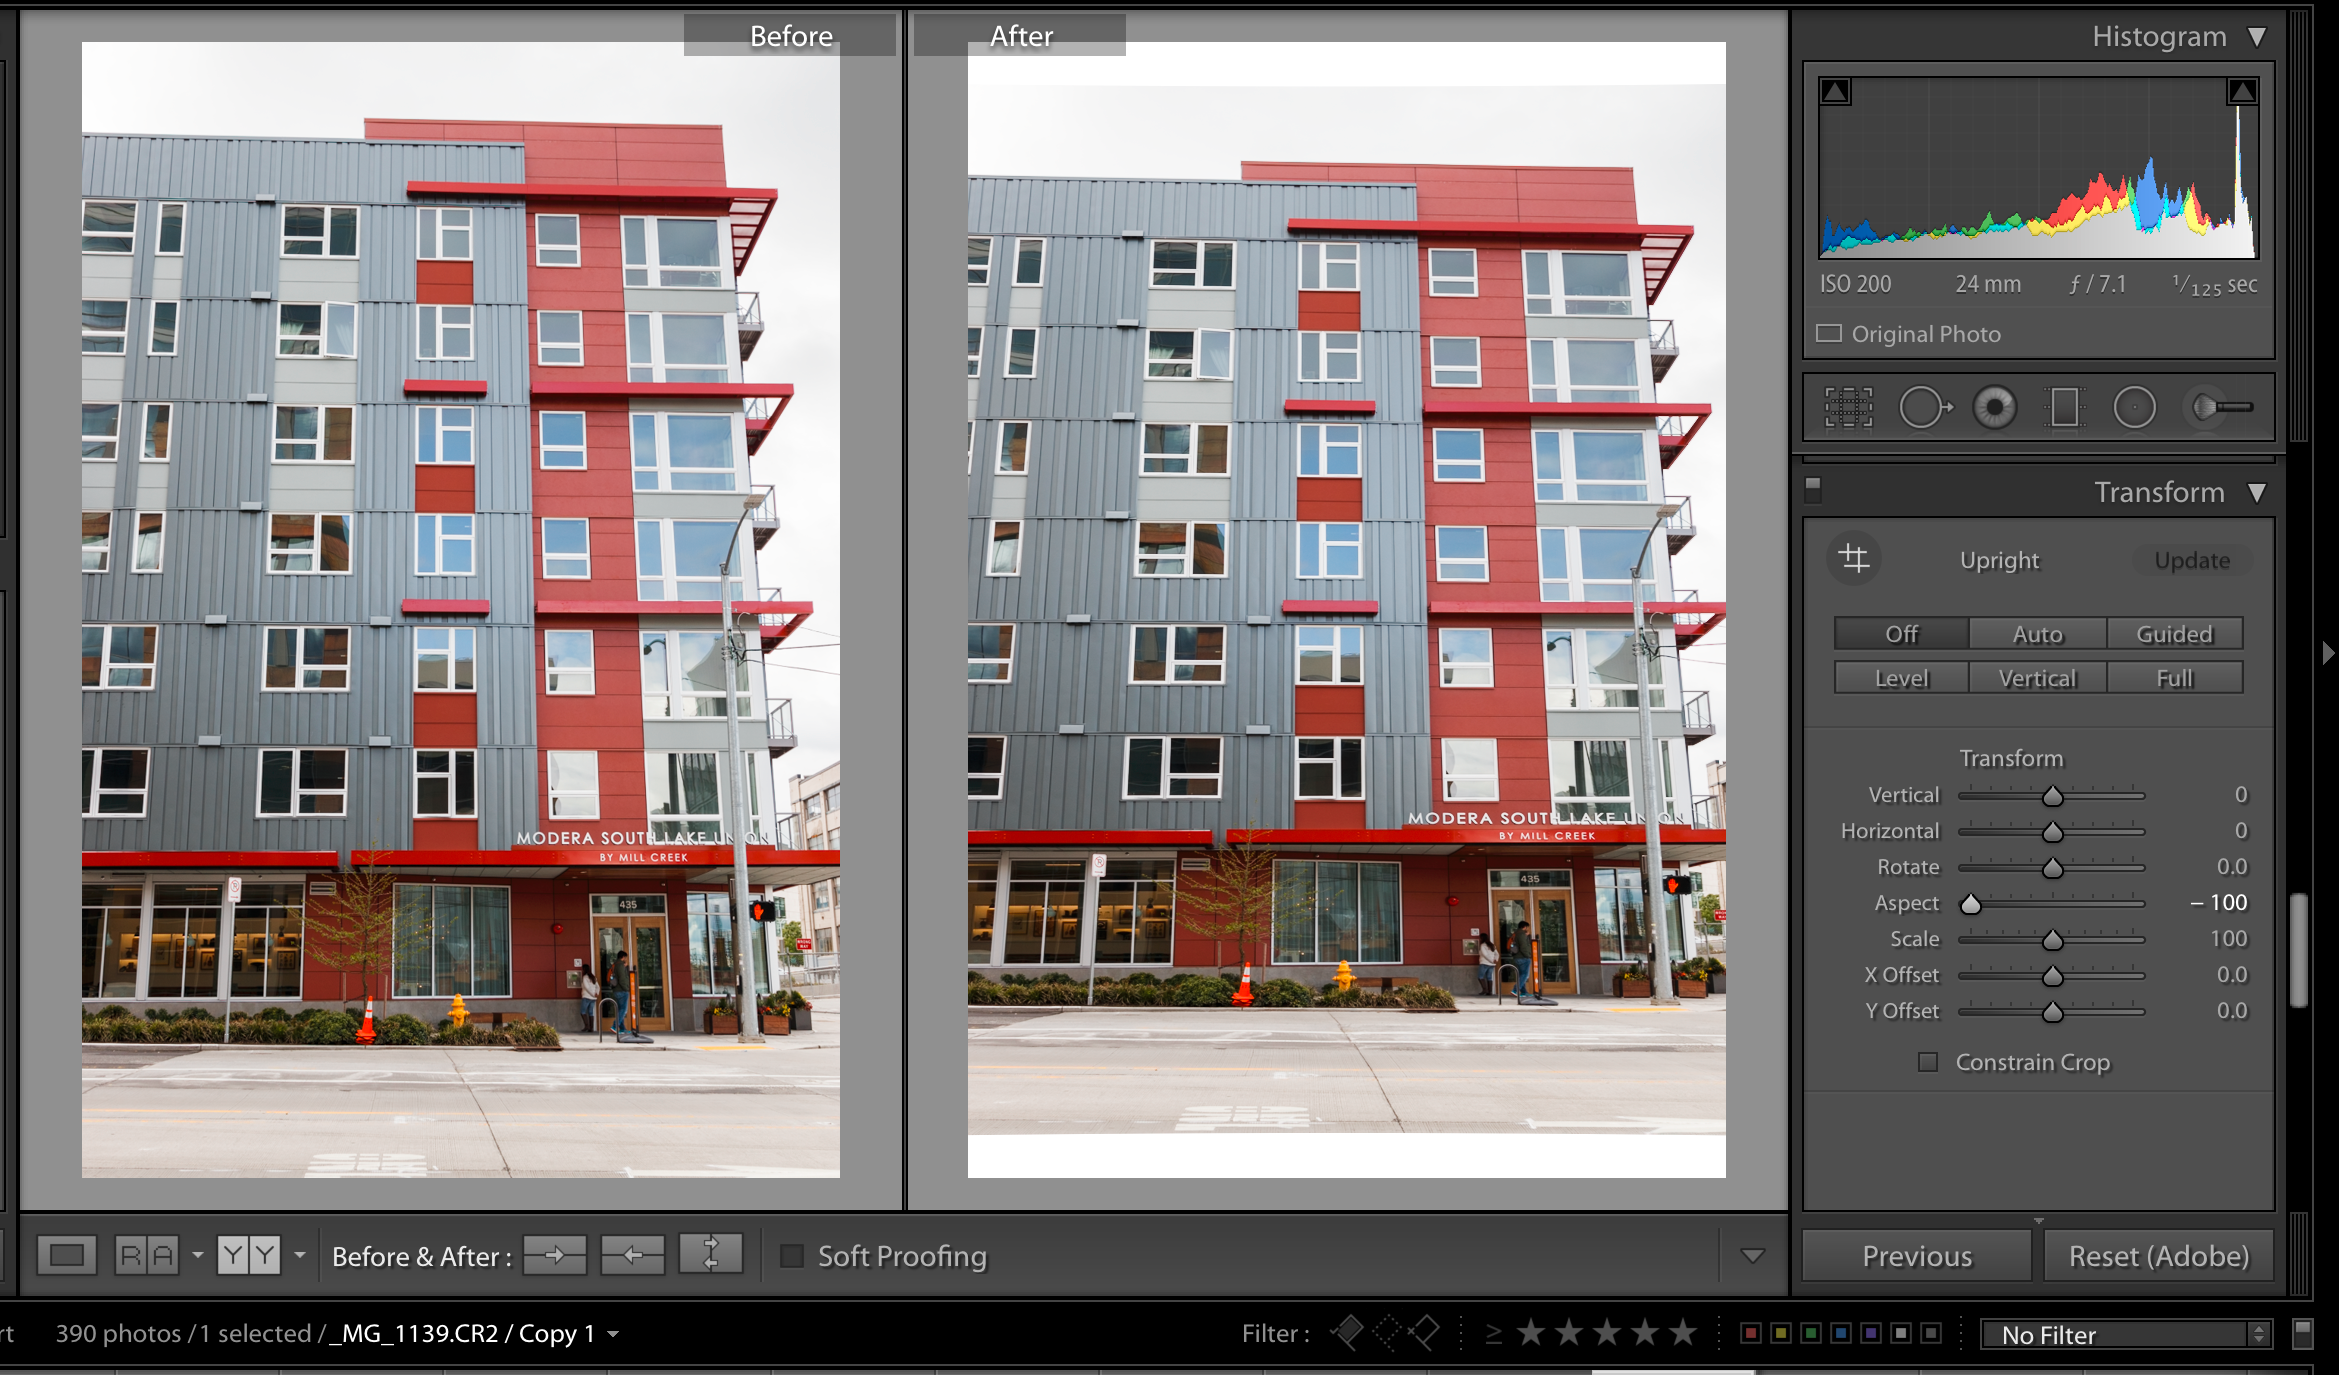
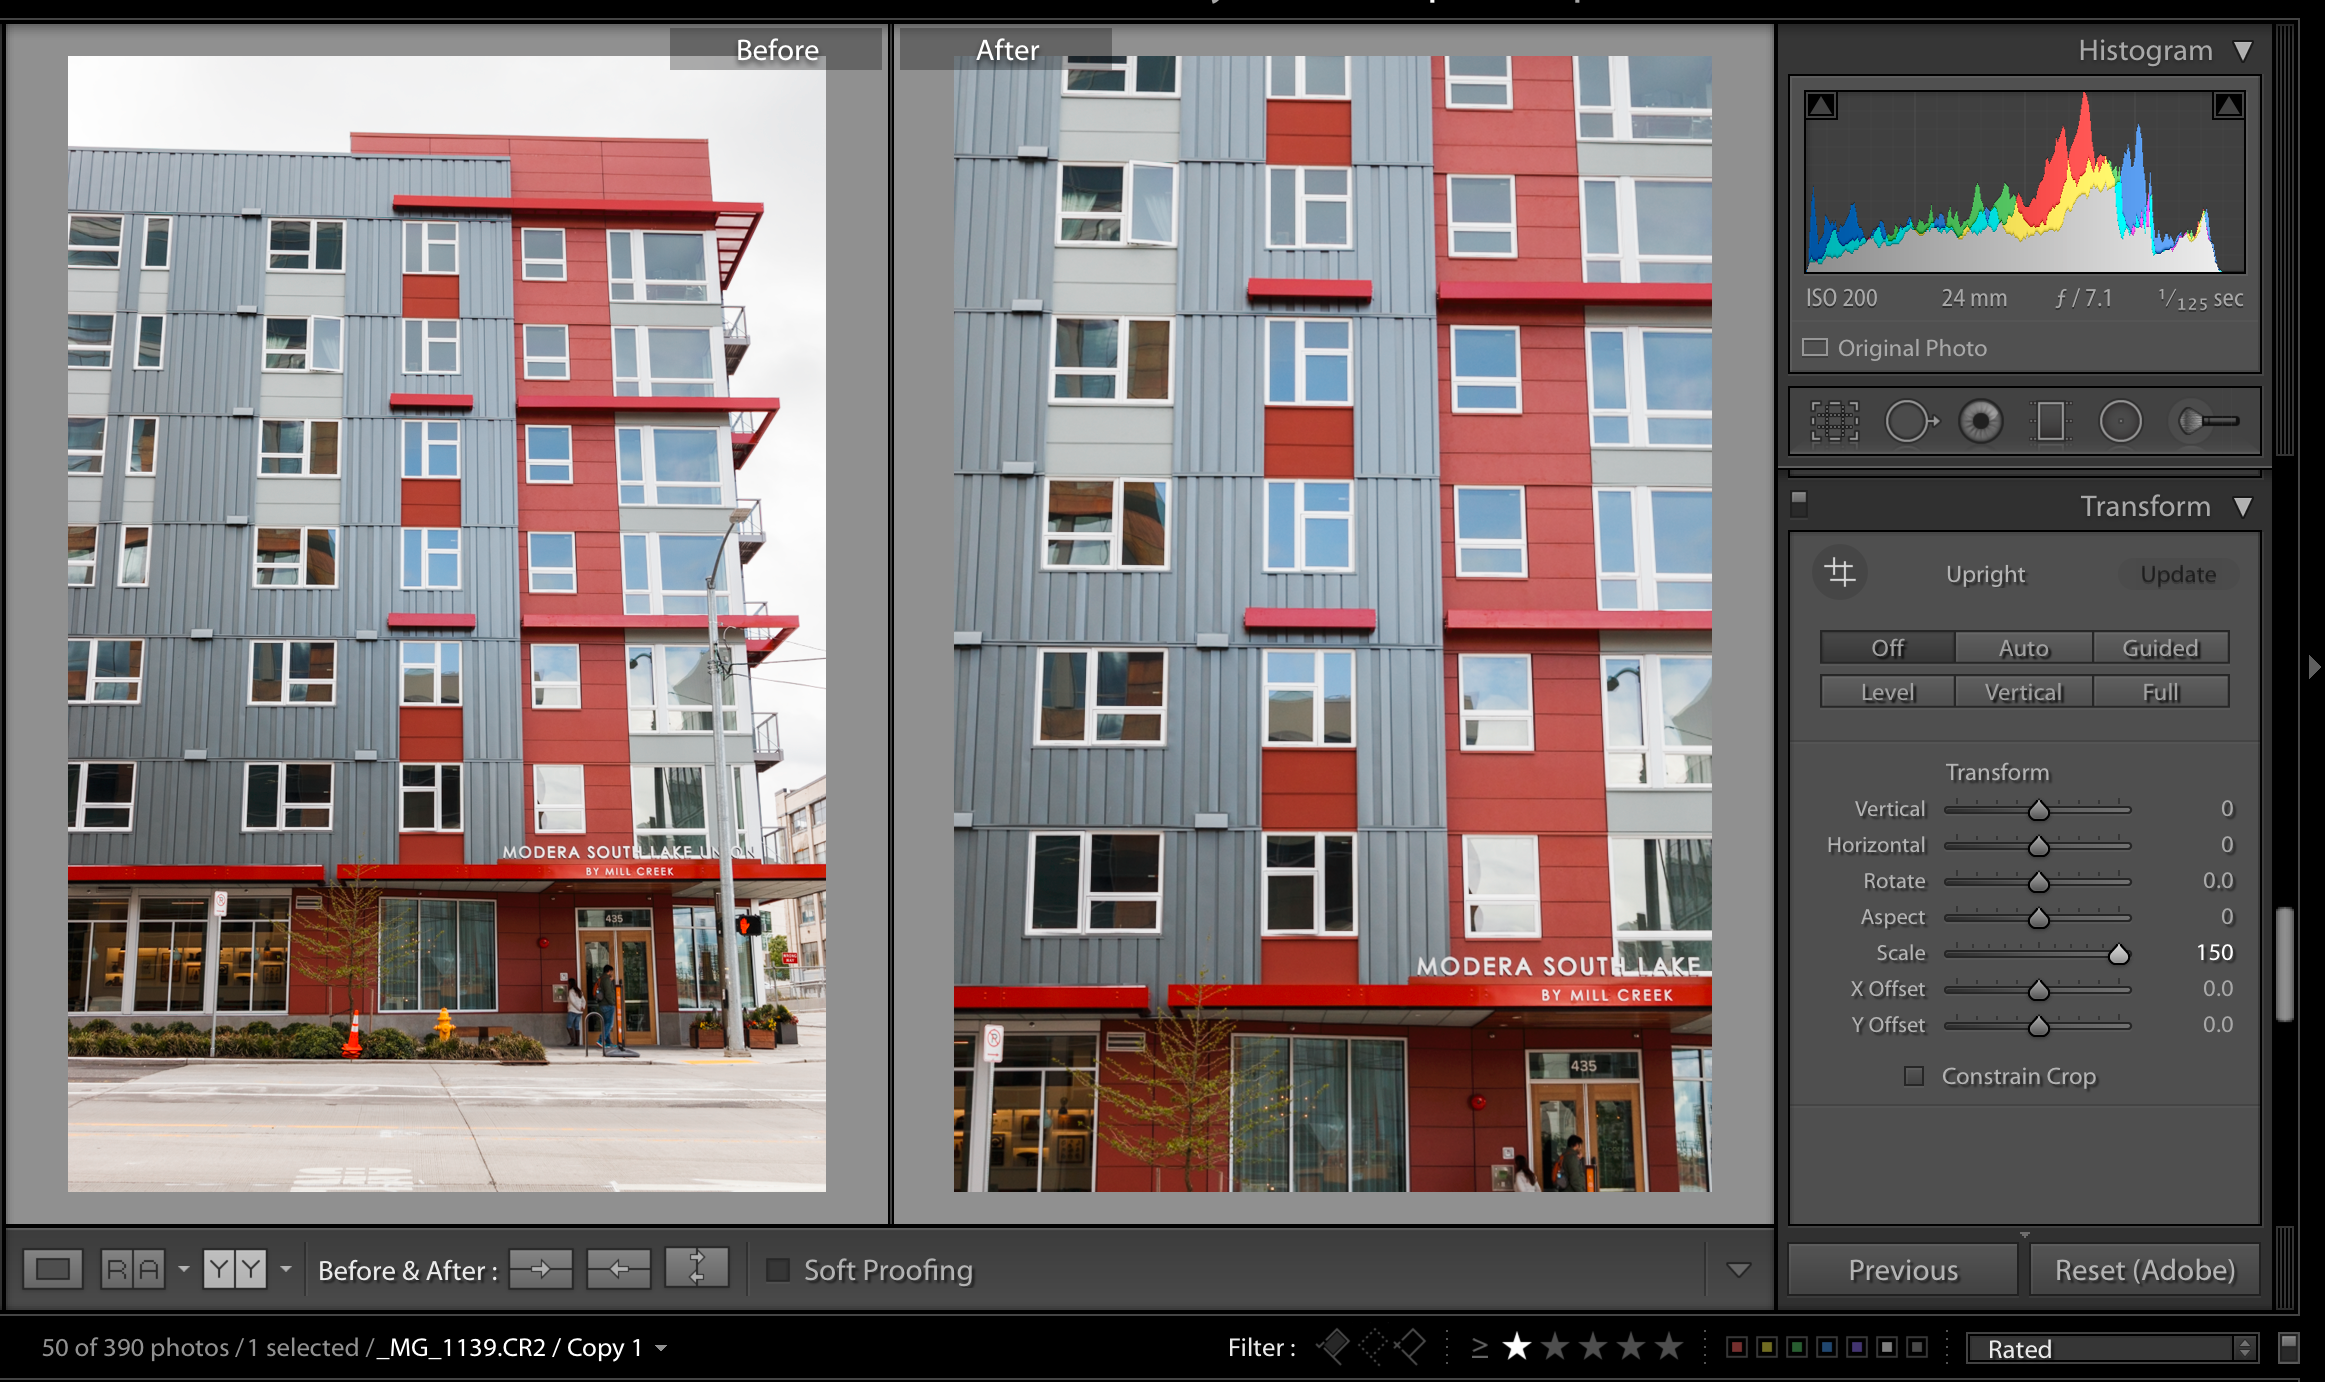
Scale
This zooms the image in or out within its canvas. Zooming out will result in space around the edges of the image.
X Offset
This shifts the image to the left or right – on the X-axis. As with several of the previous tools, this will leave white space if “constrain to crop” isn’t checked.
Y Offset
This is the same as X Offset, except it operates on the Y-axis, moving the image up or down.
With these tools in your back pocket, you’ll be able to fix any number of photographic oddities that can arise when dealing with straight lines and geometric shapes.


Get Connected!