Creating Panoramas
Prior to the new Lightroom CC, I often used third-party apps or Adobe Photoshop in order to create and edit my panorama pictures. In the previous videos and articles, I shared with you my first favorite tool: the dehaze slider, and my second favorite tool: the auto crop & straighten tool. In this tutorial, I’ll show you my third favorite tool in Lightroom CC: The Panorama Tool.
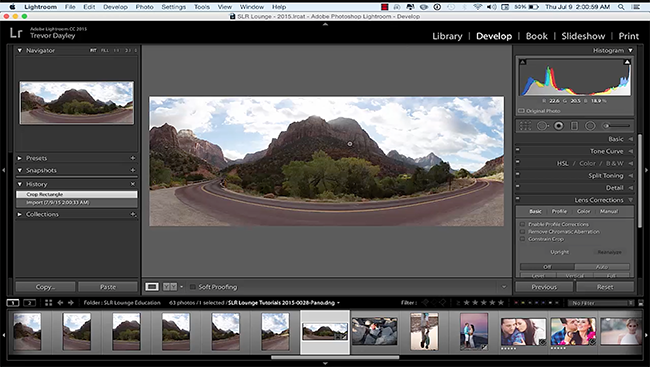
Lightroom Panorama Tool | Create Panoramas In A Few Simple Clicks
A Few Simple Clicks
First, import the images you want to to use for your panorama. Then click the first picture, hold shift, and click the last image so that it highlights all the images in between.

Highlight the images > Go to photo on the menu bar > Photo merge > Panorama
After Lightroom finishes merging your pictures, the final panoramic image can be found at the end of your catalog and library.
A Few Tips On Shooting Panoramas
-
- Make sure your images overlap a little as you pan and take photos. This allows Lightroom to recognize that space and allow for smoother merging.
- Something I like to do is to shoot additional photos around the top and bottom edges because Lightroom will crop out the sky or ground.
- Don’t be afraid to be sloppy and fire off a lot of shots that overlap, Lightroom will figure it out.
Creating Panoramas With Sloppy Images
Another example I wanted to show you were some images I took when I was traveling through Italy. I came across this plaza that I wanted to show my kids so I took a bunch of sloppy photos and decided I’d stitch them together later in post.

As shown above, the images I took are pretty messy and all over the place. I wanted to see how Lightroom would handle this image, and how effective the Panorama tool would be in a situation like this.

As you can see, it does a pretty amazing job.
Conclusion
I hope you guys enjoyed this quick tutorial on my third favorite tool in Lightroom CC. If you’d like to learn more about Lightroom, please take a look at our Lightroom Workshop Collection. Stay tuned for the next video, and please subscribe to our YouTube channel if you’d like to be updated with our latest tutorials and interviews.


Get Connected!