
It’s a consequence of technology today that we end up with far more shots from a single shoot than we’d have done with film. Is it a good thing? Perhaps, and perhaps not. The argument for and against the expendable nature of digital and the frivolity that brings is something to tackle on another day, but right now we’ll try to address a way to help deal with the ever-expanding volume of images we collect.
One of the difficulties that commonly arises for a photographer in post is the variance of exposure that can be present within a range of images that ostensibly should appear the same in terms of overall exposure. If you’re shooting in a controlled environment like a studio this is less of an occurrence, but if you’re out of one it’s all very common, even if you’re shooting the same subject in essentially the same place. Here we’ll address a little bit of why and when this happens, and show you how to use Lightroom to help make quick work fixing it.
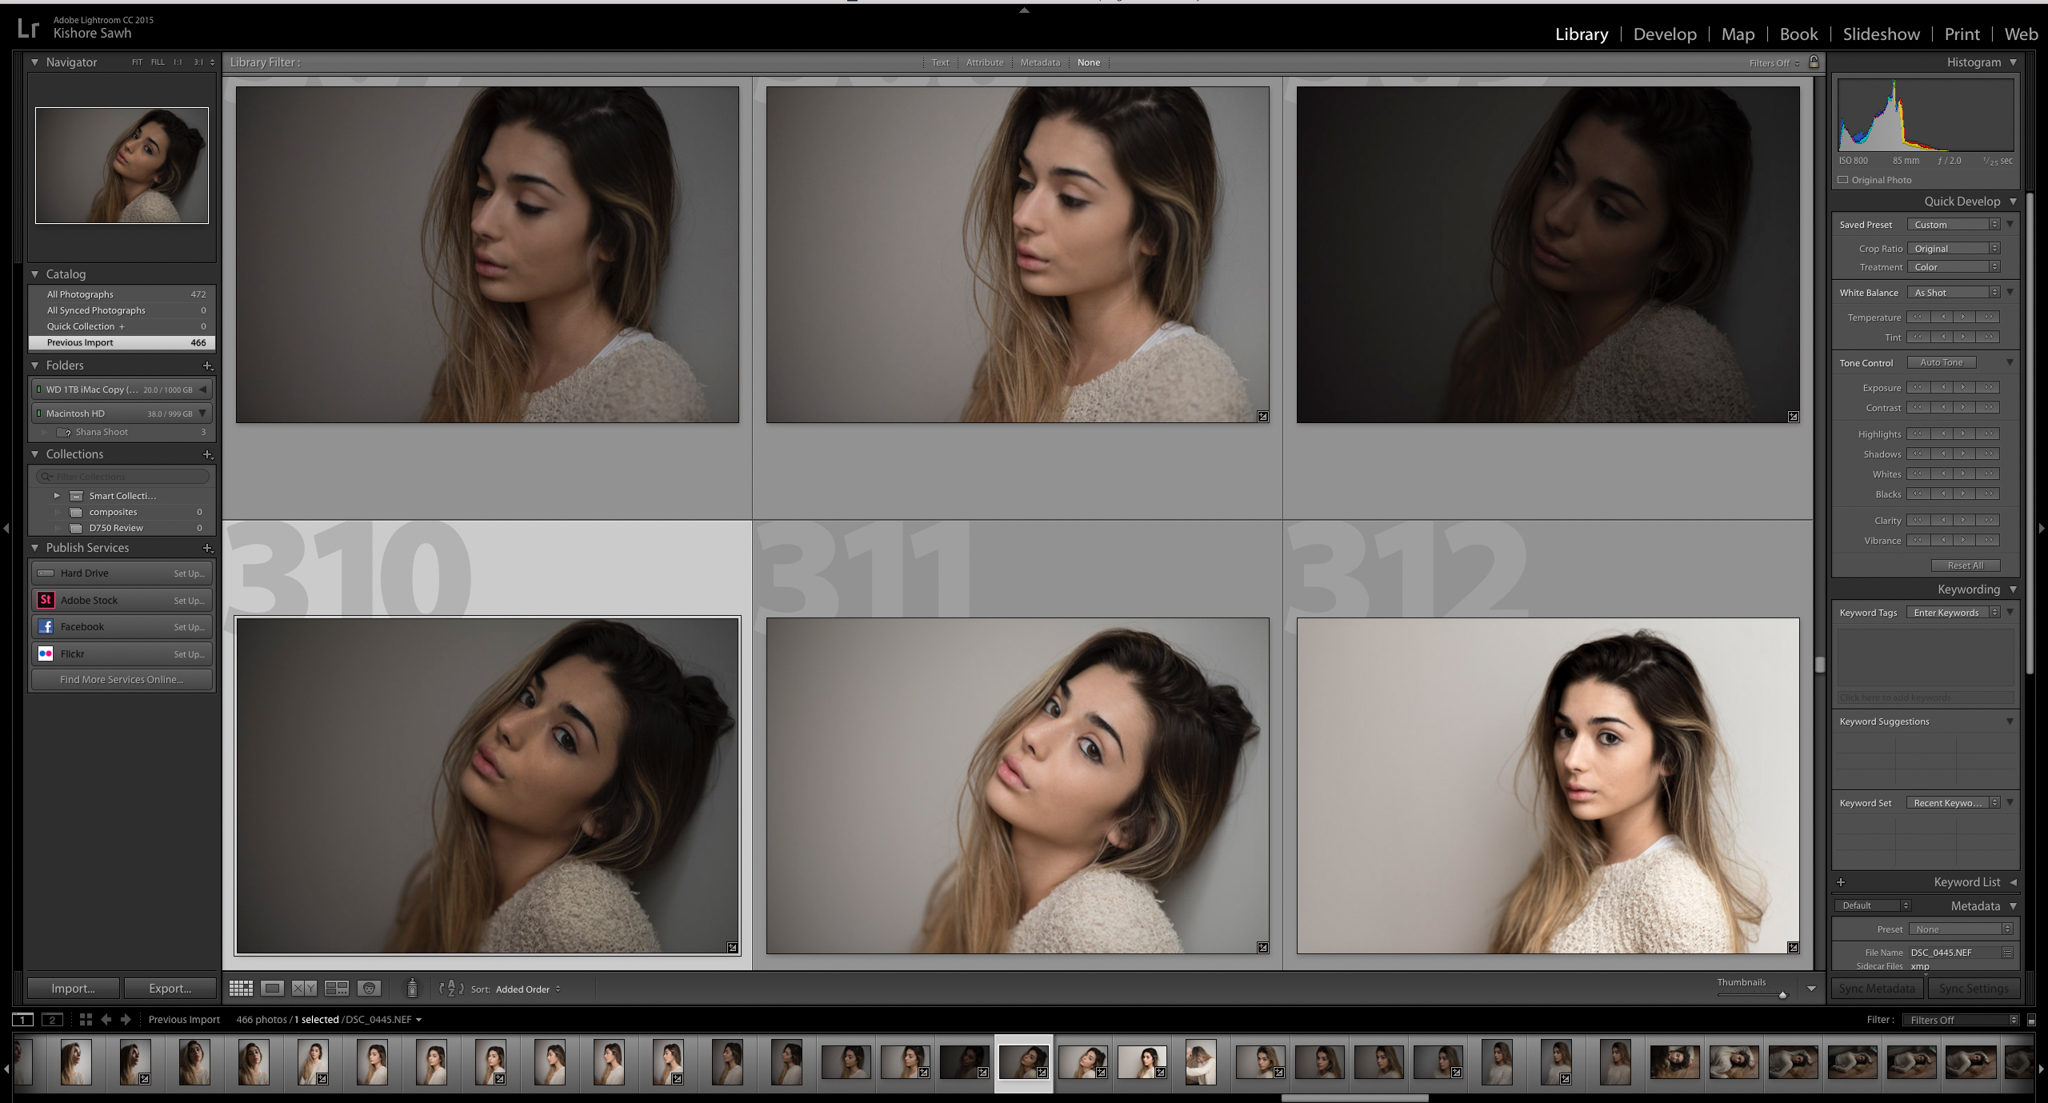
Here’s a typical scenario: Photographing a person indoors/outdoors and you’re shooting in aperture or shutter priority (regardless of exposure comp), and while the subject may stay in the same relative spot you compose your framing a bit differently. Then, when you upload all the images some are really bright and others are either better or just right, or opposingly dark. What happened?
Well, a few things could’ve happened really. Your available light could’ve shifted even slightly, sure, but more often than not this seems to happen when the composure is altered and the camera’s metering is adjusting settings as to compensate for that shift. If most of your frame is filled with something bright your camera will meter and apply settings to expose for that, but if you shift the framing up a bit and maybe there’s a shadowed wall and Now more of the scene is darker the camera will alter settings to expose for that (you could be doing this manually of course), and the resulting images will look very different even though you shifted the framing maybe an inch.
So, here you are with many photos from a session and you want many or all of them to appear equal in exposure, how do you fix it? Well, you could manually go in and adjust each photo but that’ll be tedious. If you’re using Lightroom you should use the Match Total Exposure option and save the time and headache.

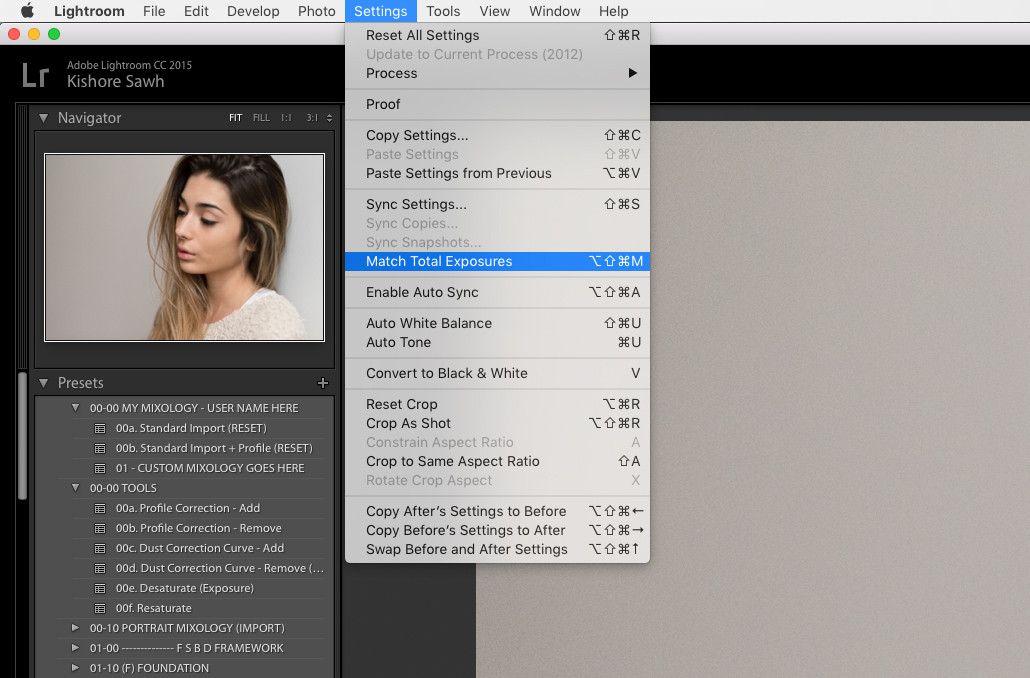

Match Total Exposure will analyze your base image and then bring the other images to match. This is NOT to be confused with regular synching or copying edits, and this is really the crux of the article. There seems to be quite a bit of confusion that one acts as the other, when in fact, they behave very differently. Regular synching of develop settings will apply the exact same settings to each image so it treats them as a whole. Match Total Exposure will treat each image individually to get it to the point you set from the base image. Match Total Exposure is like the AI version of that and doesn’t make the same adjustments for each, but adjusts what each needs.
How do you do it? Simple. Once you’ve chosen your base image and made the necessary adjustments, hold the CMD/CTRL key and select all the other images you want matched (darker or lighter). Then go to Settings>Match Total Exposure and Lightroom handles the rest. That’s it. From within the Library Module you can access it via going to Photo>Develop Settings>Match Total Exposure.
[Lightroom Tips: Lightroom Can Quickly Show You What Gear You Need & Don’t Need]
If you really do and want to absorb lots of this kind of information, I highly suggest you take a look at our Lightroom Organization & Workflow workshops and Premium SLRL Members get access to it all (all new courses we release, along with more direct access to the SLRL Staff). They’ll get you up to speed, and fast, allowing you to get the most out of this program we spend so much time with.
*This post was originally published in 2017.


Get Connected!