
Drone cameras have gotten impressive with each new release and it’s important to be able to maximize the detail and color to create a masterful drone shot. In this article, we’re going to cover some of my favorite techniques and tips for editing drone photos using Lightroom drone presets. Whether you use a drone for commercial and personal use, it’s important to be able to create a consistent look or understand how to maximize the potential your RAW drone files have in Lightroom.
1. Establish a Signature Lightroom Drone Preset
 Since you’re going to be working on a lot of images, it’s best to create a lightroom drone preset that best fits your style and the feel of the photo. In order to get the best color and detail from my images, I like to use the Visual Flow Crush Pack, meant to emphasize bold and vivid colors.
2. Use the Radial Filter Lightroom Drone Preset to Draw Attention
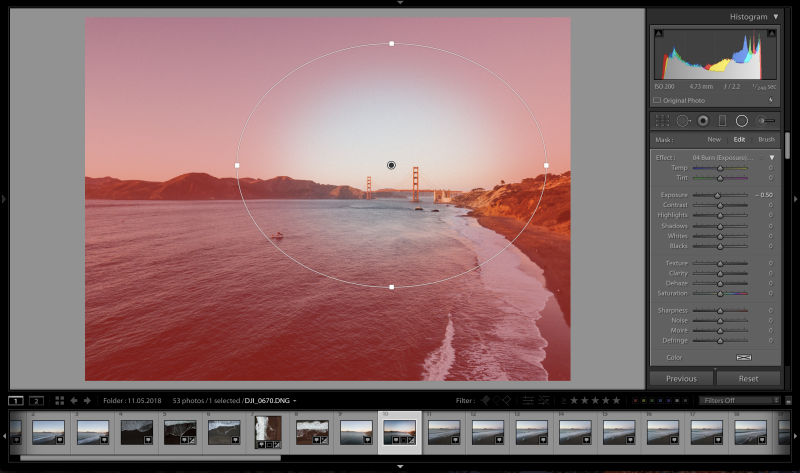 One of my favorite tools to use in Lightroom for portraits it the Radial Filter. It does a quick and effective job of dodging and burning without having to spend time manually brushing the image. The Visual Flow Preset System has a Radial Burn Filter (-.50 Exposure) that is great for drawing in the viewer’s focus to a specific area in the image. This is an ideal feature for portraiture but most people don’t think to apply it to landscape photography photos. It’s an easy Lightroom drone preset to add to your workflow especially if you have a portrait subject included in your image.
3. Try Rotating the Image to Change the Perspective
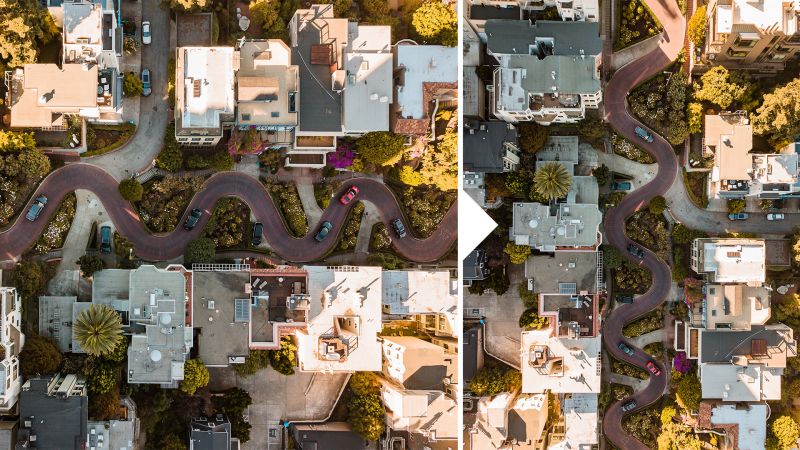 Often times landscape photos are shot in… no surprise…landscape orientation. The unique thing about social media is that it has created a trend of portrait orientation imagery, even for landscape photos. I tend to shoot more portrait-oriented images than landscape on my drone to switch up the perspective of commonly photographed locations. There are so many ways to individualize your drone photography, whether it be through Lightroom drone presets or composition. If you want more examples of how to include portrait subjects in your drone shots you can check out my Instagram for some inspo!
4. Use a Graduated Filter Lightroom Drone Preset to Emphasize Color & Detail
 Here are two of my favorite, quick Lightroom drone presets to add to your Graduated Filter adjustments: a temperature gradient to emphasize color and an added clarity adjustment to bring out the details of clouds. This is a great tool to have for epic sunsets when the colors in the sky are changing and you want to accentuate them. Additionally, having a graduated filter that targets just the sky will leave the rest of the image unaffected, for example. if you just want the clouds to be more emphasized without affecting the total exposure of the image you can drag a +10 Clarity Lightroom drone preset graduated filter from the top to the horizon line. Here is the final image with the added Graduated Filter:
 And there you have it, a few tips to get you editing like a pro with some of my favorite Lightroom drone presets and techniques to enhance the features in your drone photos. You can see more of my drone shots on my Instagram for compositional and editing inspiration. For more information on the Lightroom drone presets I used in this article check out Visual Flow Presets. If you want to get more comprehensive training on Lightroom editing, make sure you check out the SLR Lounge Mastering Lightroom Course!


Get Connected!