Early last year my wife launched her cake design and confections business, Sweet Details. And by default, I became her food photographer; which is fine because I get paid in cake. But food photography wasn’t a genre I had invested any thought or time into up until that point. And so this is the tale of how I began my journey into capturing cake art.
I re-enrolled in YouTube University picking up courses in trial and error and a few screw-up electives to meet my mandatory frustration requirements. In time, I finally found a style that the Missus liked and we started shooting. Recently, she has gotten a lot of questions about how we shoot her cakes and I felt it would good to share some of those answers here.
Gear
Until a few weeks ago my food photography gear included a Nikon D610 and the 50mm 1.8G. However, I have recently switched to Sony and have yet to replace the 50mm focal length in my kit; thus, I borrowed the 6D and 24-70mm. The 50mm focal typically length fits my needs as I am shooting in limited space.
Non-Photography Accessories
- Foam Core (Target, Amazon, Uline, Lowes, Home Depot)
- SCHOTTIS Pleated Shade (IKEA) – $2.99
- Roll of Paper White Craft Paper (Target, Amazon, or any craft store)
Using Natural Light
Our studio, formerly known as the breakfast nook, has two large windows; one facing the East and one facing the South. We use Ikea pleated shades to diffuse the light coming from both windows. The east-facing window serves as the main light with the south-facing window providing light behind the cake. It is important to know which direction your windows are facing so you know where and when to expect the best light.
For instance, the sunrise comes through the window facing the east and the sun has to rise over our neighbors house and huge pine trees so we only get strong light from about 10:30a-12:30p. If the sky is overcast or if we miss this window of time (wink) I have to suppliment the light with off camera flash; which I’ll cover in a second article.

The paper roll is mounted onto the blinds with clips and gives us the ability to create the seamless background look. It is important that you put as much distance as possible between your cake and the background. If you don’t, the cake will get swallowed up by the light in your final image. The table we use to shoot is also white and bounces light back onto the cake which is helpful because our goal is to flood the cake and its background with as much light as possible.
[REWIND: Lighting Modifiers | Which one is right for you?]

In many instances, it is not neccessary to bounce light back onto the cake with a reflector, but I always do. It all depends on the look you want.


[REWIND: Posing Tips | The Three-Point Checklist]
Post Processing
I keep the post processing on the images very light because I want the artistry in the cake design to stand on its own. So my work in Lightroom usually consists of:
- White Balance Correction
- Lens Distortion Correction
- Vignetting Correction
I do use two of the SLR Lightroom Lounge Presets to slightly enhance the colors.
Under the Foundation Tab
11a – Natural Color (With this I always, make sure reset the white back to ‘0’ because I want my whites to be well…white.)
OR
Under the Stylization Tab
21e – Neutral Punch (Standard)
Both of these give a little, and only a little, punch to colors in the cake. In addition to this, I do some minor spot removal if needed and this is typically all I do to get the look I want and it usually takes less than 2 minutes.
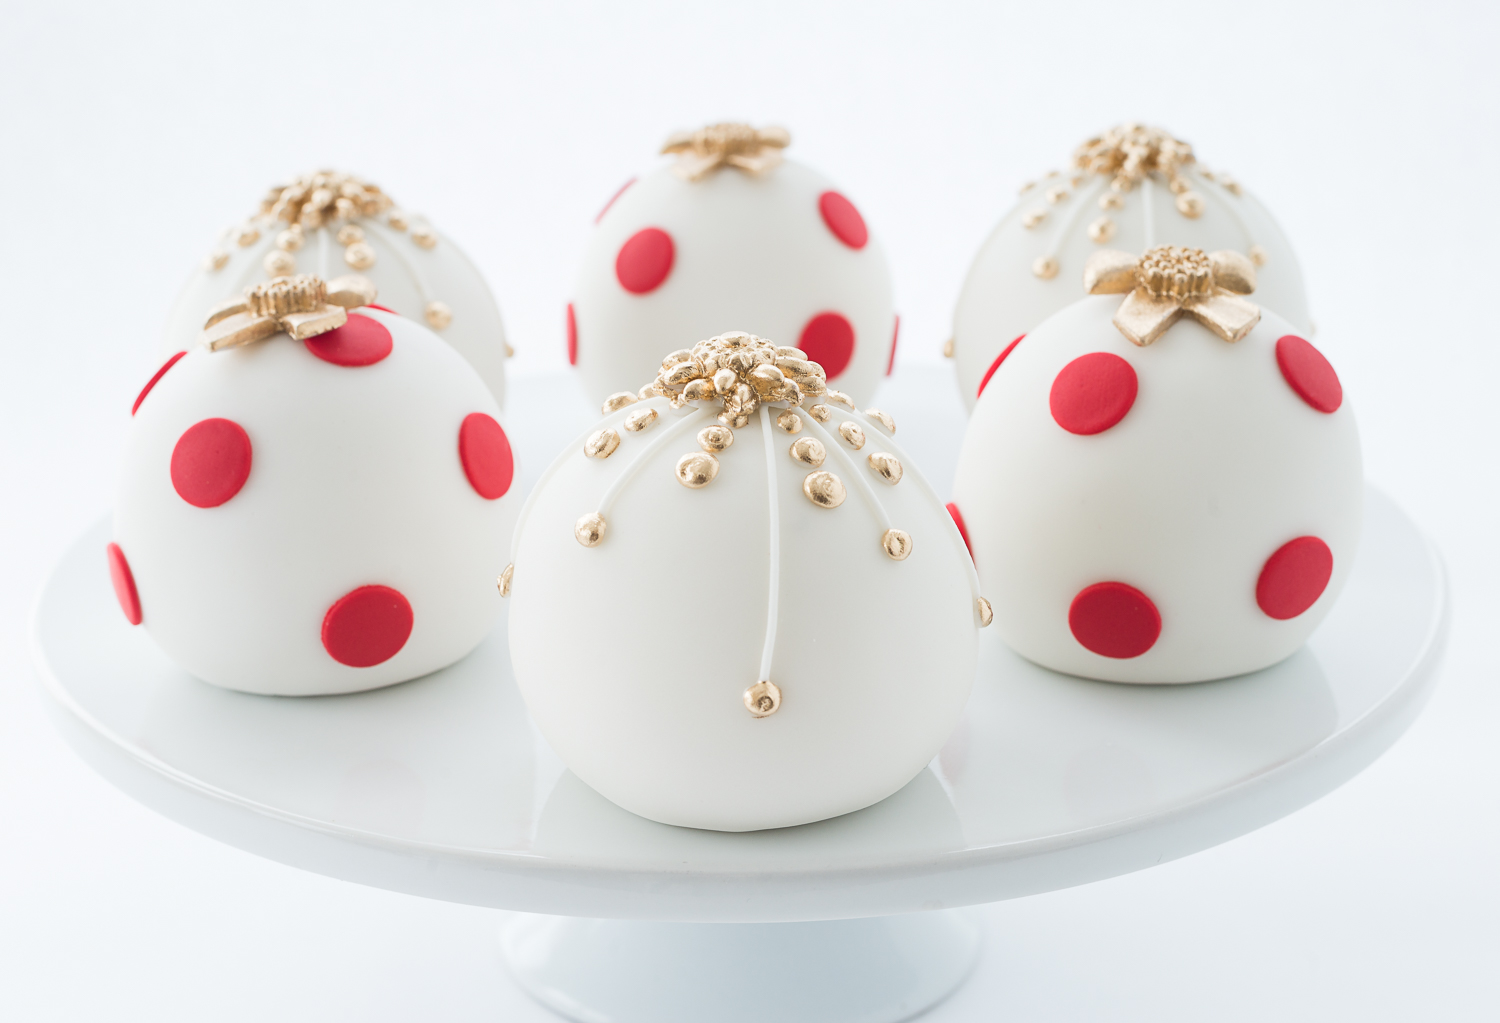
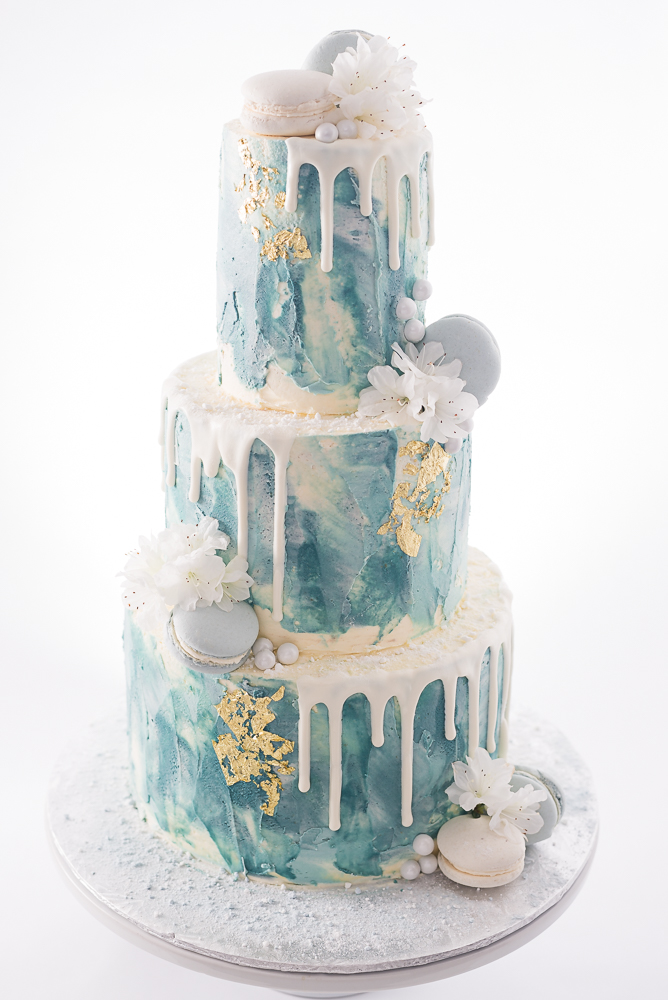
Here are some more cakes from Sweet Details.

Many of the people asking questions of my wife are facing the same frustrations I did when began taking photos of her cakes. I hope this and future articles help speed you past some of those challenges.
You can find more of Andrea’s work at:
Instagram @sweetdetailsatl.


Get Connected!