
Ever wanted to remove something from your photos? Stupid question. We all have, and Content-Aware Fill is one of the many tools Photoshop provides which aids us at this endeavour. Whether it be a blemish, person, car, or building, Photoshop is your friend. Content-Aware Fill, however, has often been thought of as less than useful, to putting it politely. But advances in technology have improved it drastically, so Is this still the case, and for those that don’t know, what is Content-Aware Fill anyway?
What is Content-Aware Fill?
Content-Aware Fill, in the conventional sense, is accessed via Edit > Fill. Make a selection around the item you want to be removed, go to Edit > Fill, and you’ll be presented with the dialog you see below. Select Content-Aware from the drop down menu at the top, click ‘OK’, Photoshop analyses the pixels surrounding your selection and perfectly removes the offending object. At least, that’s how it should work. In practise, the results can vary wildly.

As well as this “conventional” form of Content-Aware Fill, you will also find it in other forms throughout Photoshop. There’s Content-Aware Scale (Edit > Content Aware Scale), Spot Healing Brush, Healing Brush, Content Aware Move and the Patch tool. To one degree or another, each of those tools utilises, what I can only assume to be, a similar algorithm. The algorithm analyses the pixels surrounding your selection (or brush strokes) and replaces those pixels, thereby removing the object.
The big difference between using Content-Aware Fill via Edit > Fill Vs. any of the other tools mentioned above, is that applying the effect through Edit > Fill requires your layer to not be empty. In other words, you’ll need to duplicate your background or create a merged layer for the effect to work. That can be annoying as it increases the file size dramatically and makes maintaining a non-destructive workflow a little more problematic. However, if you insist on continuing in that fashion, at the very least use the shortcut Shift + Backspace (PC) or Shift + Delete (Mac).
[REWIND: AN EASY & QUICK WAY TO REMOVE DUST SPOTS USING CONTENT AWARE FILL]
As well as the blank layer annoyance, another big difference between the methods mentioned above is the ability to adjust Structure and Color. The Patch Tool and Content Aware Move tool allow this refinement, even after you have made the adjustment. Now, I’m sure some of you are going “huh!?”. Let me explain. If you head over to Photoshop and select the Patch tool (hit shift > J until it appears) you’ll see the following menu and, hopefully, ‘Structure’ and ‘Color’.

Those two settings allow us to restrict Photoshop. The higher the number, the more we give Photoshop free reign to adjust either the color or structure of whatever we are editing. Pick an image, use the patch tool to remove an object and before you do anything else, adjust those numbers. You’ll see what I mean.

Key Considerations and Limitations Of Content-Aware Fill
Content Aware Fill is a useful tool. It has come along in leaps and bounds since I first tried it. That said, it is not perfect. It can be temperamental, somewhat random, but is still extremely useful if you understand it’s limitations:
- It finds complex scenes with lots of texture and details difficult to handle.
- The larger your subject in the frame the worse the result will be.
- Your selection is crucial. Photoshop analyses what is outside of your selection to makes its calculations. As such, it’s rare for two Content-Aware Fill’s to be the same.
- There will always be work to do afterwards.
Years ago, these tools were seen as, frankly, useless, and to some extent they’re still looked down upon today. There will be some who say “always use clone stamp!”. While Content-Aware Fill may struggle with complex scenes the results can be very good. In fact, more often than not I am impressed with what Photoshop can accomplish, even with complex imagery. In addition, there are many examples where Content-Aware Fill is easier and works better than using the Clone Stamp; gradients, soft bokeh, skies and so on. Areas of smooth color and tonal transitions can be difficult for the clone stamp. This is an area where these tools will shine. Which one will be appropriate will always depend on the image in question. So how do you know which to use? Practice and experimentation.
[REWIND: 5 WAYS YOUR LIGHTROOM EDITING IS RUINING YOUR IMAGES]
Using Content-Aware Fill to extend an image
Before we finish I’m going to give you three quick examples of using Content-Aware Fill. One great use for it is to extend your canvas. I very very rarely do this, but I have done it a couple times over the years and it can save an otherwise boring composition.

Select the Crop tool and extend your canvas however you would like. Bare in mind that the more you attempt to alter, the worse the result will be. Having adjusted the crop, use the magic wand to select the transparent edges. Go to Select > Modify > Expand and choose anything above 10; you’ll need to experiment with your image to achieve an acceptable result.

Having expanded your selection use the appropriate shortcut (Shift > backspace PC or Shift > Delete Mac) and bring up the Content-Aware Fill Dialog. Sometimes selecting Color Adaptation works better, sometimes it doesn’t. You’ll need to experiment to find what works best for your image.

As you can see the final result here is pretty good. There’s definitely some work that needs doing but Content-Aware Fill has got us pretty close within just a few clicks.

Using Content-Aware Fill To Remove An Unwanted Object
I feel bad calling the young ladies little sister an unwanted object but hopefully you can all forgive me. As little ones do, she was wondering around minding her own business, getting in the way of every image. I knew it wouldn’t be a big deal so I decided to focus on expression. How did I know it wouldn’t be a big deal? Simple. I was shooting wide open, so I knew there would not be much in the way of detail and she would be relatively small in the frame and thus easy to remove.

For this task, I opted for the Patch Tool. I made the selection, dragged that selection over to a part of the image which made rough visual sense, and tweaked the Structure and Color settings. In this instance, a setting of 1 for Structure and 7 for Color, worked the best. Again, there is a small amount of additional work necessary but we’re almost there.

Use Content-Aware Fill To Move An Object
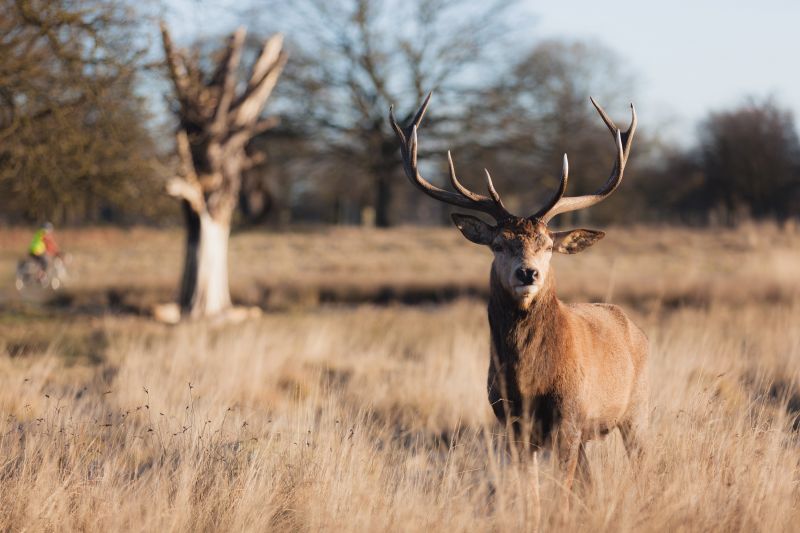
This one’s a little different. Instead of removing an object from our scene, we’re going to move it. In the photo of the two Deer you see below, I decided to move the out-of-focus Stag a little closer to help balance the frame.

I hit Shift + J until the Content-Aware Move tool was selected, made the selection, dragged the selection and let Photoshop do its thing.

Photoshop didn’t do a great job out of the box, but with a couple adjustments to Structure and Color, I was fairly close. Along with some minor cloning, the result is pretty convincing. In this example, I believe that Photoshop struggled as the details were so subtle, which is something I notice quite often.
Summary
Just like any other tool, Content-Aware Fill has its limitations. Do not expect it to be a fix all, and learn every tool so you can be a more rounded editor and know what is best to use for every situation. Is it time to start using Content-Aware Fill and stop dismissing it as something only amateurs would use? For me, yes. But you’ll need to make up your own mind.
[REWIND: LIGHTROOM VS PHOTOSHOP FOR REMOVING BLEMISHES]
If you’ve not noticed, we’ve just released the updated version of the SLR Lounge Preset System. When the job calls for it the Preset System is an excellent tool to make you a more efficient editor. I use it all the time! Check it out here. Oh, and for those craving more SLR Lounge education, the Premium membership might be for you.


Get Connected!