When it comes to aperture settings in wedding photography, low is almost always the way they go, as we’re often in low light or simply prefer the shallow depth of field. However, because we sometimes want to achieve specific effects, i.e. clarity in the whole scene when shooting venue shots, motion blur for artistic purposes, etc, we sometimes need to turn up the aperture. But how high should we go and should there be a limit? f11? f22?
First and foremost, what is diffraction? To briefly summarize, diffraction, in terms of photography, is when light waves bend around corners and interfere with one another when traveling through small holes, causing a loss in sharpness. Diffraction plays a role in determining the “sweet spot” of most lenses; and it varies from lens to lens.
While there have been many arguments, articles and theories about the “best aperture,” we believe that it depends on what you’re trying to capture and how much depth of field you need. In our general experience, diffraction starts to become noticeable around f/16 and we never go above f/22 (although some articles claim to notice it around f/13; and some claim to have perfectly crisp pictures at f/45).
Our argument is that some diffraction is unavoidable and therefore okay. In some situations, we’re willing to turn up the aperture and sacrifice a little bit of sharpness at the focal plane for better sharpness at the extremities of the depth of field. In other situations, the subject is the all-important focus of the scene; and we’re not willing to risk having diffraction cause any loss of its clarity.
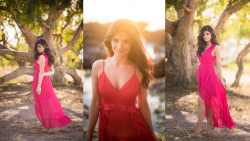
In almost every image, the eyes naturally flow to one area of the image, whether it be by lines, contrast, frames, or colors. Our theory is that if this subject is dominant, meaning it’s essentially the only thing that matters in the scene, we use apertures at our lens’ sweet spots, light permitting (usually around two stops above their largest – lowest- aperture). If the subject is important, but something else on a different, yet relatively close, plane needs emphasis as well, we take the aperture between f/7 and f/9. If everything in the frame is equally important, we might use something around f/11 and f/14.
We might run our f-stops above f/14 for other creative shots. For example, often times, the wedding venue isn’t ready until the last moment before people start coming through the door. In order to prevent capturing all the workers and waiters setting up, we simply raise our aperture up to its highest point (f/22), then shoot the shot at 100 ISO with a 20-30″ shutter speed. The long shutter and slow exposure makes it so that the workers (so long as they are not standing still) are not noticeably captured in the picture.
From our experience, here is a brief summary of our aperture settings in full stop increments for different situations:
f/1.2 – f/2.8:
Lighting: Ultra low to low light
Sharpness: Poor – average
Bokeh: Heavy
Usage: Making subjects pop off the page, blurring out undesired backgrounds, capturing ambient light in low light situations
f/4 – f/8:
Lighting: average to bright light
Sharpness: Average – optimal
Bokeh: Moderate to light
Usage: Obtaining optimal sharpness, keeping backgrounds recognizable but still slightly out of focus, will require flash if used in low light situations
f/11 – f/16:
Bokeh: None. Full scene clarity, diffraction begins to reduce overall sharpness, full daylight or dragged shutters required for proper exposure
f/16/ – f/22:
Full scene clarity, diffraction moderately reduces overall sharpness, full daylight or dragged shutters required for proper exposure
Why F22 Is Softer Than F8?
If you’ve ever gone out to capture some epic landscapes I’m sure you’ve experimented with taking the same shot at a variety of apertures to see how it’ll look. And of course, you’ve probably noticed that sometimes, a shot at F22 is softer, sometimes MUCH softer than a shot captured at F8?!
It seems bizarre and counter-intuitive but in pretty much every lens you use, you’ll eventually hit a point when upping the f-stop where you start to experience softness issues in your frame. Well, thankfully the team at ZY Productions has released a great video explaining the concept of diffraction and why it causes softness at narrow apertures.
What you need to keep in mind, is Diffraction by definition is an optical effect that limits the total resolution of your photography. No matter how many megapixels your camera may have. It happens because light begins to disperse or “diffract” when passing through a small opening (such as your camera’s aperture). The smaller we make our aperture, the more obvious the diffraction becomes. The tricky part is there’s no set number where it happens as every camera, lens, and accessory will differ in design and thus have a different impact on when you start to notice the diffraction in your shots.
So, when you’re out in the field and ready to capture that breathtaking moment. Instead of jumping to f16-f22 for your shot, it may be better to stick at the F8 area and toss on a good quality ND filter instead! Check out the awesome video above to get the full run down and let us know what you think in the comments below.
Related Articles to Diffraction Definition

Diffraction, Aperture, and Starburst Effects