Buried somewhere beneath the glitz and glam of world-class portraits, under layers of creative techniques, gear, and clever marketing, you’ll find the unsung hero that allows successful photographers to do what they do: a foolproof data management workflow. I know, it sounds crazy, but it’s a big deal, especially when studios grow and manage files for multiple shooters. When it comes to data management, there are certain precautions that professional photographers should take, whether working solo or as part of a team. These include things like using dual card slots and the 3-2-1 Data Workflow, which we’ve previously discussed. When you’re working as part of a team in a multi-shooter photo studio, however, you can further strengthen your workflow with a couple of added steps.
In this article, we’ll share seven tips you can use in the field and in the studio to lock in an airtight backup process and even earn points with your clients and fellow vendors along the way.
In the Field
Tip 1: Use a Camera with Dual Card Slots

Cameras featuring dual card slots have become an industry standard and a must-have for many photographers, especially those who shoot weddings and events. With the camera set to record to multiple cards, you will have two backups right out of the gate, which will come in handy should one of the cards fail. These two backups make up two-thirds of the “3” in the 3-2-1 workflow. We recommend using 256GB cards if possible to ensure you can cover an entire event.
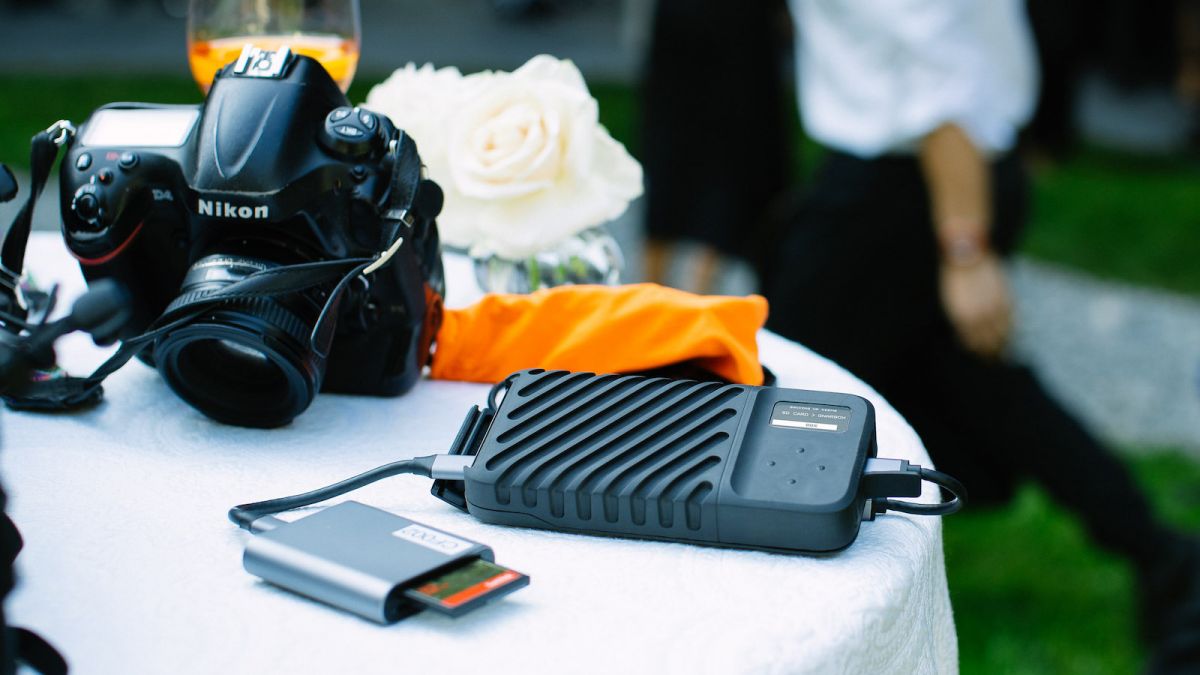
Tip 2: Back-Up Images to Cloud Storage & a Backup Device

To create yet another copy of the source file (the 3rd part of the “3” in the 3-2-1 workflow) and further secure your images, we recommend backing up to a backup device, and possibly cloud storage (or do both at once with a backup device like the GNARBOX 2.0, which pairs with the Selects app on your mobile device and allows you to cull, rate and even keyword files on location, not to mention sharing your files to a cloud drive). Cloud storage is especially useful in the event that your gear is lost, stolen, or damaged. The best time to do this is during any downtime you might have during the event, such as open dancing during the wedding reception, or perhaps when the bride and groom are eating. If you’re shooting as part of a team, you can designate some to handle this task during downtime while the other shooters use a new card and continue to cover the event. Just be sure to back up the additional images/cards before calling it a night.
Be sure to check out our article on the Ultimate 3-2-1 Data Workflow for the remaining steps in that process, which include creating a working drive backup and backing up to a NAS.
Tip 3: Share “Day of” Teasers on Location with a Backup Device

If your camera has Bluetooth capability, you can upload images to your mobile device to edit and share with your clients during an event; this is great, but there’s an even better way to share your teasers on the day of. Rather than uploading teasers to your phone only to have to load them a second time to an external drive, we found a way to make file sharing part of our on-location back up process. The GNARBOX 2.0, which we mentioned in Tip 2 above, integrates with Lightroom CC on mobile and makes it easy to deliver high-quality images to our clients before the event wraps, all without having to lug around a computer. This is especially helpful for networking with other vendors who often like to share teasers on social media on the day of the event. Here’s a quick breakdown of how to do it:
- Backup to GNARBOX
- Do a quick initial cull with star ratings in the Selects app
- Import key selects (for example, 5-star rated images) into Lightroom CC on your smartphone or tablet
- Quickly edit images, ideally with presets
- Share the images with your clients so they can circulate them (rather than share bad phone pics from other guests
[Related Reading: GNARBOX 2.6.0 Review Update]
Tip 4: Separate Cards After the Shoot
After each shoot, it’s crucial that you separate your memory cards. Keeping all of your cards together increases the potential for loss should anything happen to the cards. If everyone is using cameras with dual card slots, like we suggested, then each shooter should have at least two cards. This means you’ll need to make at least two sets of cards. To do this, take one card from each shooter and place them into a bag. Put the remaining card in a separate bag and keep the sets at different locations, such as your studio and your home. Include a piece of paper in the bag that contains the following information:
- Client’s name
- Shooters’ names (if you have multiple shooters)
- Date of the event
- Number of cards each shooter submitted
Place this paper in the bag with the memory cards. Also, make sure the number of cards on the piece of paper and in the bag match.
In the Studio
Tip 5: Check the File Count

If you use Lightroom Classic, we recommend creating a new catalog for each event you photograph. Then, when uploading your images into Lightroom (or whatever photo editing software you use), select “All Photos” from each card and write down the total image count. You should also verify that the date on all images on the card matches the date of the event. When you’ve finished uploading cards from all of the shooters, check the total number of images you wrote down against the total number of files in the folder(s) you’re using to store the images. In Lightroom, the number of images in your image folder should match the number shown on the bottom left corner when importing images. When the import is complete, double-check for any corrupt images. If you find any corrupt images, you’ll need to go to your backup card and re-import the corrupt images. Once your images are backed up and verified, you can format the cards so that they’re clear when you return them to the shooters.
Pro Tip: While the images are loading into the import screen, do the following:
- Choose the “Add” option at the top of the Library Module
- On the right side, under “My Catalog,” choose the following options:
- Under “File Handling,” set “Build Previews” to “Minimal” and select “Don’t Import Suspected Duplicates”
- Under “Apply During Import,” set “Develop Settings” to “None” and include your studio’s name in the “Metadata”
Tip 6: Archive the Files

Having a clear, easy-to-follow archival system is a crucial part of a successful data management workflow. Here’s a quick look at a Lin & Jirsa Photography‘s archival process:
- Create a final folder set to “00_Originals” to house all of the “keeper” RAW files (those not rejected during the culling process)
- Create a “01_Print” folder to store all final images that are to be exported for print use
- Create a “02_Web” folder to keep all of your watermarked, web-sized files for sharing on your blog or social media platforms
- Create a “03_Rejected” folder to save jpegs of your rejected images in case the need arises to access these files
- Delete the RAW rejects from the catalog
- The main folder should be titled as follows: MM-DD-YY_Name_Description
Once the project is ready to be archived, you’ll need to initiate two transfers. One copy will go to the cloud for off-site storage, and another copy will go to the NAS for completed projects. The NAS copy remains readily available for the next 12-24 months in case it’s needed. After that, convert the files to jpegs for long-term archives via external hard drives. You can delete your cloud backup after the final archived project has been uploaded, which should help free up your cloud storage.
Tip 7: Deliver Images Before Deleting
Don’t delete your image archive until you’ve delivered the images to your client through your preferred online proofing method (SmugMug, Dropbox, ShootProof, etc.). You might also consider keeping a full set of the images, depending on your file storage budget. At the end of the day, it could be less costly to store your images in perpetuity compared to not having the files available in the event your client returns for them later (for whatever reason). If nothing else, consider hanging onto the RAW “keeper” images that you delivered. Cloud-storage makes it affordable to do this and it frees up space on your main workstation.
Conclusion
We’ve said it before, but it bears repeating: It’s not a matter of if, but when you’re going to lose your files if you don’t have a proper data management system in place. Hopefully, these data management tips for multi-shooter studios will help keep your team’s photos safe and sound, even after all of the images have been delivered to your client. All that’s left for you to do is figure out a system for returning the cards to your shooters before the next gig. Here’s a quick recap of the points we covered above:
- Tip 1: Use a Camera with Dual Card Slots
- Tip 2: Back-Up Photos to Cloud Storage and a Backup Device
- Tip 3: Share “Day of” Teasers On-Location with a Backup Device
- Tip 4: Separate Cards After the Shoot
- Tip 5: Ensure You Have All of the Cards and Check the File Count
- Tip 6: Archive the Files
- Tip 7: Deliver Images Before Deleting
Please share any additional tips you might have to further enhance the data management workflow of a multi-shooter photography studio.


Get Connected!