Even though we’d describe ourselves as photojournalistic in our style of wedding photography because we like to focus on moments and capture the real emotions of the day, we’d also tend to describe ourselves as creative because we like to get in close, constantly searching for the better shot and angle. At the same time, we’re still suckers for a good old fashioned portrait. Let’s just say that we like to make use of our artistic license.
One way that we like to drop some creativity into our portfolio of wedding images is with double exposures. And here’s how you can do it in-camera.
[Rewind: 3 Ideas to Inspire Creative Getting Ready Shots]
1. Conceive the Shot
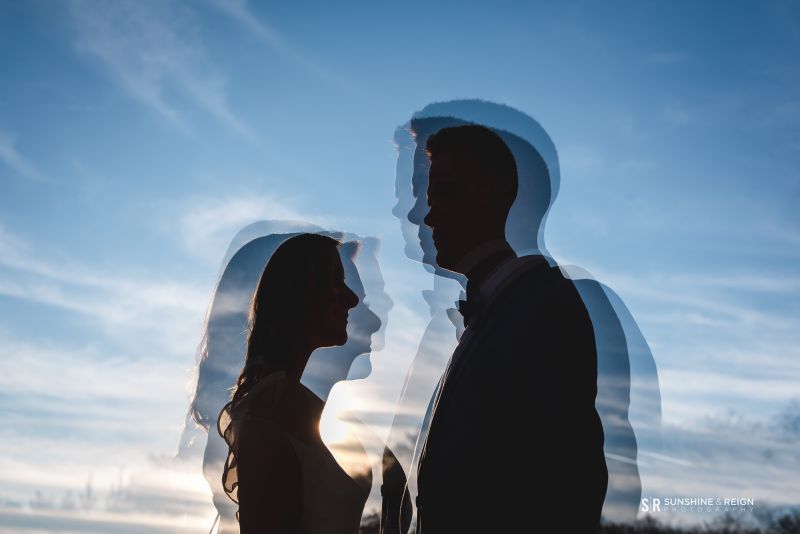
First, you have to form a concept in your mind, especially since with a Nikon you can’t see the first image when shooting the second like you can with Canon – You have to capture the images separately. In the case of the image we’re sharing here, our idea was to overlay a tree with a portrait. So we took the portrait, and also snagged a silhouette of a tree branch.

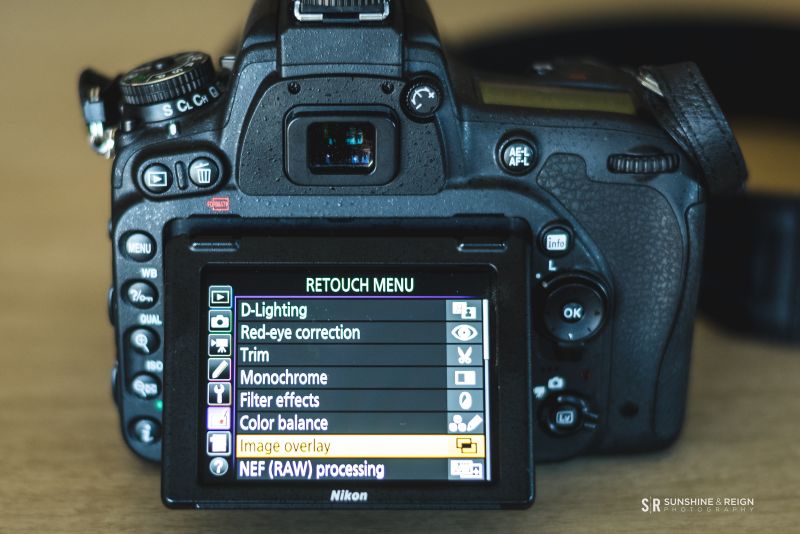
 2. Go Into the RETOUCH MENU & Select Image Overlay
Once you have the images you want, go into the “RETOUCH MENU” and simply select “Image overlay.” Image overlay combines two existing images that is then saved separately from the originals.
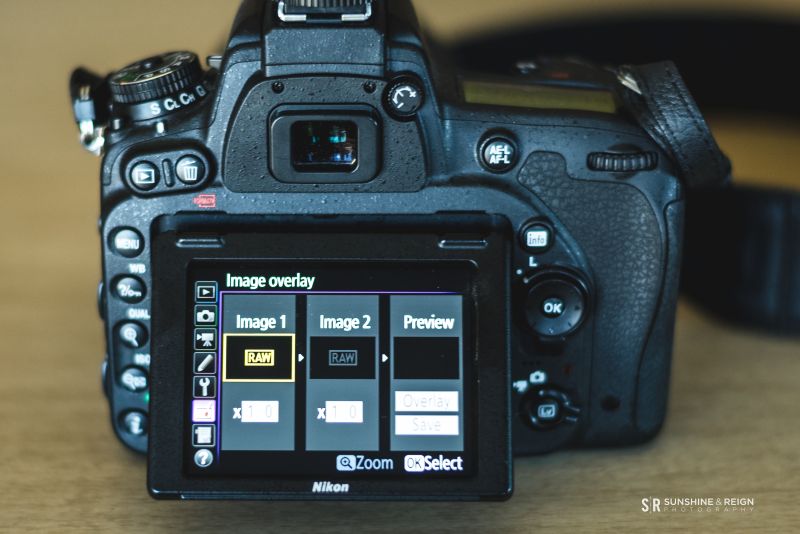
 Once you select Image overlay, a new dialog box will be displayed with “Image 1” highlighted.

3. Select Your Images
At this point, you’re ready to rock ‘n’ roll. Highlight the image you want, which you can view in full frame by pressing the “QUAL” button if you so choose.
If you like it, press “OK,” and you’ll head back to the preview display.

Next, select “Image 2” by repeating the steps you followed in selecting your first image.


Once you’re back to the preview display with both images selected, you may want to optimize exposure for the overlay, a process which is also known as “adjusting gain.” You can do that by selecting gain from values between 0.1 and 2.0. You’ll want to do this for both images as necessary. The default value is 1.0, and the effects are visible in the “Preview.”

4. Preview the Overlay
You really only have two more things to do from here. Highlight “Overlay” and press “OK” to preview the image. You can also save the overlay without displaying the preview if you want. Just hit “Save.” We like to take a look though . . .
 5. Save the Overlay
While the preview of the image is displayed, you can save it by hitting “OK.” If you’re not happy with it, select “Back.” From there you can make any necessary adjustments or just scrap it and start the process over.

We liked this one, and went for it . . .

Image Inspiration: DOuble & Triple Exposures
We really love double exposures. It’s a fun process and an artistic challenge that allows for the creation of something extraordinary that might otherwise be fairly ordinary.
[Related: How One Off-Camera Flash Turns Ordinary Into Extraordinary]
For these shots we used our D750 and either the available light; our SB-910 with our Westcott Rapid Box – 26″ Octa Softbox or a MAGMOD MagGrid2; or our AlienBees B1600, w/ a Honeycomb Grid. The EXIF data is captioned under each image!


[Related: 3 Tips for Creating Lens Flare (with a Metal Tube)]


Every once and a while, we’ll step it up and even produce a triple exposure. And, really, creating a triple isn’t all that much more difficult than making a double. You just select a double exposure as “Image 1” and follow the same steps from there, selecting “Image 2,” etc.


Conclusion
When you start dabbling in double exposures, especially if you intend to deliver them to clients, we recommend making one of your images a silhouette against a blue sky and the other some relevant piece of nature. From there you can up your game, and creativity, by experimenting with different lenses, off-camera flash, prisms, or even a copper pipe.
What are some of your favorite double exposures that you’ve taken? Leave them in the comments below! And, as always, we welcome your comments here, and/or you can join in the conversation over at our ever-growing Facebook Photography Comunity group.


Get Connected!