It is becoming more and more common for photographers to emulate filmic looks due to the cyclical trend of film photography. Using high-resolution DSLR’s doesn’t prohibit you from creating bright & airy images, it all just comes down to the final processing of them.
Using virtually every tool in Lightroom, we are going to break down how exactly to emulate filmic processing for DSLR imagery, focusing on producing luminous highlights and pastel color grading. The SLR Lounge Preset System has a range of Film presets for Lightroom CC, making you one click away from a Fuji 400h or Illford HP5.
[REWIND: FILMIC PROCESSING IN LIGHTROOM]
We are going to take a page from our Advanced Lightroom Processing Workshop to show you how to take create this preset from scratch, giving you the freedom to adjust your settings to imitate the filmic look you desire.
Stylize your Shoot with Filmic Look in Mind
Whether it be the props or the directionality of light – stylize your shoot to mimic the post-processing style that you wish to create. Coordinate the style of the shoot with the filmic look you choose to post-produce the images with in order to tell a stronger story, and match the style with the processing.
one click filmic processing
Using the SLR Lounge Preset System we compared the Fuji 400H with the Kodak Portra 800 Preset to show you the mild but significant differences in tonality and color.
While the Fuji leans heavier on the green and pastel color grading, the Portra is rich in color, highlighting the golds and warmth in the image, a subtle yet noticeable difference. In one click, we took an image shot at ISO 100 with full dynamic range, and converted it to a vintage film style. The specifics lie in the HSL section of Lightroom, the first Develop setting that alters the colors in the image.
Dial in the settings to correspond with the film you are trying to emulate. You’ll see that the preset gives us a foundation of color adjustment, pulling the greens to teal hues, reducing saturation in the greens, and brightening up pretty much every color with the exception of the reds.
Camera Calibration for Color Adjustments
Color specifications lie in the Camera Calibration tool as well, unlocking a variety of color options in the RBG primaries and tint shifts. The only way to get familiar with this tool is to adjust the sliders to see how they affect the emphasis of the effect and the saturation selectively for the filmic look you desire.
The Ever Famous ‘Bright & Airy’ Look
Now that the color is exactly where we want it, how do we arrive at the final image? The first step actually starts in camera, as you can see the image was shot to maintain dynamic range, regardless of the fact that we are trying to imitate film processing. The image was shot this way intentionally, in order to have enough wiggle room in post to work with our ambient exposure, and without having to worry about blown highlights or skintones. So long as you have the detail that you need in that raw file, you can push it to create vastly different styles all within Lightroom.
[REWIND: 4 WAYS TO RETOUCH SKIN COLOR IN PHOTOSHOP WE SHOULD ALL KNOW]
Brightening up the Exposure in the shot, unsurprisingly, is how we achieve the ‘bright & airy’ style that is ever so popular in current photography trends. Decreasing the Contrast & Shadows allows us to brighten the darker areas, a common theme amongst filmic styles, which will help us later when we modify the tone curve.
It’s All in the Curves
Fine tune the highlights and shadows through cross processing, a concept foreign to classic-styled imagery that focuses more on vivid and contrasted color.
Here we chose to adjust the RBG Tone Curves to add in plenty of warmth into the highlights while pulling it away in the shadows. Fine tune the curves to get to a balance between the three colors.
Film Effects in Lightroom
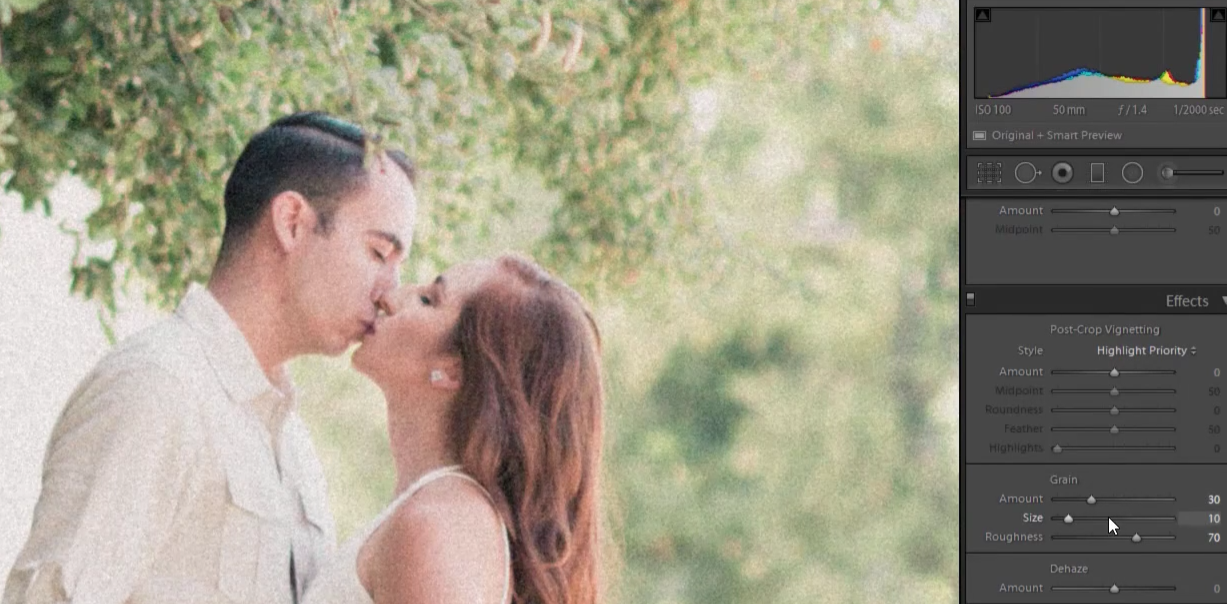
When we said virtually every tool, we meant it. The last two Develop settings we will be tweaking are the Grain & Radial Filter. Classic film processing has a heavy granulated effect, but careful not to have a heavy hand when adding in grain, ultimately this could lead to a muddy image and an extensive loss in quality.
The finishing touch for a bright & airy image is to brighten the edges of the frame, but not by using the Vignette tool. Use a simple Radial Filter with a 0.5+ Exposure Dodge to create a natural edge-to-edge glow, adjusting the strength of the brightness if necessary. And just like that, we arrive at a completely alternate version of our original image, post-produced to fit the style and theme of the shoot.
This is just one of countless start-to-finish images produced from our Advanced Lightroom Processing Workshop. For access to more in-depth post-production tutorials & education become an SLR Lounge Premium Member.
Join Premium


