
Setting up your own photography studio can be overwhelming, especially if you need one that can travel for jobs on-location. It can be a significant investment, but having a portable studio of your own frees up your creativity from standard settings and lets you stand out from the competition. Especially if your travel requires you to fly! You just can’t get away with lots of clothing AND gear on budget airlines, and given the restrictions on baggage in general, it can be difficult and expensive nor matter what airline you fly with. Also walking around with multiple bags of heavy, (not to mention expensive), gear will drain you physically and you’re likely to lose something or break it along the way.
Cameras, lenses, speed lights, strobes, power packs, softboxes, strip banks, octa boxes, grids, nets, flags, cookies, silks, scrims, gels, reflectors: the list of things we photographers spend money on is just about endless. When you think about it, it’s not only overwhelming, it’s a little crazy, especially from the perspective of a beginner.
The truth of it is, you don’t need a thousand pieces of gear to do impressive studio work. All you need is your camera & lens, a good light, and your subject! That’s what’s most important, ensuring you the best light possible for your subject. Finding one that comes at a great price point is an added bonus, making what Westcott can offer in this setup one of the best and safest strobe investments at this time.

In this write up we’ll go over how you can create amazing portraits anywhere with a lighting kit that can fit into a suitcase, and costs just around $1000


Where To Start
First things first, don’t worry about your camera and lens selection. Just use the camera you have. For the images in this post, while I was shooting on a newer Nikon Z6 mirrorless camera, I was also using the “kit” 24-70mm f/4 lens to capture everything. The difference between a good portrait and a missed opportunity is often just a very small amount of light. With some practice, you can get great results by reading the scene and adding just a little bit extra.
When I shoot environmental portraits, I’ll often just use a single light to fill in any hard or contrasty shadows on my subjects, making it feel softer and more natural. Studio shooting is something entirely different. You can create something epic with just a single light, or you can start adding reflectors, flags, and additional lights to further shape the light and add extra drama.

My Single Light Gear Use In My Career
I’ve done a large number of fashion shoots, corporate events, and headshot sessions using just a single light and reflector combination, which is why I know that this setup is more than a viable and very usable solution for portrait photographers, and why I’d personally recommend it. When we’re just starting, most of us have the well known Gear Acquisition Syndrome, and yes, a lot of times it feels like no one will take you seriously unless you have a truck full of gear and accessories…but the truth is you can make incredible images without all of that gear! Yes having more lights can make things more interesting, but it’s not needed and can overcomplicate things pretty quickly. As I’ve mentioned in my originals before and in this post, when I shoot for clients, (Fashion/Editorial), I’m often just adding lights to fill in and shape what’s already present in the room, and for me that is often, just a single light!


In both of these images, I used a single light with a 36-42” softbox to light my subject. For the male model shot on the left, it was used in the studio as my main light source and to carve and add drama. For the female model shot on the right, it was used to feather and fill in the shadows a little bit to make it a softer image from the hard Nevada sun.
The images below show a last-second setup done at a trade show using a single light and reflector to create a fantastic corporate headshot for the company’s entire team! No joke, I literally created over 700 headshots that day with a single light setup. Were the clients happy? Well, I’ve been hired annually to do their updated headshots ever since so I think it’s a fair assumption they were, and this type of setup is more than worth it!

What You’ll Need
To create an epic portrait, indeed, a single light is enough. For the purpose of this post, we’re going to assume you already have the basics like your camera & lens(es), plus a tripod & light stand. So, let’s discuss those items you may not have that’ll help you start creating…

Start With A Light
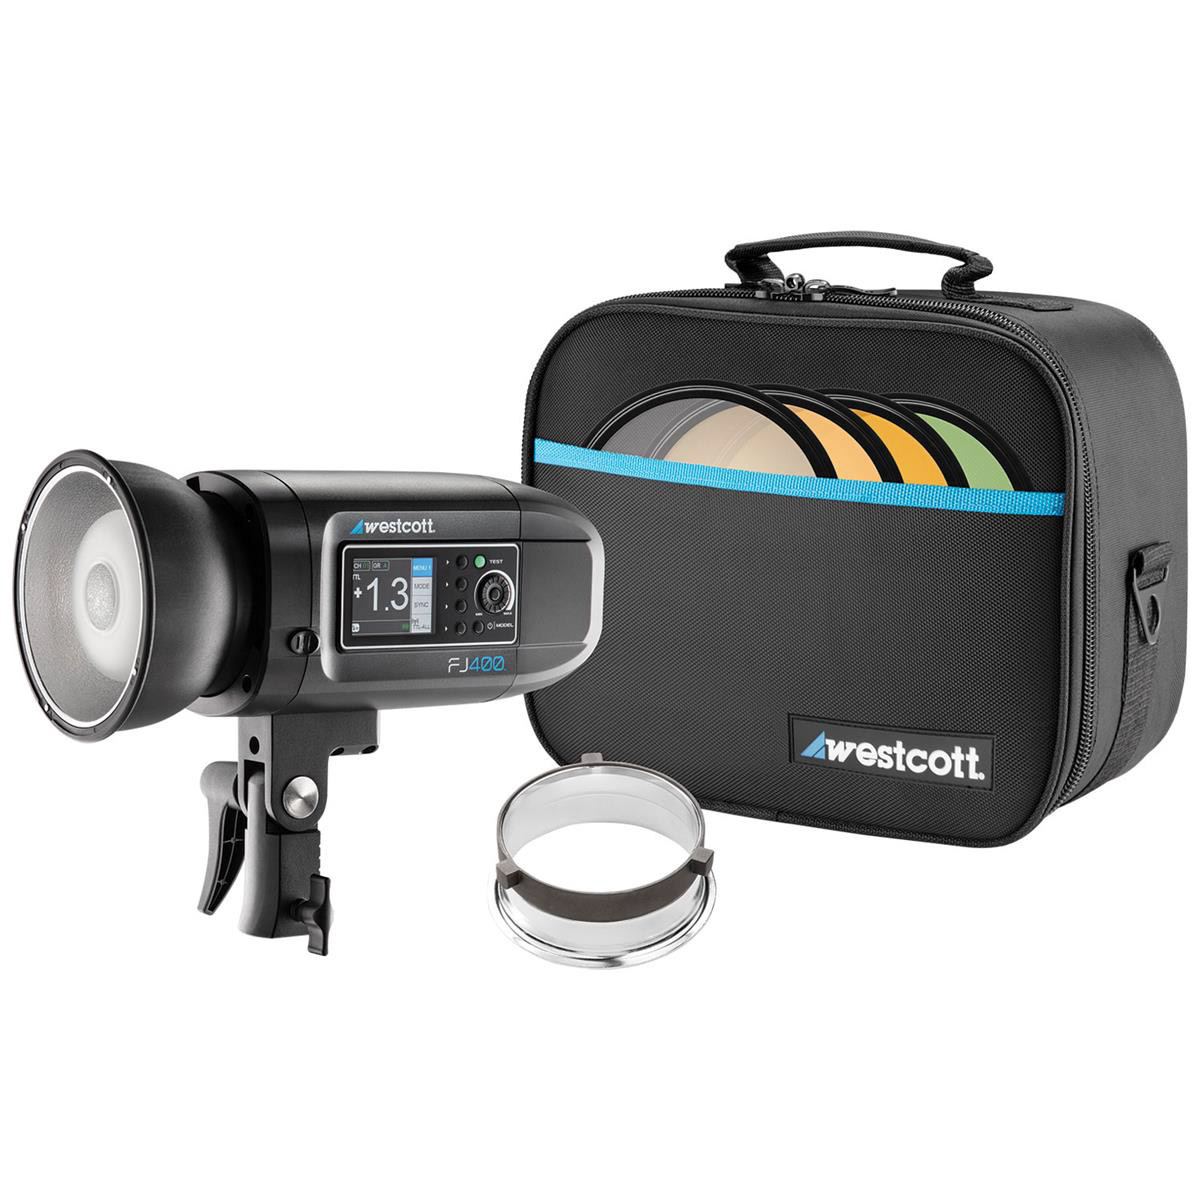
What would a studio portrait be would it be without a good light source? For the portraits of myself and my dog Harley, I used the new Westcott FJ400, which cost $570, and I have to admit I’m impressed with this light. It’s the first 400Ws AC/DC light with less than a 1 second recycle time at full power. (And believe me, I had to fire quite a few burst shots to capture my puppy sitting still! Even with treats involved!)
I was also impressed with the battery life of this light. It charged quickly, and over the course of my testing, using it on both the puppy and my own headshots, I barely even went through 1/4 of the charge.
The white balance (the color of the light itself) was consistent, and it was incredibly easy to get set up and running out of the box.

FJ400 Flash Head
-
- Maximum Power 400 Ws
- Flash Duration 1/19,000 Sec
- Color Temperature 5500K ± 150K
- Flash Modes Hi-Speed Sync, Second-Curtain Sync, Stroboscopic
- Reflector 5.5″ / 13.97 cm Changeable
- Accessory Fitting Type Bowens S Type
- Modeling Light Type LED
- Modeling Light Wattage 20 W
- Sync Type Button, Cable, Radio
- Wireless Channels 16
- Wireless Groups 6
- Wireless Range 985′ / 300.2 m (Radio)
- Price $569 – Adorama | B&H | Amazon | Westcott


Integrated Radio Triggers & Wireless Power Control
Radio triggers are an item that anyone looking to work with strobes will have to invest in. These triggers or “Transmitters” let you fire your flash wirelessly from a distance, and in some cases can even let you control the settings of that light or lights letting you focus on your subject and camera rather than running back and forth to make minor adjustments. With radio transmitters, like with any investment, you’ll want to be sure to put your money into a set that’ll cater to your photography for the immediate and hopefully future needs.
This is where the $100 Westcott FJ-X2M Trigger excels. The device can work with pretty much any camera on the market, (including Sony, when paired with their adapter), and it’ll command any newer Westcott light automatically since the receivers are built-in to the strobes. Something I really liked about this trigger compared to some other brands is, you can see the power setting of the light (not just making up/down adjustments to it), so you always know where you stand in terms of your light’s capability.
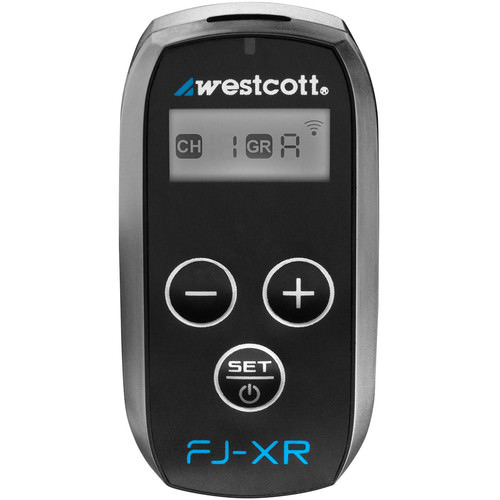
You can even use it to control your non-Westcott lights, if you pick up the $25 FJ-XR Wireless Receiver! For my testing, I actually used this with an old Paul C Buff AB1600 light which I had set up as a hair/rim light on some “Quarantine Self portraits” (shown further down) and it worked fantastically!
FJ-X2M Trigger
- Channels 16 (Normal)
- Groups 6
- Wireless Range 985′ / 300.23 m
- Radio Frequency 2.4 GHz
- Control Modes Group, Manual, TTL
- Up to 200,000 flashes per charge cycle
- Connectivity
- Ports 1 x USB Type-C (Data)
- Bluetooth compatible with free mobile app
- Dimensions 1.1 x 1.65 x 1.25″ / 28 x 42 x 31.7 mm
- Weight 0.8 oz / 22.7 g
- Price $99 or $119 with Sony Adapter – Adorama | B&H | Amazon | Westcott


FJ-XR Wireless Receiver
- Wireless Range 164′ / 49.99 m
- Radio Frequency 2.4 GHz
- Ports 1 x USB Type-C
- Operating Temperature 14 to 122°F / -10 to 50°C
- Dimensions 2.13 x 1.13 x 1″ / 5.41 x 2.87 x 2.54 cm
- Weight 0.81 oz / 23 g
- Price $24.90 – Adorama | B&H | Amazon | Westcott


Adding Boom Arms To Your Lighting Setup
Boom Arms may not seem like a necessity when you’re starting out, but you’ll be able to do so much more with your lighting with them. Using the $70 Westcott Mini-Boom arm was really great since, just like the name says, it’s small, portable, and surprisingly strong!
I was able to use this to get creative with my angles in a small space, and it packs up REALLY small which makes it easy to fit in a suitcase or standard gear bag.

Mini-Boom Arm & Weight Bag
- Color Black
- Load Capacity 11 lb / 5 kg
- Thread Size Reversible Spigot with 1/4″-20 and 3/8″-16 Male
- Length 31 – 57″ / 79 – 145 cm
- Height 4.5″ / 11.4 cm
- Width 4.3″ / 10.8 cm
- Weight 3.3 lb / 1.5 kg
- Price – $69.90 – Adorama | B&H | Amazon | Westcott


Strobe Lighting Modifiers
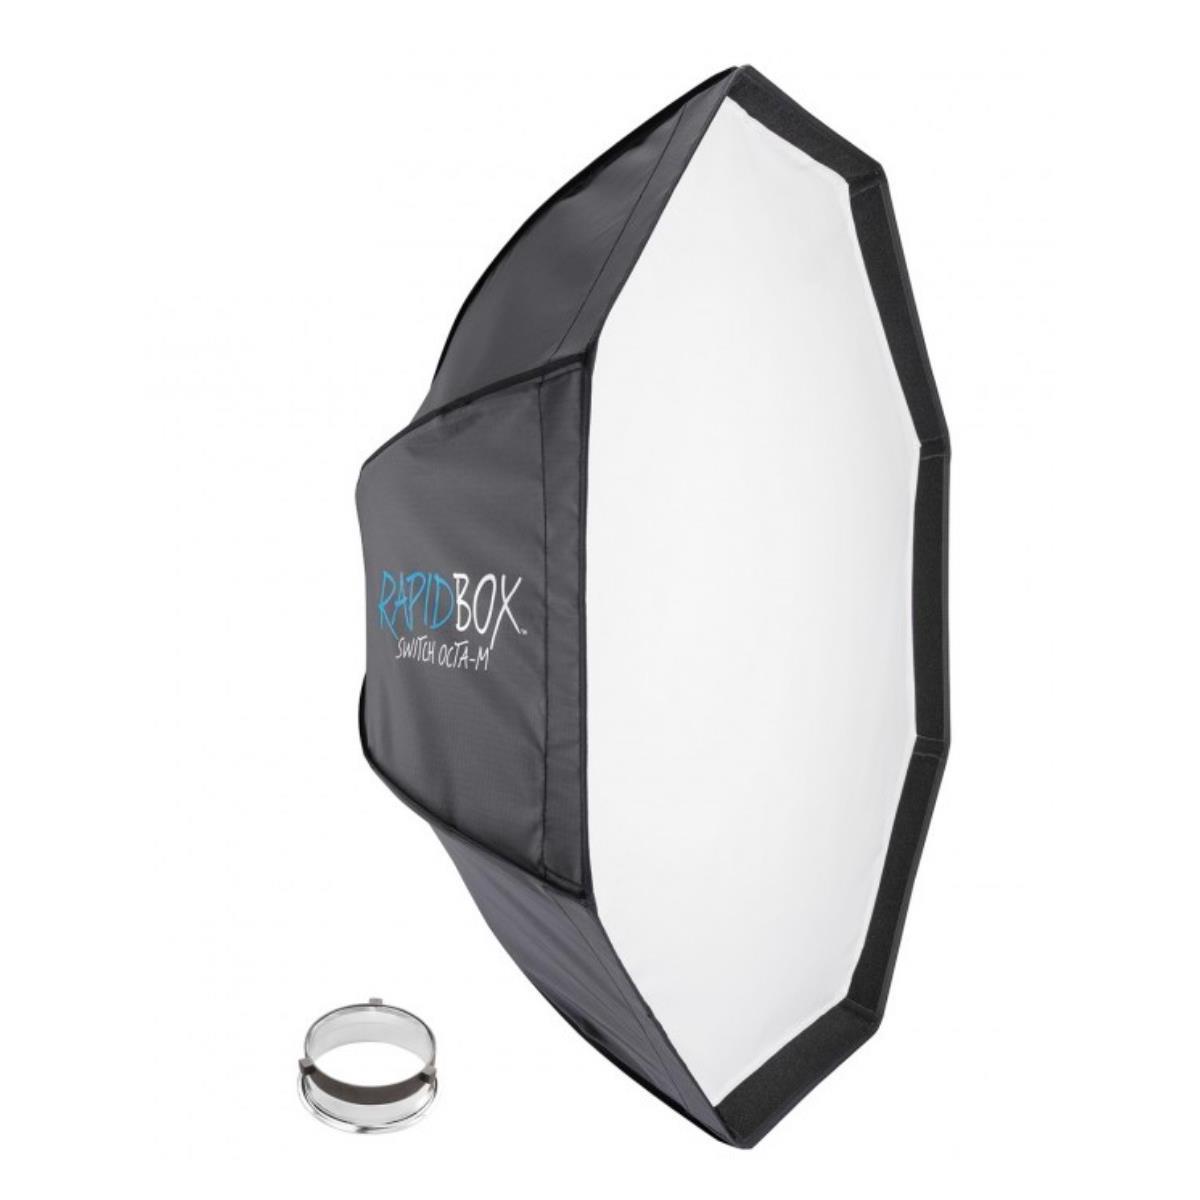
With this single light setup, I had used the $260 Westcott Rapid-Box Switch Octa (Medium) as it was compact, quick to set up & tear down, comes with a free grid for added light control, and it’s incredibly versatile with what you can do. Not to mention how easily it travels when collapsed and tucked into a suitcase!
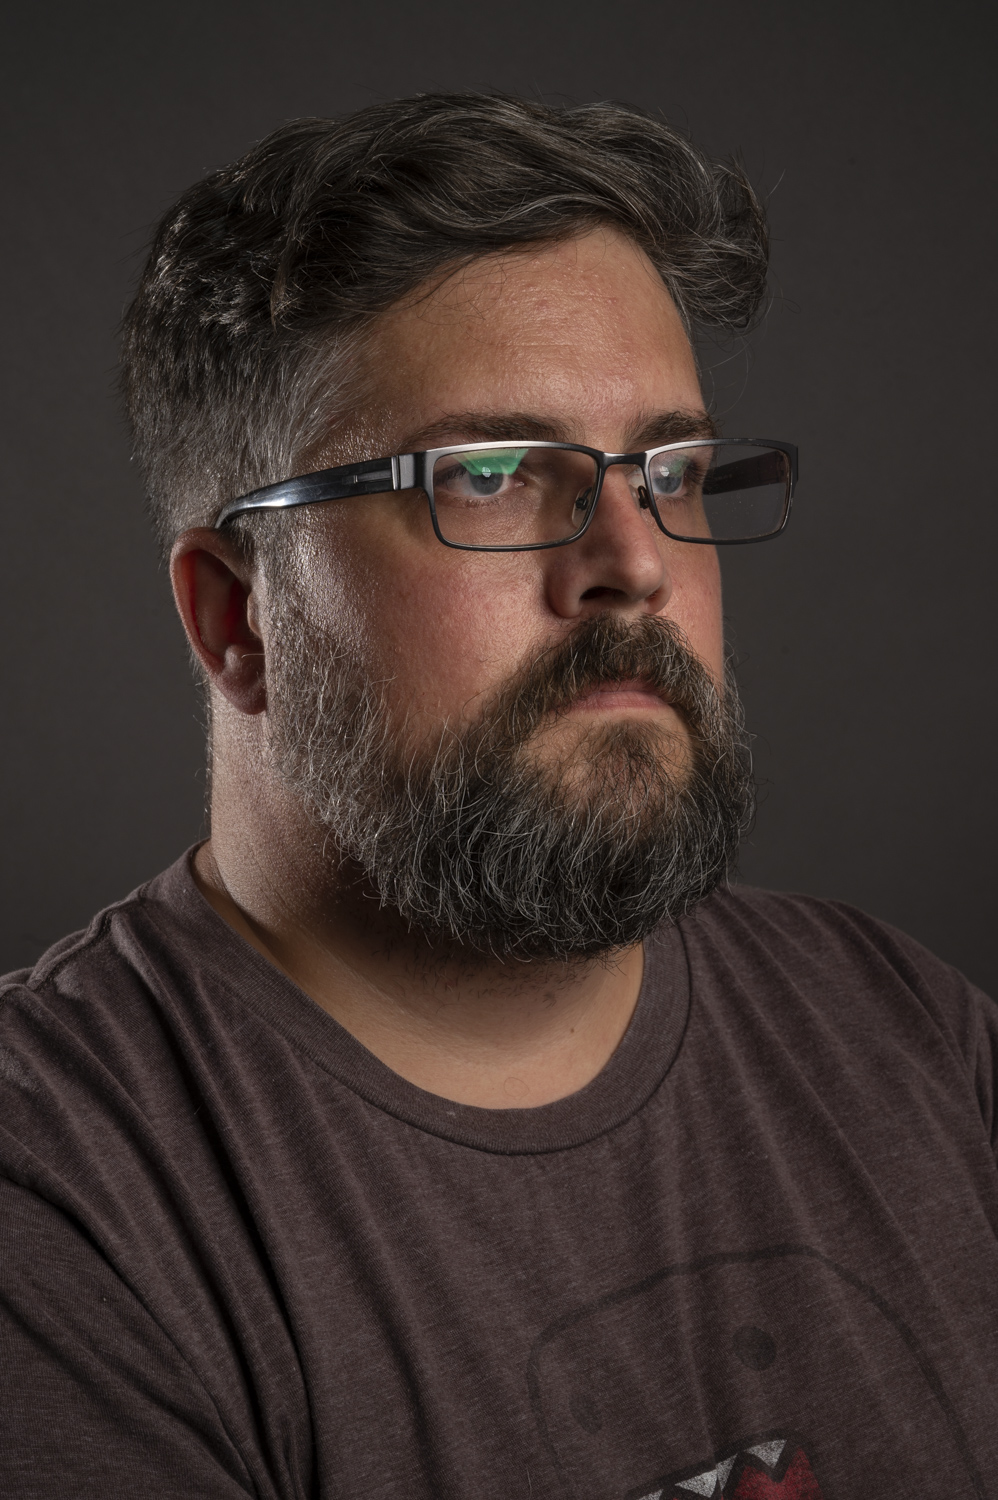
Basically this modifier, (I personally own a few of them) is a must-have for the photographer on the move. Use it for directly lit portraits like a beauty/glamor, headshot, or pet portrait, or use it feathered like with my self-portraits below or my environmental work; the possibilities for what you can do are limited only by your own creativity. While the subject in the photo below may not be the greatest (don’t judge my Domo shirt ^_^), it’s hard to argue that the lighting isn’t on point!

I actually fired this using the TTL mode with my camera controlled by my phone so I could see what I was doing….as you can tell, I was concentrating REALLY hard on getting the shot.
Here’s an example shot near Las Vegas using the Rapid Box to fill in some shadows in a bright daylight lit environmental portrait.

Rapid Box Switch Octa-M
- Shape Octagon
- Interior Silver
- Requires Speed Ring Yes, Included
- Accepts Grids Yes
- Removable Front Face Yes
- Removable Interior Baffle Yes
- Light Loss None
- Rectangular Dimensions W: 36.0 x H: 36.0 x D: 17.8″ / W: 91.4 x H: 91.4 x D: 45.1 cm (Open)
- Weight 2.25 lb / 1.02 kg
- Price – $259.90 – Adorama | B&H | Amazon | Westcott


Now let’s Do The Math
With all these items added to your cart, you’re looking at the following: The FJ400 Light $570 + The Trigger $100 + The Mini Boom Arm $70 + The Rapid-Box Switch Octa $260 = that’s a total of only $930!!! You literally built a portrait kit for under $1000 before taxes! That’s pretty epic. Don’t forget, also, you can pull in your other strobes at $25 per receiver/light to expand on the single-light kit.
So, now that we’ve shown you you can build an incredible kit on a budget, let’s have a look at some more of these images. Keep in mind, since we’re under the Covid-19 quarantine my subjects for shooting were limited to my new puppy and myself. First up I decided to try some single light portraits of Harley using the FJ400 shot beauty-dish style from a 45-degree angle directly from above and slightly in front.

While it was….challenging….to keep my pup sitting still for any amount of time, after some trial and error with a LOT of treats, some burst fire shots, and auto timers, well, we finally got it right!
Check out the before & after here and the gallery of finished shots below


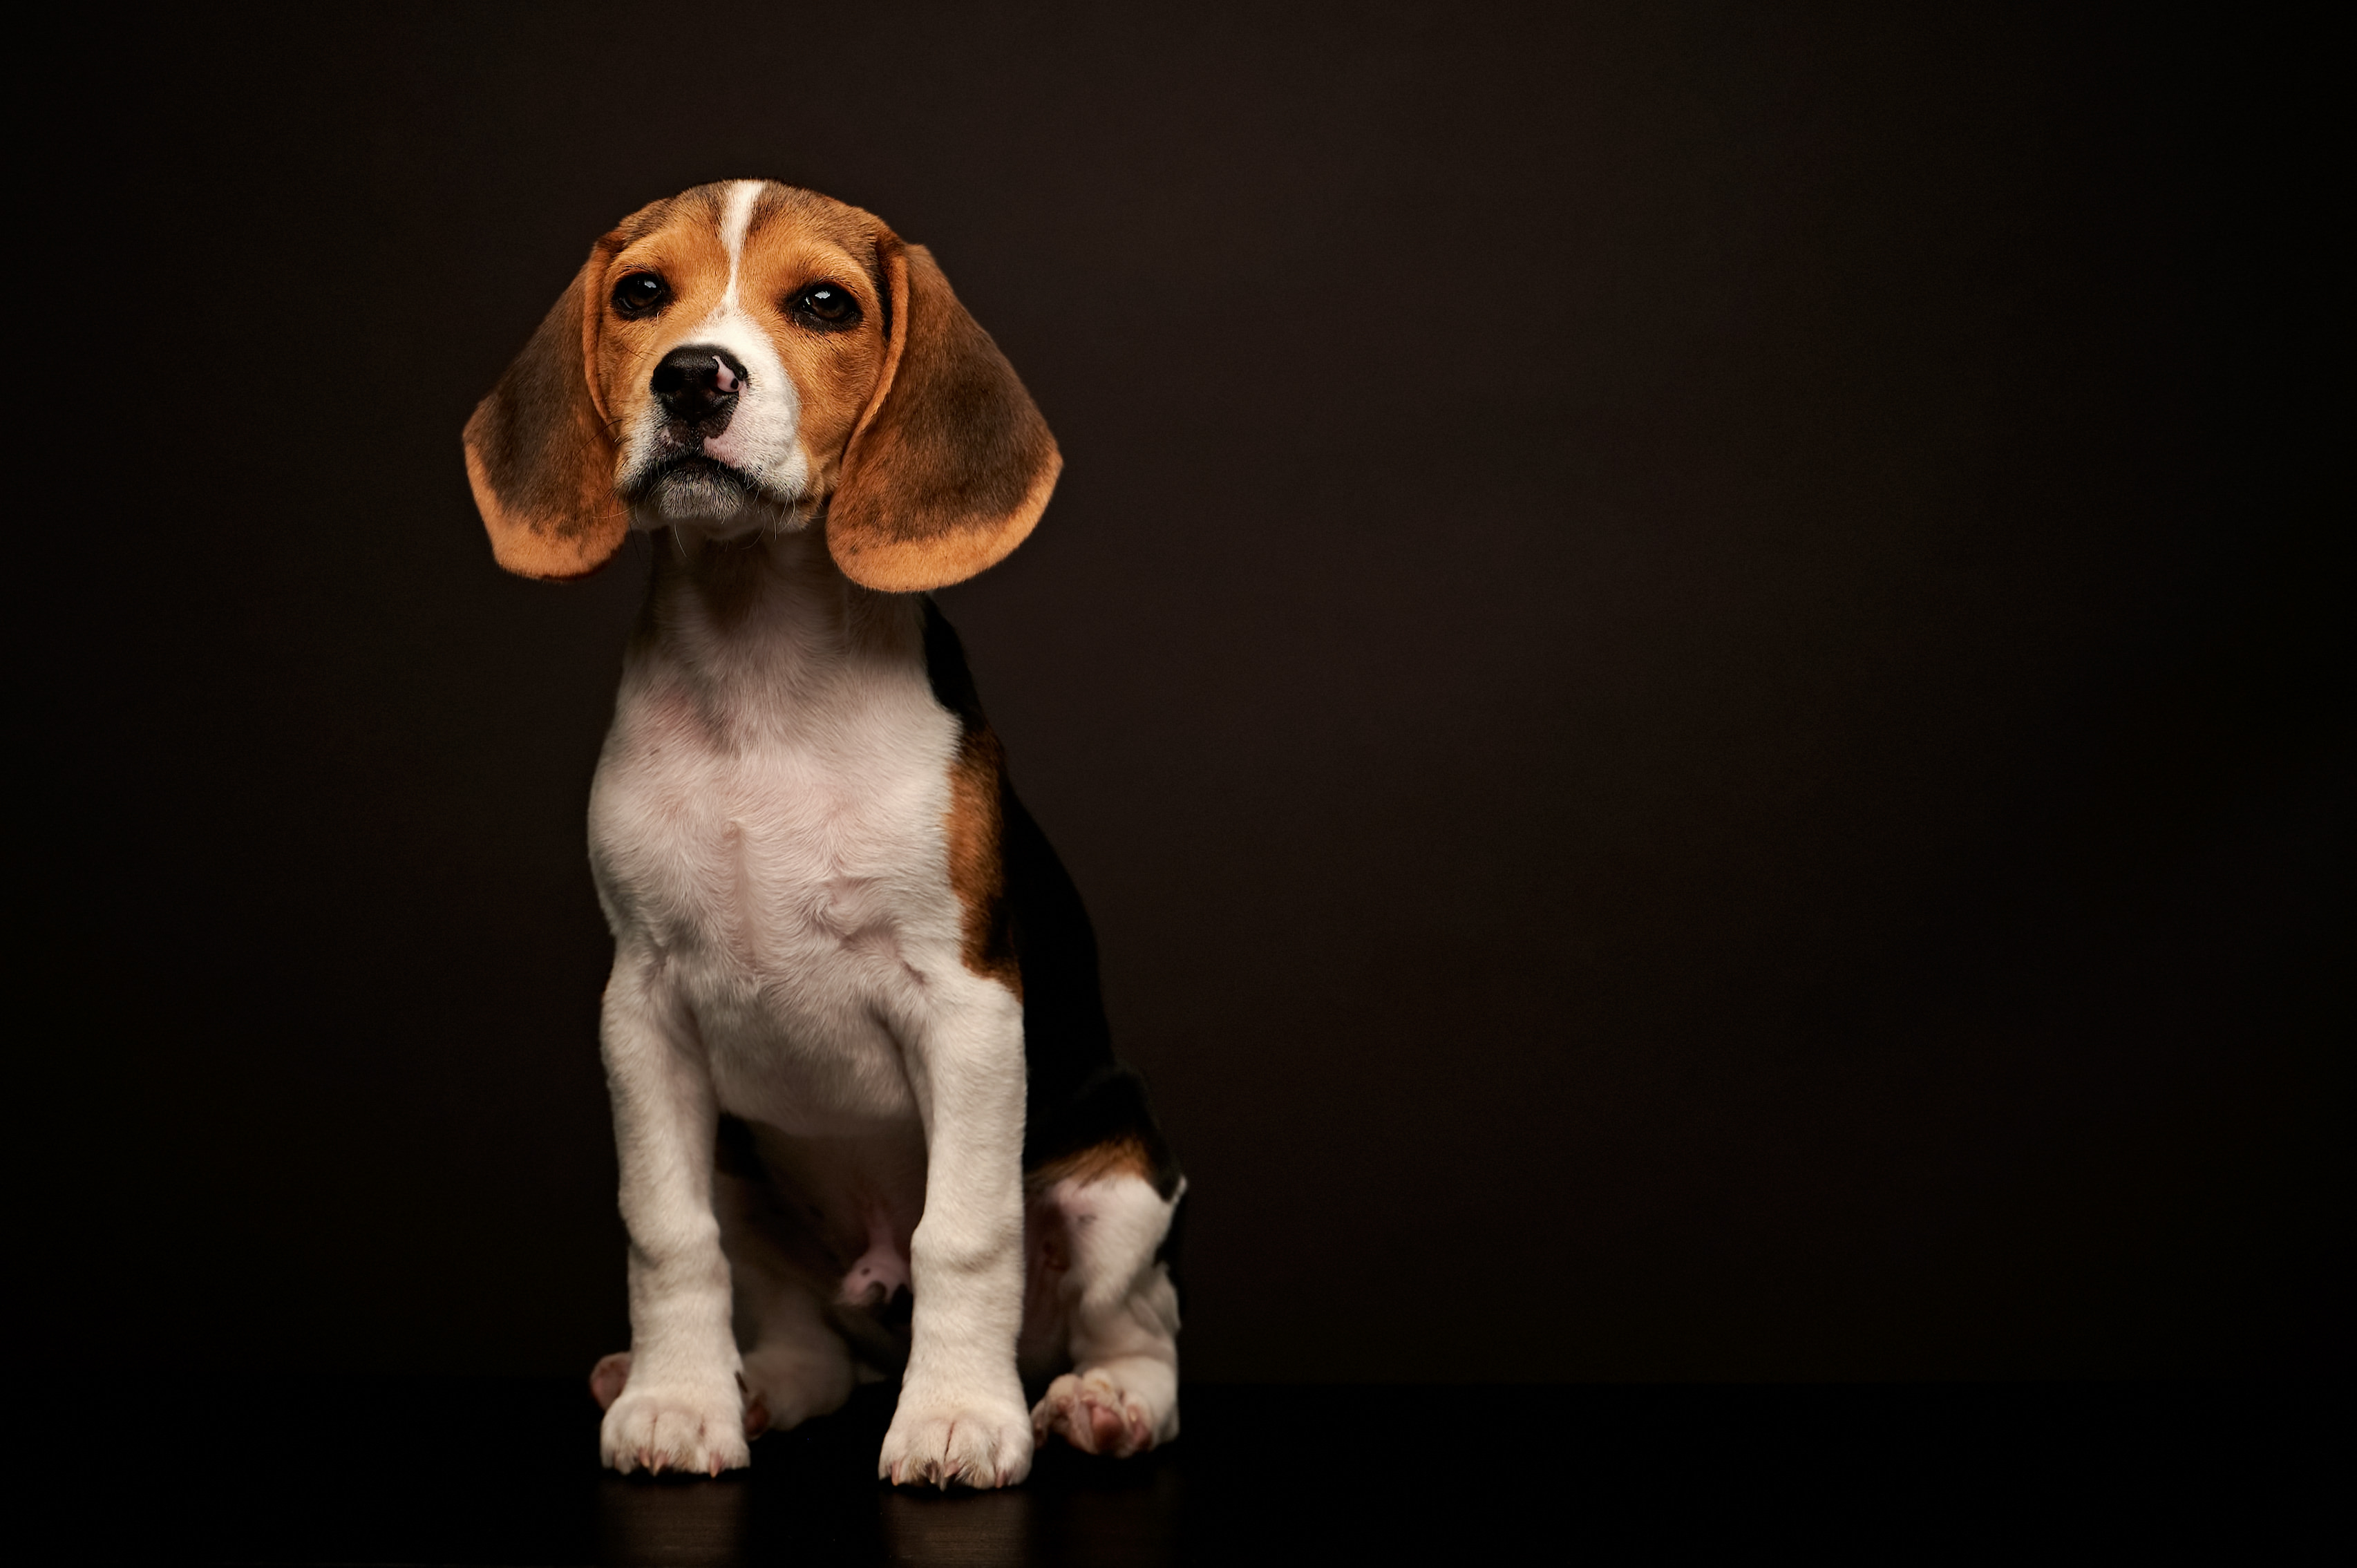

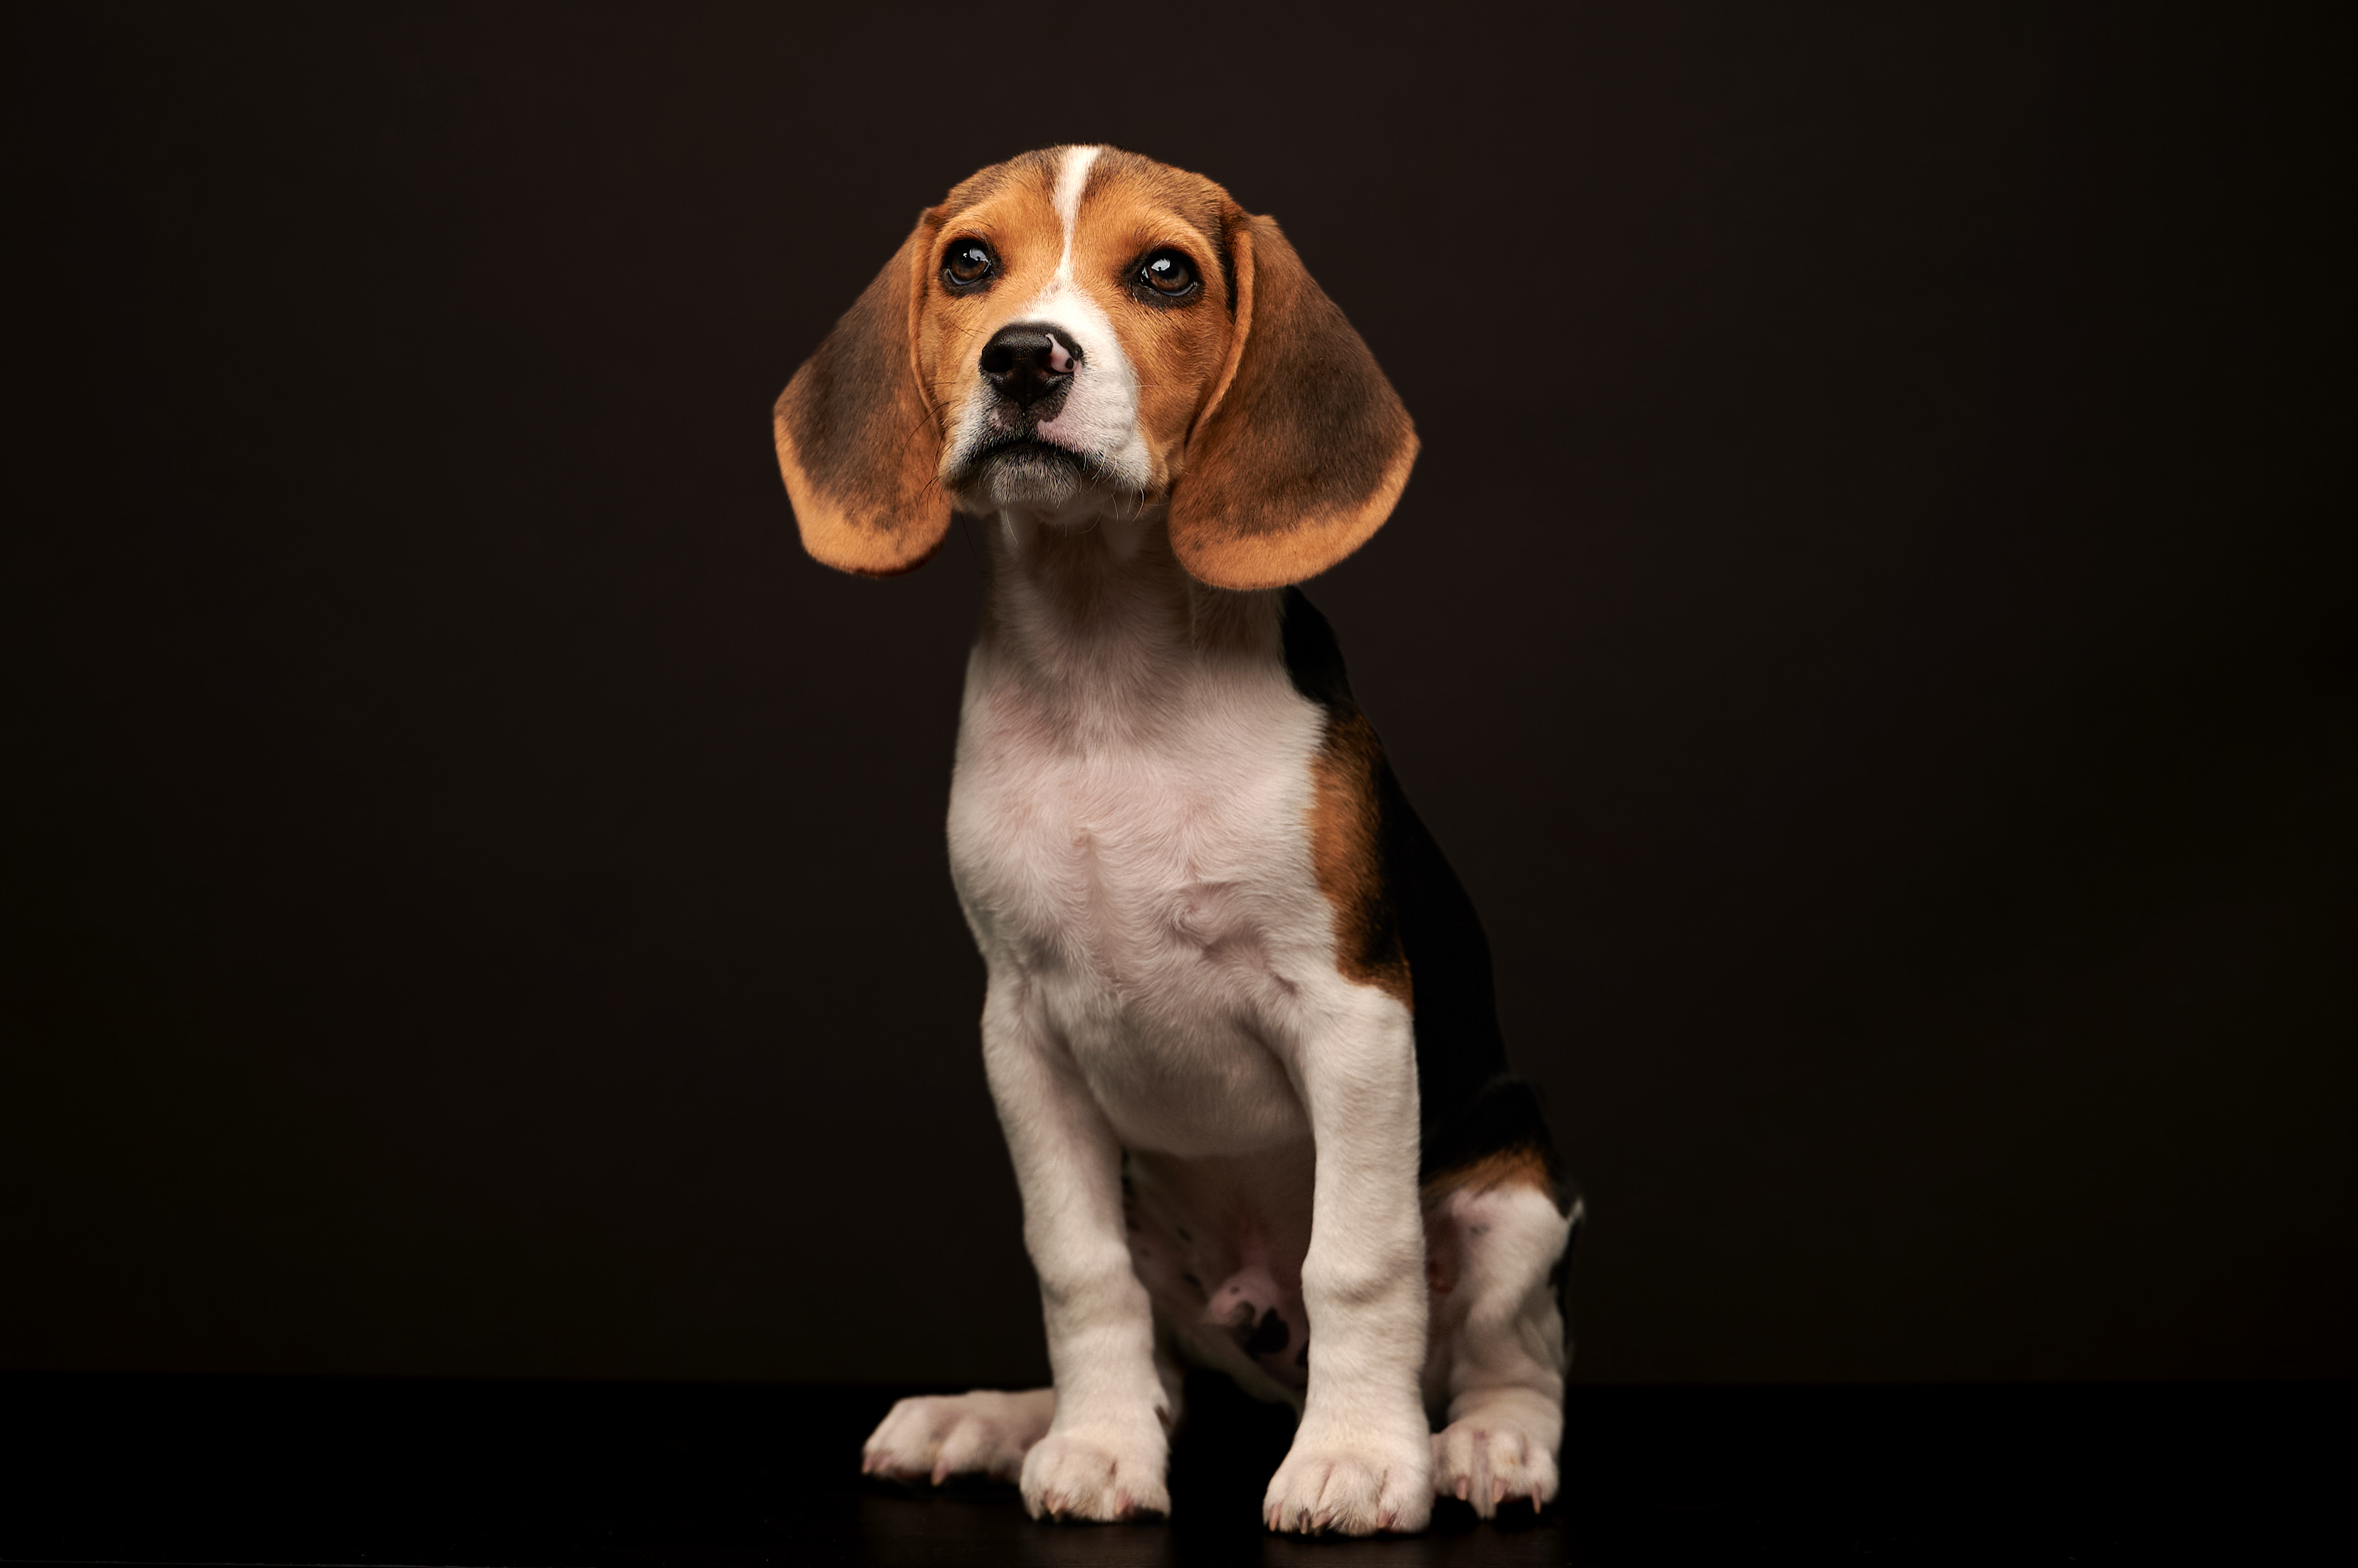

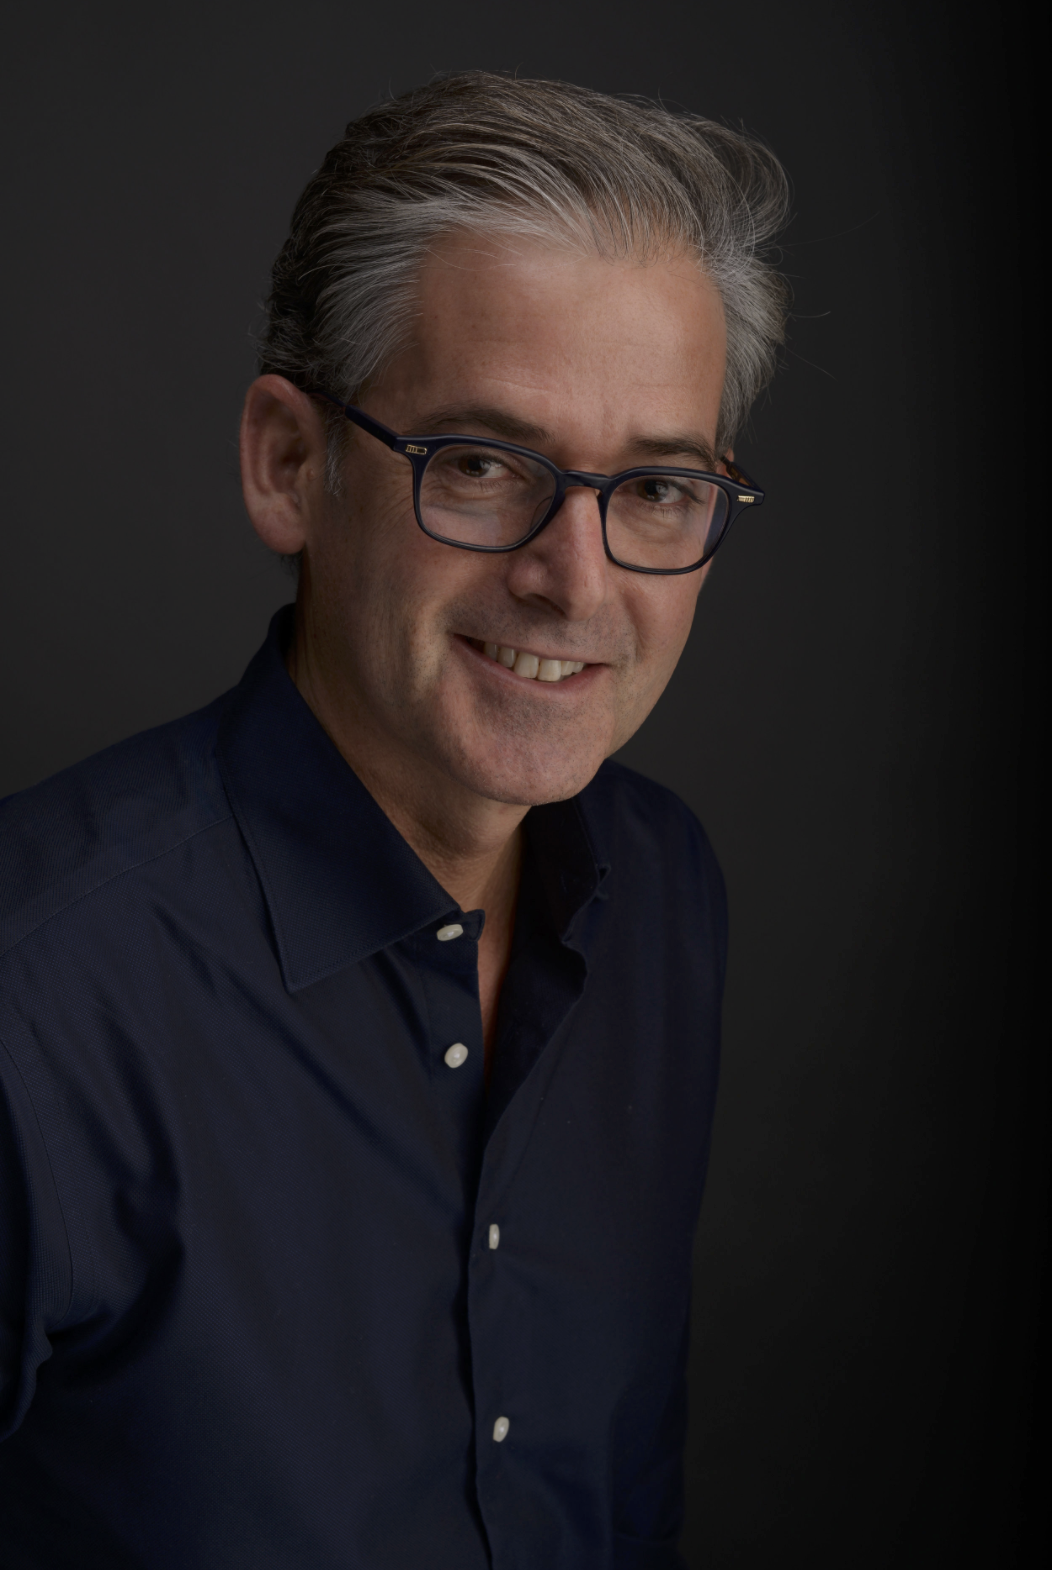
It’s pretty impressive what you can do with just a single light and some patience for your puppy…err…I mean model/client! The retouches required just a quick crop and then a quick edit in whatever raw processing software of choice is. (For Me it was Adobe Lightroom and a quick run-through of Luminar 4‘s Portrait tools to get these finished shots. Pretty adorable right? It took more time to get Harley focused where I needed than to set up the lights, tear them down, and edit the images. Honestly, I was impressed with how easy this light was to use. The power was consistent, it never missed a shot (in the hundreds of frames Ii had to fire) and it could pump out quite a bit of power! Next up, was a more challenging subject – _ME_
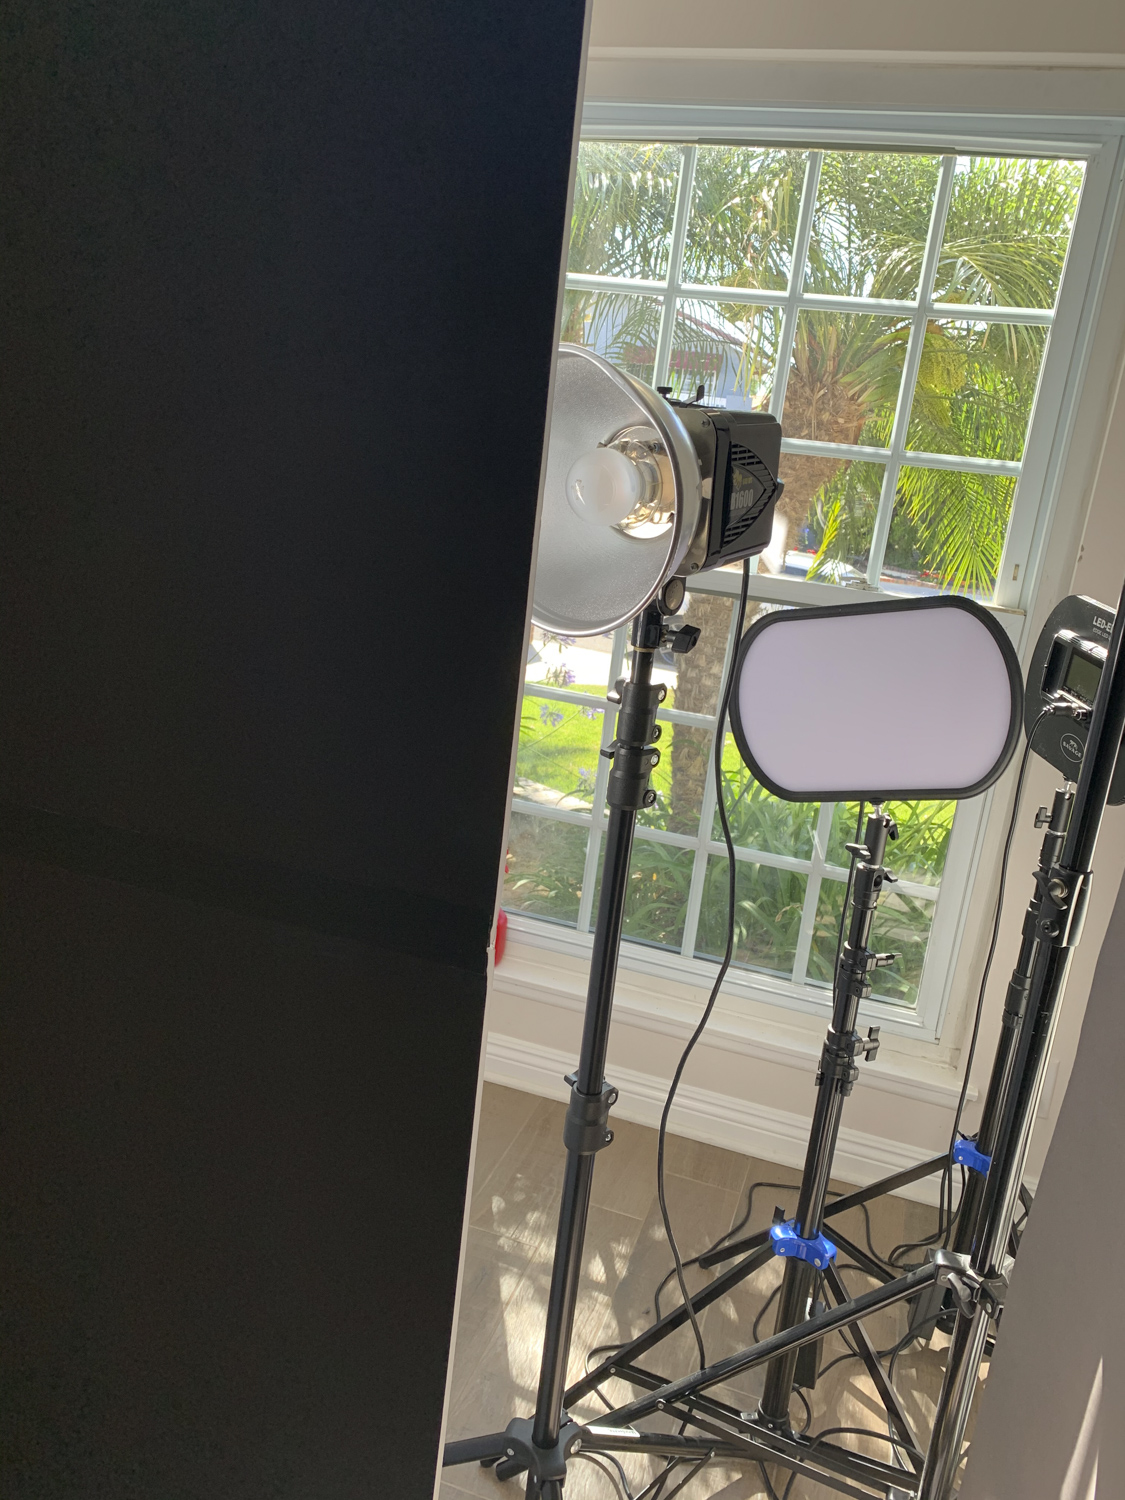
So, here’s where things got interesting. I now wanted to test out the FJ-XR Receiver on my old Alien Bee Lighting to make sure they fired since I had mine set up as a hair light behind some v-flats, out of line of sight.

Let me tell you, it was seamless. I sat myself down and used my phone to control my camera wirelessly and other than my own expressions, (it was challenging being in front of the camera for a change haha), the lighting was gorgeous. I tested a few shots using just the FJ400 in TTL and then set the power manually. Then added the rim/hair light from behind my v-flat and here were the results;

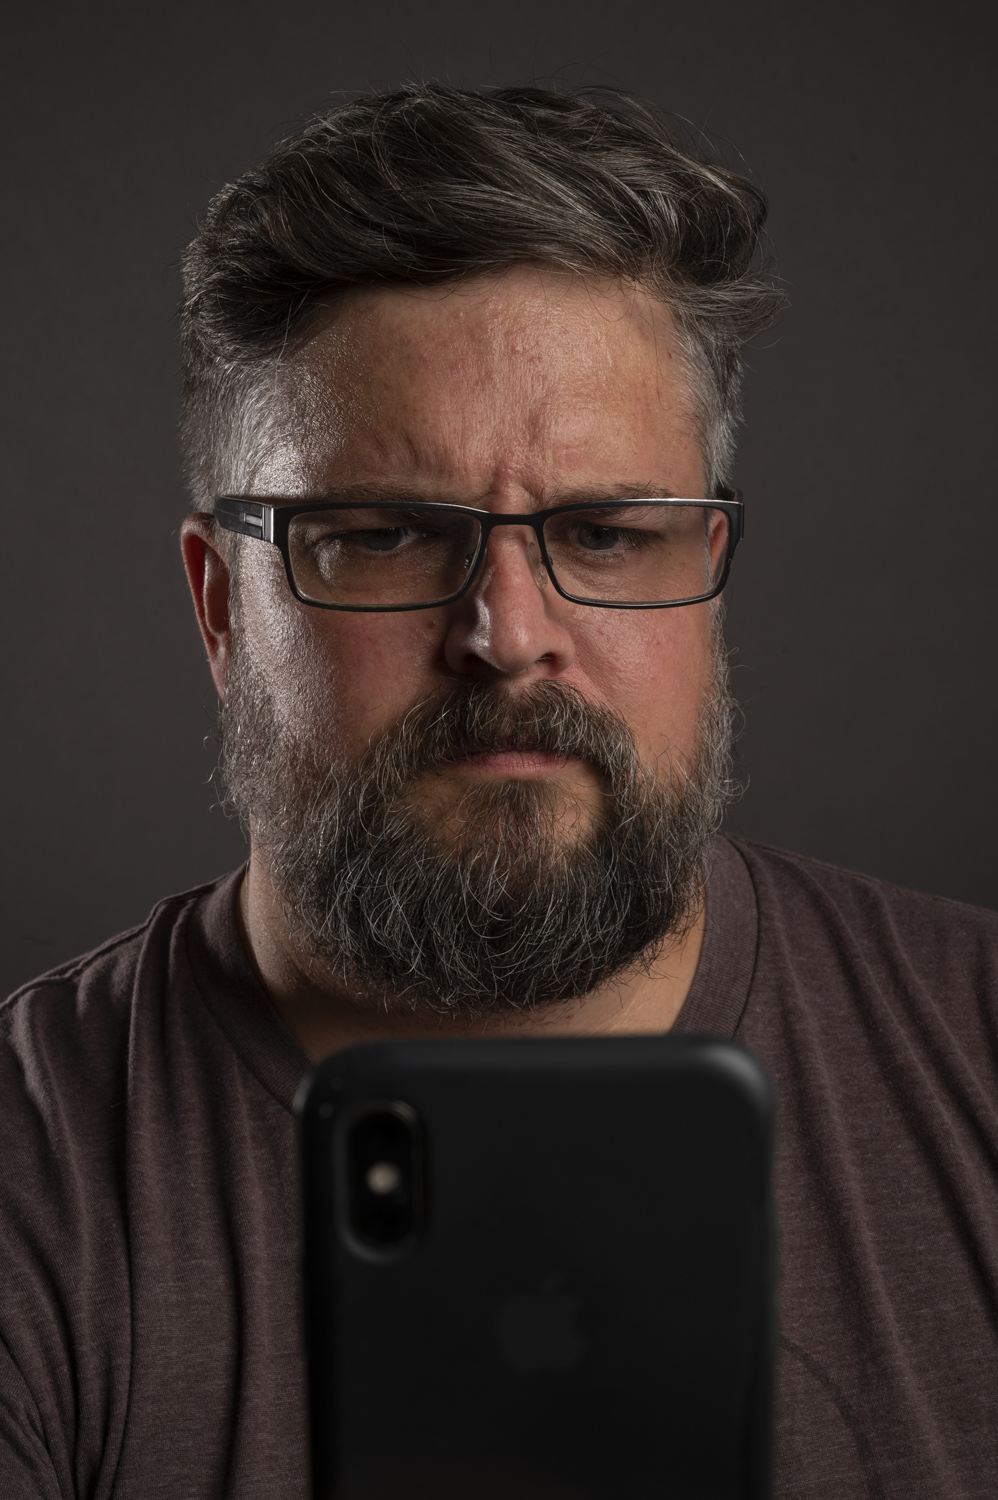


The first shot is lit with JUST the FJ400 and then the rest have the AB1600 added for the rim light. So if you ignore that it’s me in front of the camera, you can capture some pretty awesome shots with a very affordable setup that can travel with you in a suitcase with ease!
For the technical savvy and inclined, the portraits of myself were shot at 70mm f/14, ISO100, and a shutter speed of 1/160.
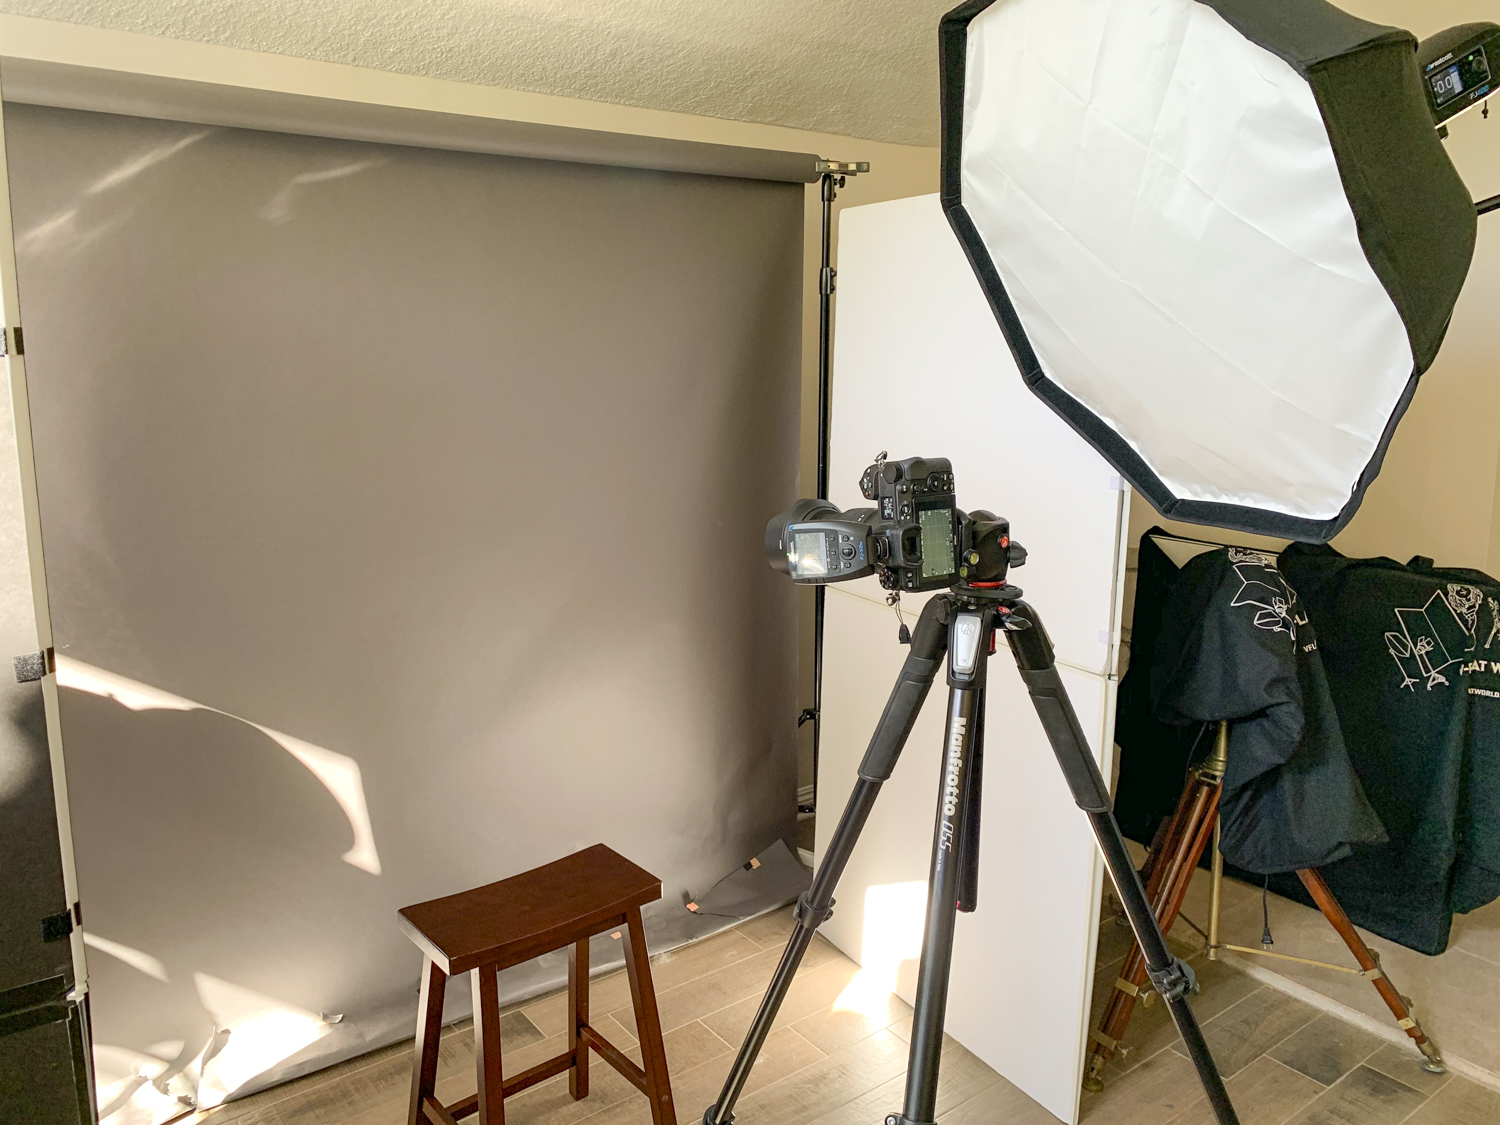
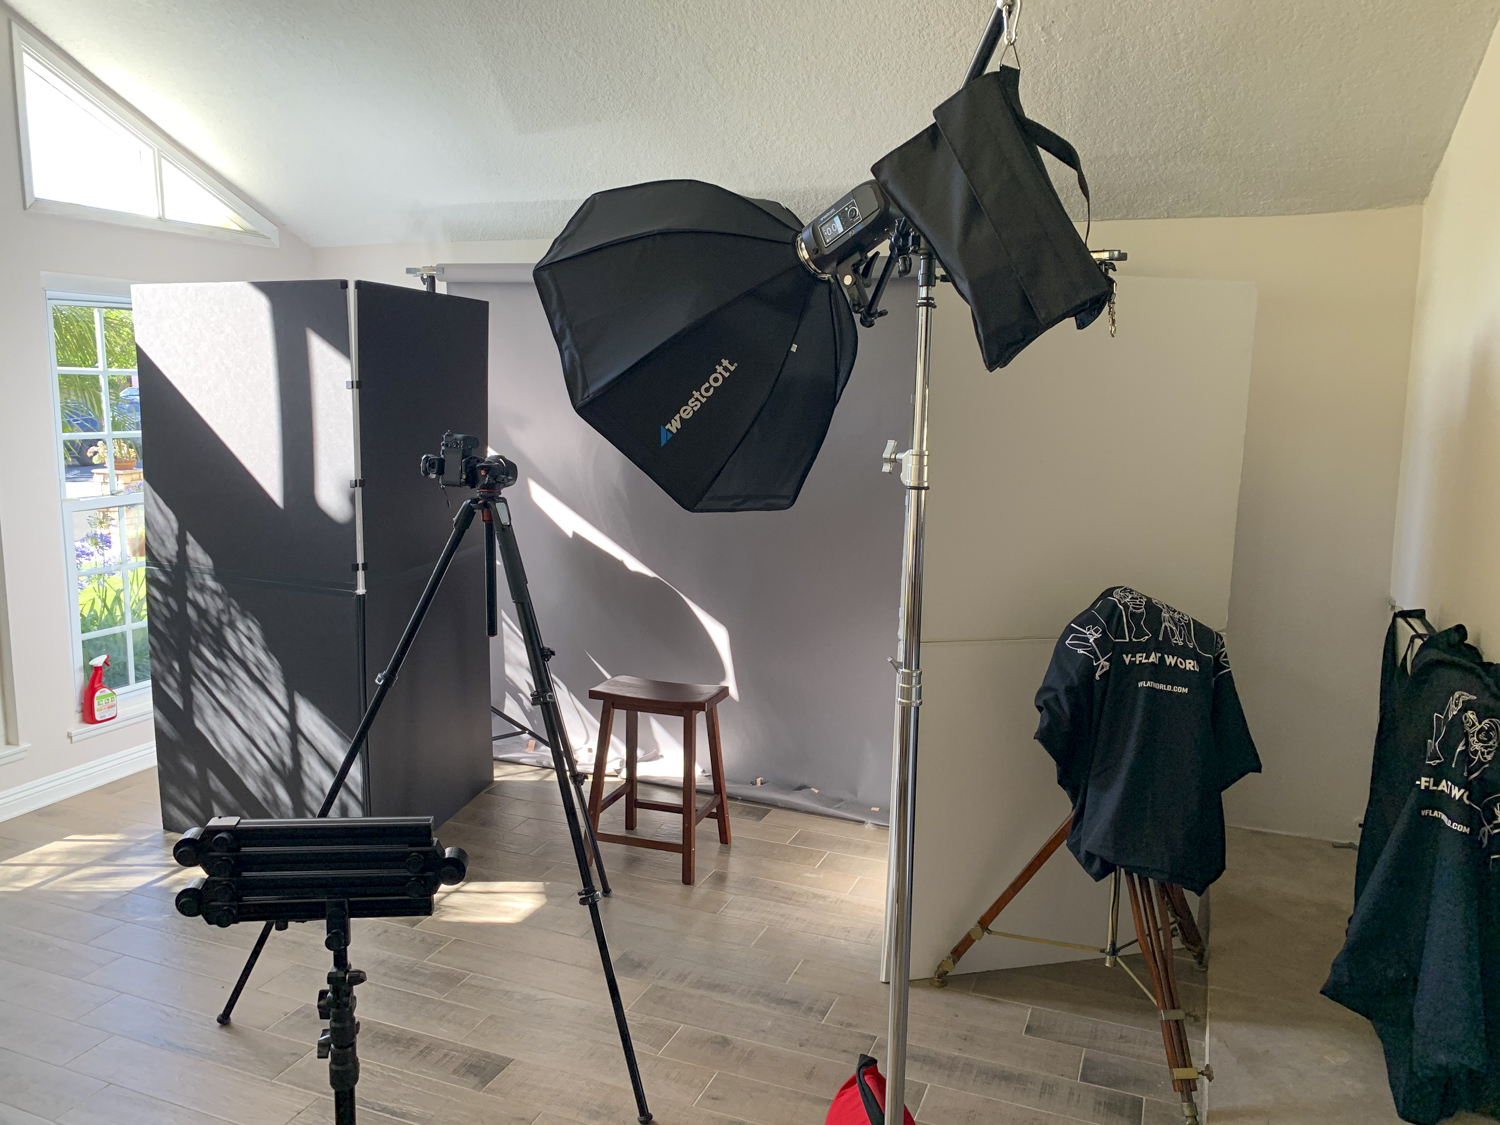
Here’s A Peek Behind-The-Scenes Of This Setup:

[Related Reading: Westcott Announces The FJ400 – Beating Godox At Their Own Game To Become The “Best Value Strobe”]
Final Thoughts
I’ve used a lot of gear over the years ranging from homemade DIY gear hobbled together for a few dollars from a Home Depot trip to testing and reviewing some of the most expensive luxury brands in the world where the modifiers alone were nearly $20,000! During this time, whenever I’d speak to fellow creatives about non-DIY budget lighting the options were always Paul C Buff or Godox. But now, with the recent additions to the Westcott Line up, the FJ400 will definitely be giving both of these brands some serious competition.
The FJ400 can outlast the Godox when shooting full power when operating from the battery, and the color (white balance), is far more consistent than both (Godox or PCB) with only a 150 Kelvin shift, and frankly, the durability of the Westcott lighting and modifiers seem to be far better than most I’ve tested. Having used/owned/tested all of these brands, I feel pretty confident when I say I’d actually use this light in my day to day client work.
Additionally, the controls are easy to use both on the remote trigger and on the side of the light itself. Most of the lights I own personally are Profoto with a few older PCB’s lingering around, and even I have to admit that the Fj400 system kind of blows it out of the water for ease of use. Westcott also said they are “quickly working to put a complete system in place to support the FJ400” and given the system is only about 6 months old and they’ve already launched a collection of Reflectors, Grids, and a Snoot, I’d say they’re delivering on that promise.
Building a portrait kit that will let you create diverse and stunning images for a price of less than $1,000 is a huge asset to beginners and professionals alike. The combination of gear available from Westcott is easy to use, impressively powerful, travels easily, and is just too affordable to pass over.


Get Connected!