
Have you ever come across an image, specifically a portrait, that you felt you could re-create, then tried and had the result just not compare? Or perhaps it was close, and you did everything you could to make it look just so. You could’ve even had all the right lighting elements in check, camera execution with the same settings, there was the perfect planetary alignment, and still, something was amiss. These days, if you’re not adept at Photoshop and Lightroom, the likelihood is that would be your answer.
Now, any photographer worth his salt is going to not only understand, but promote for themselves and others, to always do everything feasible to get the shot right, IN-camera. There is no substitution for this, and those who don’t adhere to this are kidding themselves that their work can compete with those that do. They’ll never understand gargantuan value of subtlety, and will always be a step, or 12, behind. It’s like getting a 4.0, once you drop below, you’ll never get it back. That being said, there are things you’re going to want to be able to do with your images; ways of manipulating them to make use of artistic license, and that’s entirely fine. What I suggest is that you learn how to do this well.

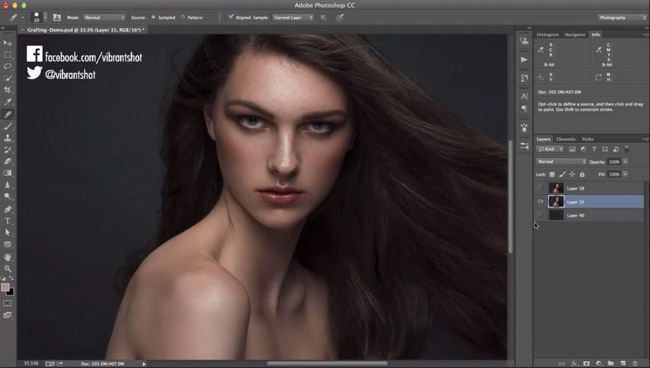
Human brains are engineered it seems, to recognize faces. It’s possibly the visual we know best. It’s so good at it we see them everywhere, and even when a face comes within a breath of ours, and our eyes are taking in a warped image, our brains shift it around so we don’t really see the true distortion. As this is the case, if you’re going to Photoshop someone, make it good. Make it really, bloody good. Michael Woloszynowicz of Vibrant Shot, puts out some of the absolute best Photoshop retouching material I’ve seen, and much of it free. In this tutorial, he gives an in depth look at how to fix hair and skin issues with texture grafting.
[REWIND: My 2 Current Favorite & Fast Photoshop Tools]
Managing texture is extremely important in order to render a realistic, yet improved image. It’s also not one of the simplest things to do, though Michael certainly breaks it all down so well it appears so. Even the most difficult problems seem easy once solved.
Branching out of frequency separation, the steps can be used with ease, and either with a mouse/trackpad, or pen tablet.

Further Thoughts
I have been using a slightly varied version of this method for some time and I actually like this one better, and have adopted it into my routine. Some of the results that can be achieved are quite astonishing, and you would hardly know that the photos were edited to begin with. I would be remiss not to mention that Michael’s images tend to be very high fashion, or high quality studio portraits, so he takes his editing further than I take most of mine. The methodology in practice can be easily adapted for all sorts of shoots, for lifestyle etc. The method also can be helpful in sorting out issues in texture with other items, such as clothes, or even in landscapes.
Some Key Notes:
1. Shortcuts – they will make your life so much easier. Remember the ones mentioned by Michael or make your own.
2. Work in layers. Work. In. Layers. When it comes to portraits, you’re often working in sections and it can be just one of the most frustrating, patience-testing events to make a mistake and lose your past edits, or to accidentally save in a way where you can’t go back and modify each adjustment. This can make your file sizes grow tremendously, so if your computer is more akin to a bi-plane, versus an F-15, then you may want to have other programs closed.
3. You’ll notice that the model in the tutorial doesn’t have very distinguishing moles or freckles, and if you’re retouching someone who does, understand that even when working on the ‘skin texture’ layer, you’re somewhat going to be changing these skin characteristics.
I like to keep the photo, most times, from looking too much like the model has on a blanket of make-up and like to keep certain distinguishing skin features apparent, if not toned down, so the model still retains some more of his/her unique marks. So just keep that in mind when adjusting ‘texture.’ Here’s an example of an outdoor portrait photo I retouched lightly using my slightly varied version of this method, where my friend/model has some unique freckles and moles, and I didn’t want to change them.

There are a lot more tutorials from Michael to be seen on YouTube which are certainly worth checking out. Vibrant Shot also offers one-on-one coaching, and that’s pretty special. You can also follow along on Vibrant Shot’s Twitter
Source: YouTube


