
We’ve teamed up with Adorama to bring you a new series of photography tutorials called “Master Your Craft” to be featured on their YouTube Channel. Subscribe to see more of our videos on their channel throughout the next couple of months that will cover photography, lighting, posing, and editing education to help you hone your skills and master your craft.
In this video, we’re doing a throwback to one of our favorite tutorials from Lighting 101. We’re going to cover the difference between direct flash vs. bounce flash and give you an easy secret to creating soft, flattering light anywhere you go.
Gear You’ll Need for This Technique
Bounce flash photography can be done with any type of on-camera flash. Here are some of the other gear items you’ll need to complete the look:
- On-Camera flash – see our favorites here! For this tutorial, I am using the Profoto A1x
- 5-in-1 Reflector
- 40 in. Matthews C-Stand
I am using a Canon 5DM4 and a Canon 24-70 f/2.8, but feel free to use whichever lens and body combo you prefer for portraiture. Through this video, you’ll see the progression of learning, starting with no flash on camera using just the ambient light to then manipulating our on-camera flash to yield the most flattering light.
Direct Flash
Direct flash has a very distinct purpose and looks when used correctly. Often times, amateurs point the flash straight forward because they want to fill the face with light in dark situations make the subject look like a deer in headlights.
 It looks hard and specular, and although it is an improvement from our ambient light image, it isn’t the most flattering way to utilize an on-camera flash. Now let’s try using different modifiers to see if it can soften the light.
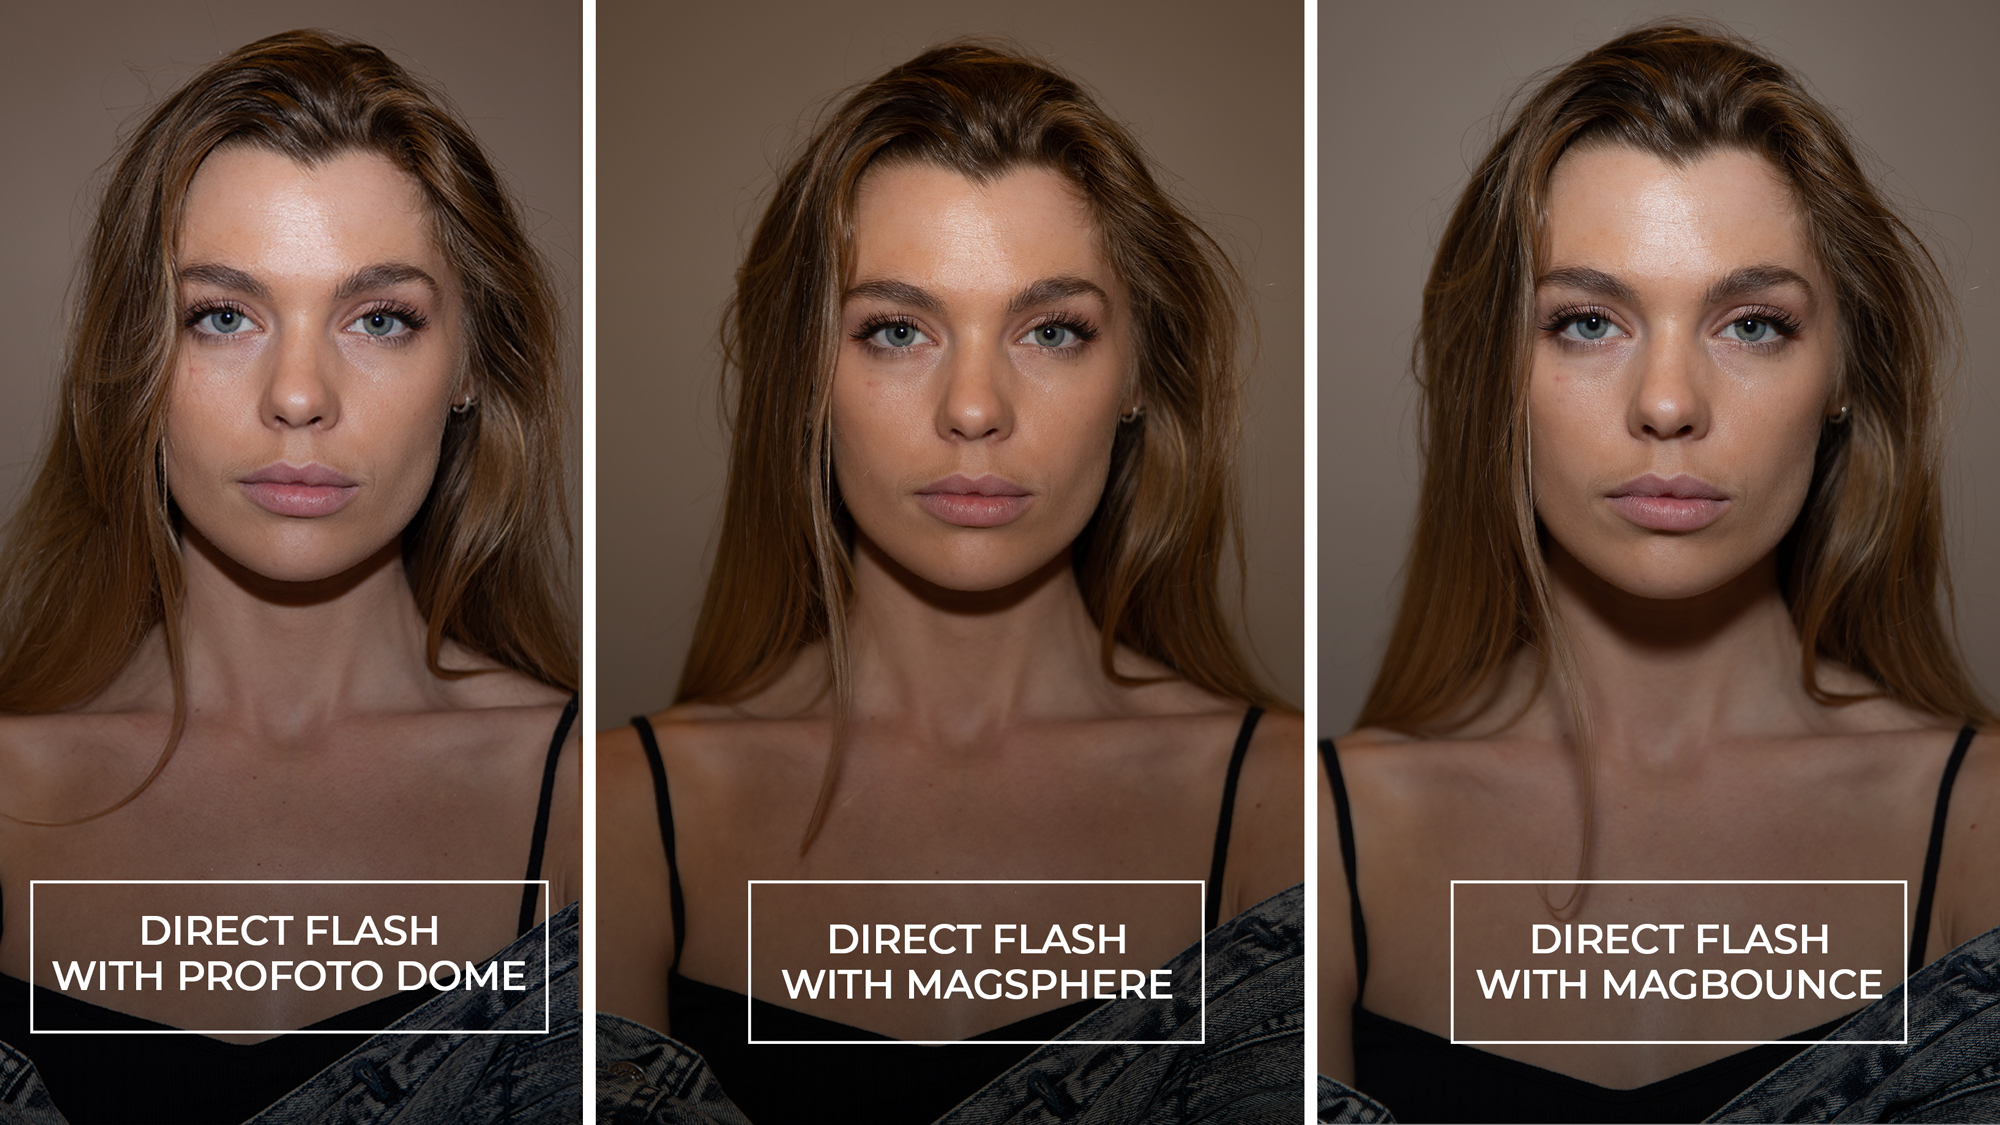 We used the Profoto Dome Diffuser, the MagMod MagSphere and the MagBounce to test and see which would get us the best result. The MagBounce gives us the best results out of the three, but it’s still not looking quite right with that right highlight on her forehead. Now that we see the limitations of direct flash, let’s discuss bounce flash.
Bounce Flash
We’re just going to turn the flash now so it’s no longer being directed at our subject and we’re going to bounce it off a neutral color, like white or grey. For the sake of demonstrating this video, and offering an alternative to those of you that may not have a ceiling or white object to bounce off of, we are using a scrim to create that white surface.
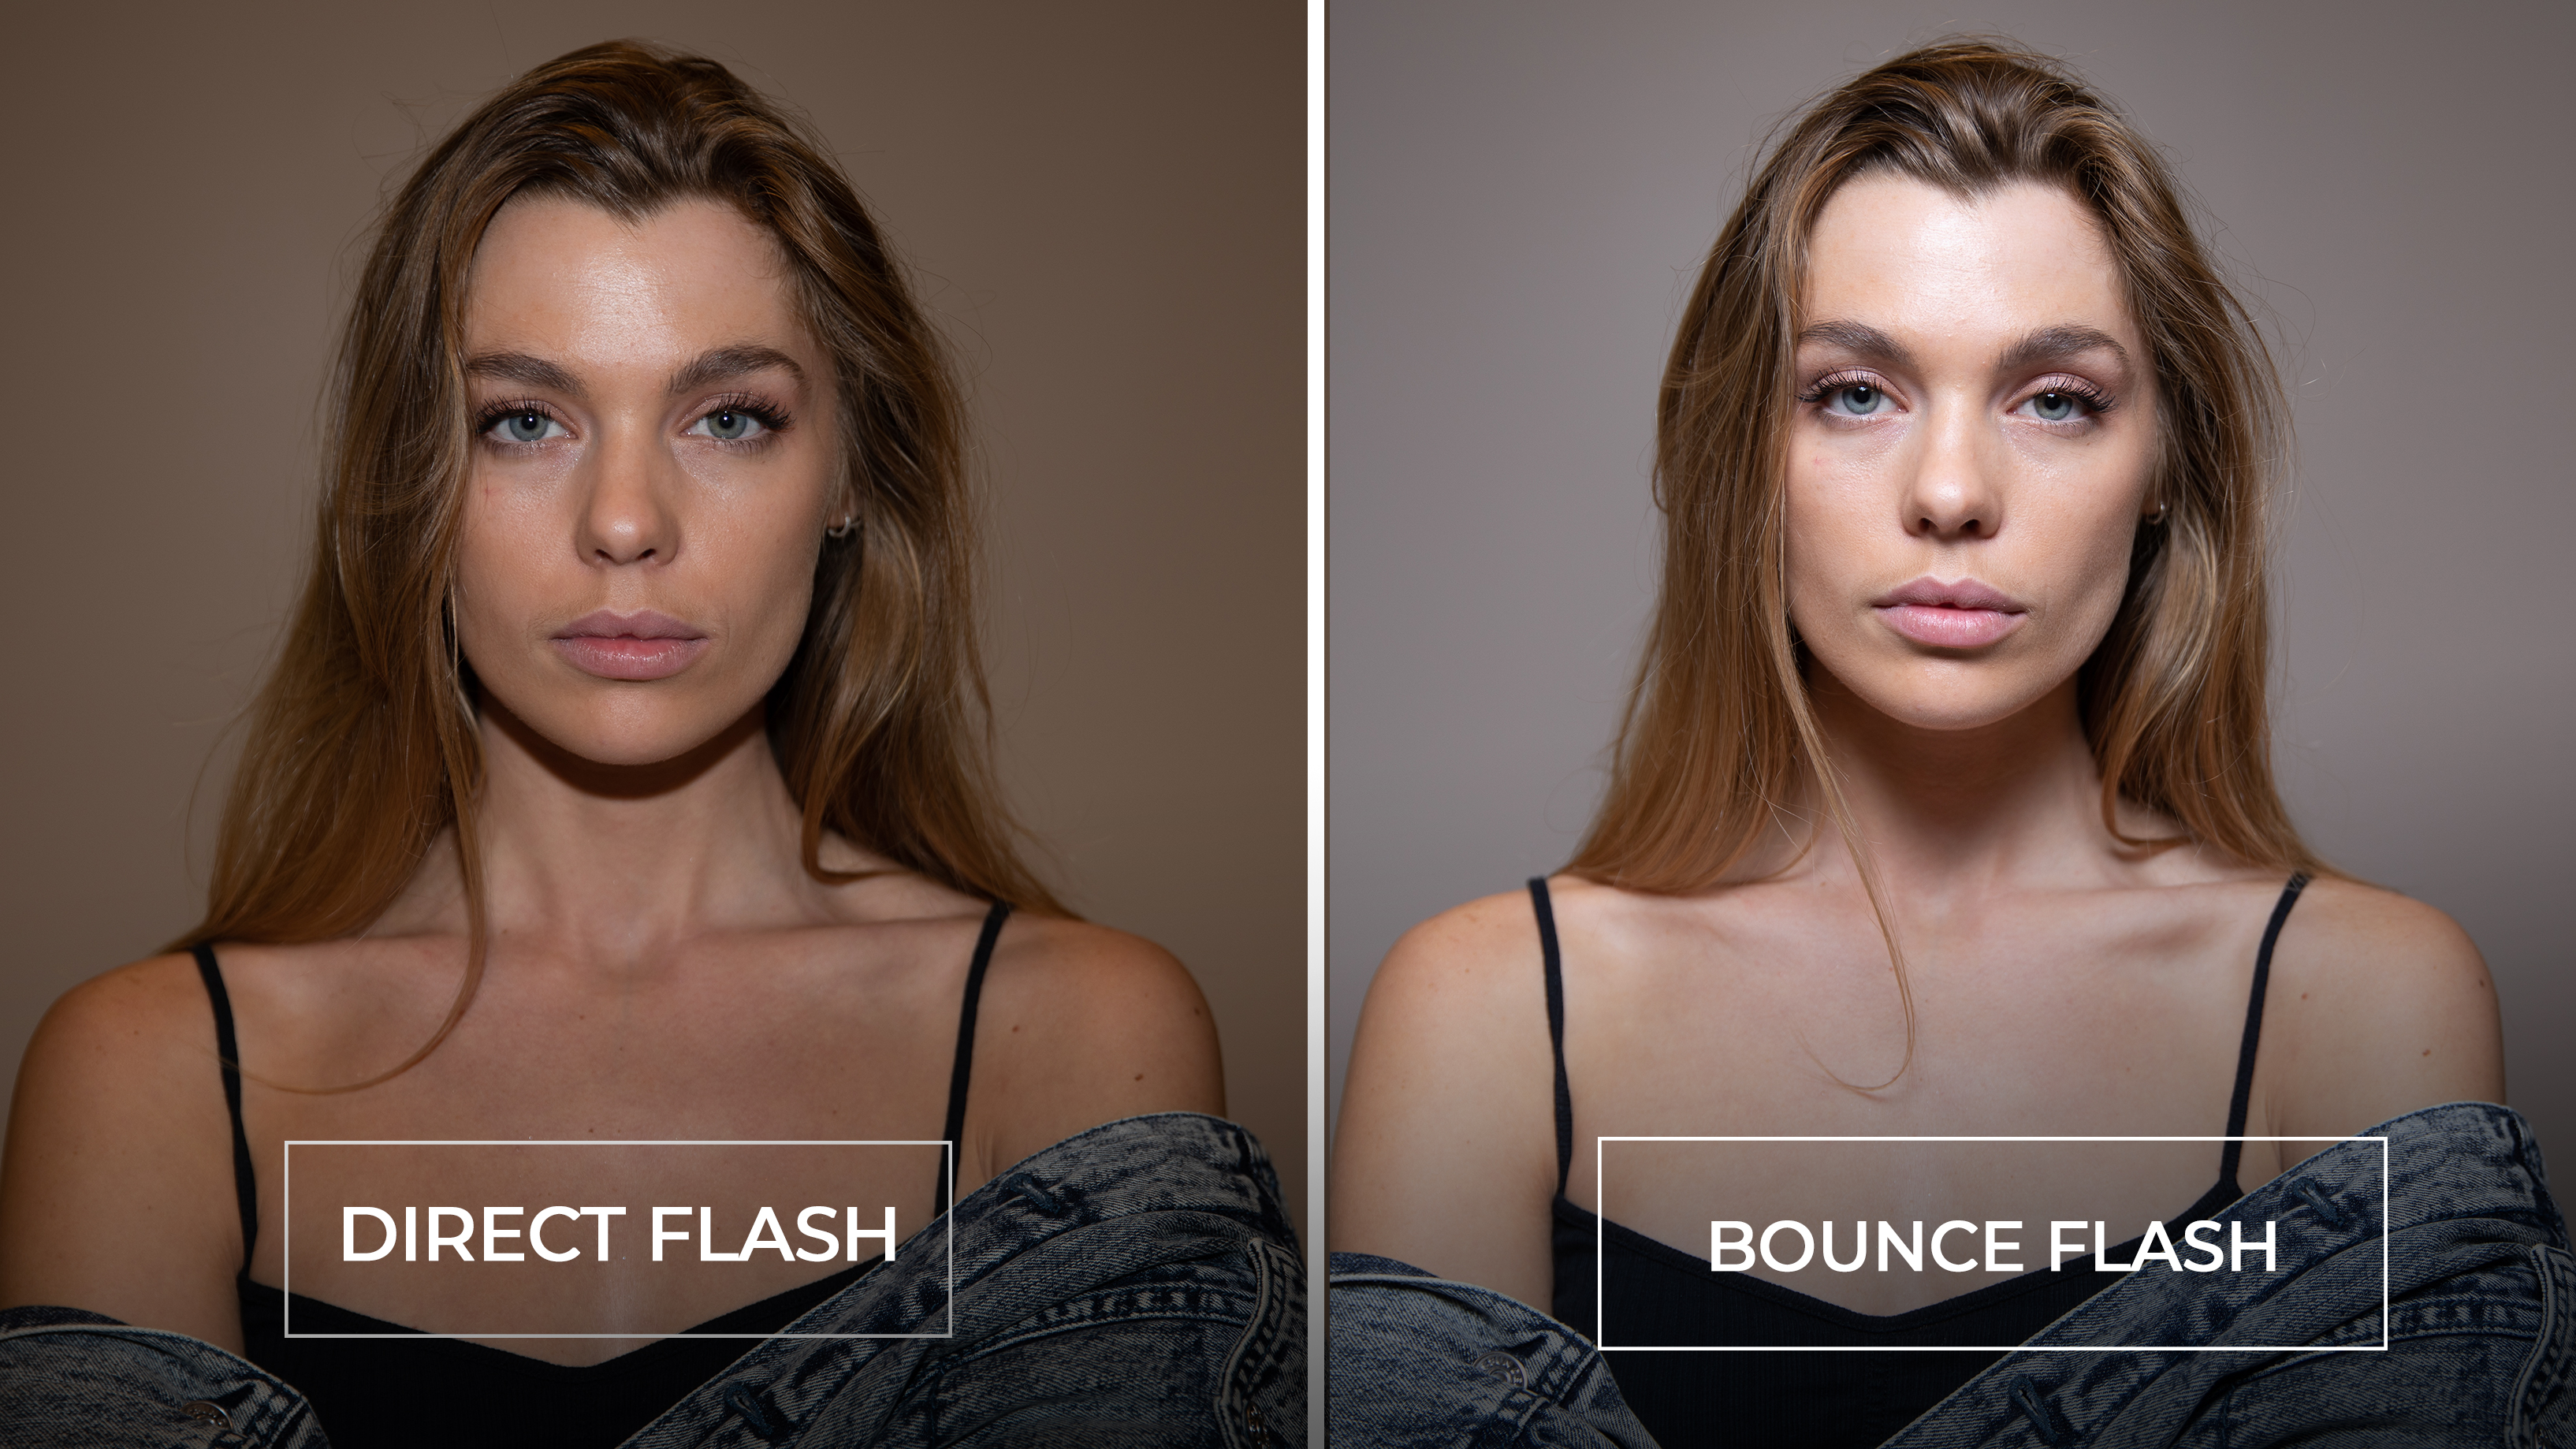 You can see automatically, our light quality and direction has vastly improved. There are no longer any harsh highlights on her face and the shadow beneath her chin is softer and gradually falls off. To improve upon this, even more, let’s move the location of the scrim behind me so that I am throwing my light directly towards the subject by bouncing behind me. This is the final image we get:
If you don’t have a scrim with you, the best thing to do is to find a white wall to bounce off of. This bounce flash technique is going to save you in scenarios where you don’t have the ideal location.


Get Connected!