In this video, we’re going to start a mini-series about shooting portraits at night, under the stars. There are many different ways you can do this, but for starters, we’ll just talk about creating a single exposure that has sharp, well-exposed stars, and a steady, blur-free subject that is also nicely illuminated. In future videos, we’ll talk more about creating multiple exposures, and other techniques for creating astro-landscape portraiture. Enjoy!
Equipment Used:
- Nikon D750
- Rokinon 14mm f/2.8
- FotoPro C5i Tripod
- Yongnuo 560 iii flash & 560 TX transmitter
Camera Gear You’ll Need:
- Any recent camera
A full-frame camera is nice, but not at all necessary. As long as your camera sensor was produced in the last few years, you should be able to pull off images similar to this. - A wide lens that goes to f/2.8 or faster
An f/3.5 aperture kit lens can do in a pinch, if you’re learning, but when you get serious, you should find yourself either an f/2.8 or f/1.4 (etc) fast, wide angle lens for this type of work. - A solid tripod
If your tripod is a little wimpy, that’s OK. Just make sure you set your camera to 2 sec. timer so that you don’t introduce any camera shake into your images - A flash / wireless flash system
An on-camera flash can be used, if you bounce it off a nearby object / reflector, but I prefer to just use off-camera flash.
Key Tips To Remember:
- Darkness on your subjects is critical
For this flash technique to work, you need some serious darkness. If you don’t have to use flashlights to see where you’re going (or focus your lens!), then it’s not dark enough. - Avoid direct flash – it’s too bright!
If you have an f/1.4 lens that you want to use, or a camera that is really cutting-edge and you feel comfortable shooting it at ISO 6400 or higher, you’ll have a hard time getting your flash power low enough to avoid completely “exploding” your subjects to white oblivion! Find ways to diffuse or “knock down” the brightness overall. - Hold still, and shoot multiple shots!
Have your subjects pose in a manner that allows them to help each other hold still, especially when standing. Then, be sure to capture multiple images and review them at 100% zoom. If your flash is creating sharpness on faces, but subject movement is causing a dark ghosting effect around the edges, don’t worry, that’s relatively easy to remove in Photoshop, especially if you have multiple images to use as source material for cloning or masking. - Avoid light pollution
It goes without saying, that you’re not going to get many stars in a downtown city environment. However, you’d be surprised at just how many stars “show up” if you find even just the slightest bit of darkness near where you live! Be safe though, and don’t go anywhere risky. Here in Southern California, the beach is always a safe bet.
[REWIND: BLACKOUT CITY: A COMPOSITE TIME-LAPSE OF A VISIBLE MILKY WAY ABOVE A LIGHTLESS LONDON]
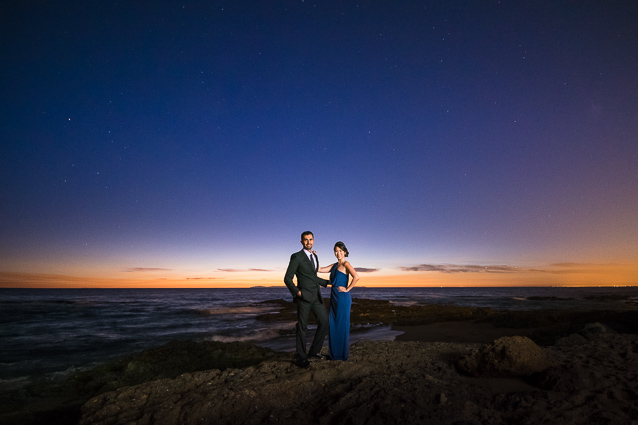
Original, un-edited image:

Final image edited using the SLR Lounge Presets:

Additional Tutorials:
How to shoot portraits at very slow shutter speeds
How to create a ghost-like 15-minute self portrait
Inspirational Star Photography by Ben Canales – The Star Trail
Thanks everybody for watching! If you’re curious about shooting portraits at night or under the stars, stay tuned for a few more tutorials on this subject, and feel free to comment below if you have any questions.
Take care, and happy clicking!


Get Connected!