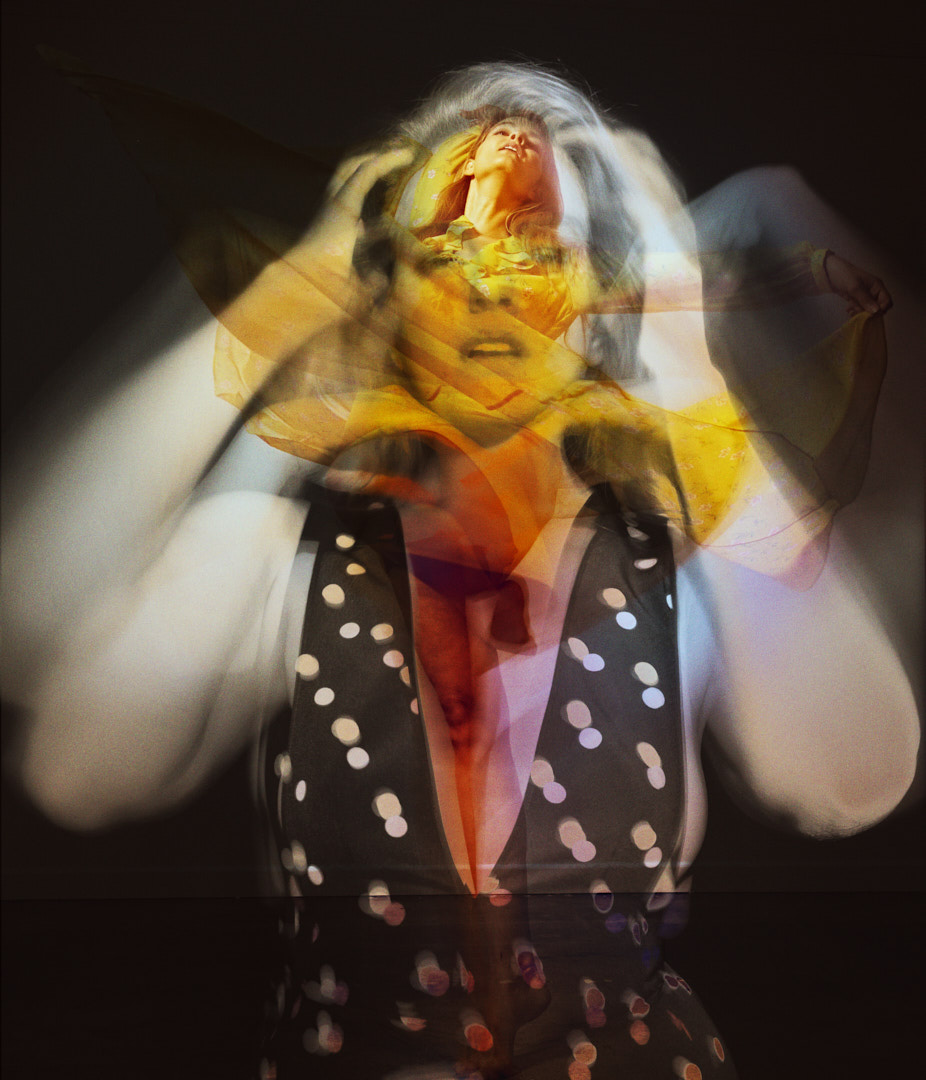
I found myself interested in the idea of capturing and conveying movement in still photography. There are, ostensibly, two approaches to the idea: you can either use a very short shutter speed, or strobe lighting, to freeze an object or person in motion, or you can lengthen the shutter speed and embrace the motion blur. For this particular image, I opted to do both.
Because my specialties are portraiture and fashion, and knowing I wanted to incorporate movement in this shoot, I made a concerted effort to find a model with a background in dance. I hadn’t worked with Meg before, but she is a model, actress, and has been dancing, and teaching dance, for years, and she turned out to be ideal for the shoot I had in mind.
The Layers
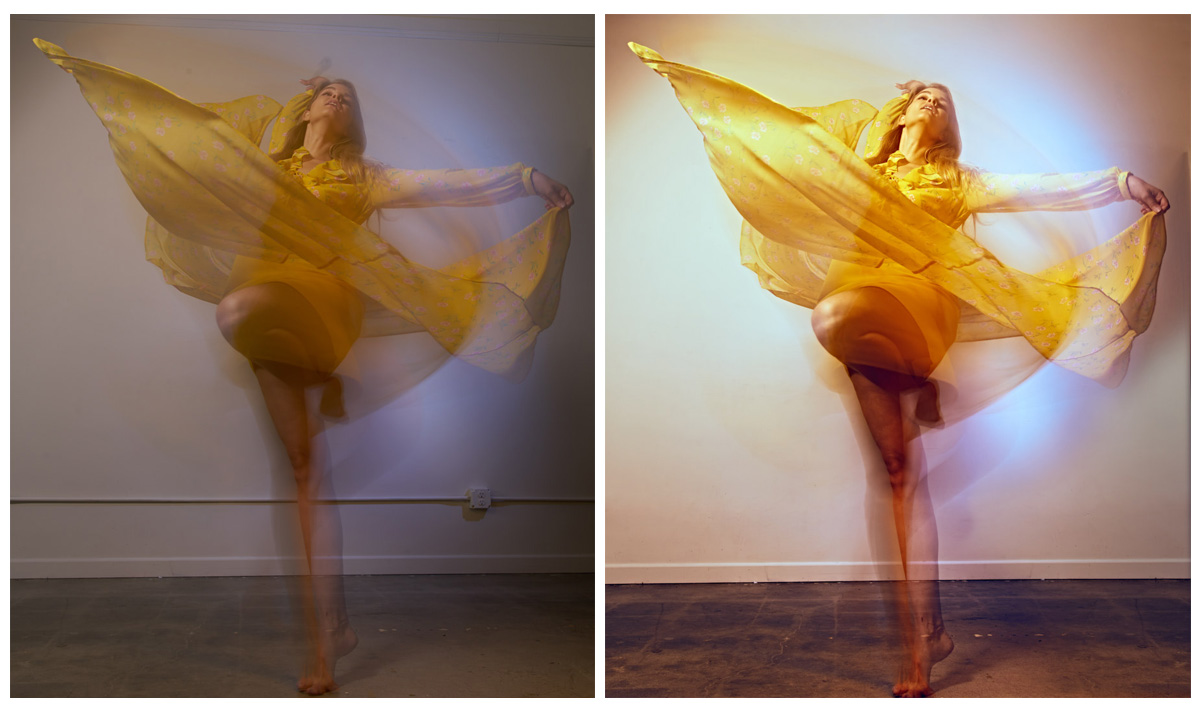
The final image is, of course, a blend of several different exposures, and was not an effect that I could capture in camera. In fact, it includes photos from two separate setups that I had not planned on combining until after the shoot, when I was culling the images. I first saw how well the closeup image would work as a clipping mask, and then when I realized that the color shot lined up with it, I knew what I wanted to create.
To create this ghostly effect, I used a technique that may be quite familiar to wedding photographers, or anyone who has seen the SLR Lounge premium tutorial on photographing the reception. It’s essentially the studio version of dragging the shutter. Rather than using an speedlite and moving the camera, I created a lighting setup that combined strobes with continuous lights and mounted the camera on a tripod.
I set my continuous lights first, so that I could determine the exposure settings I needed to get the motion blur I wanted. I used Hive Lighting Wasp 100-C LED lights, both at full power. The great thing about these lights is that Profoto modifiers can be mounted onto them. I used a Profoto strip box camera right, mounted vertically, quite close to the subject, essentially as a fill light. The other continuous light was a Hive with the standard reflector, set to blue, pointed at the background. Both lights were set at full power, and using a light meter I found that I could slightly underexpose the fill light with a 0.4 second exposure at ISO 100 and f/11.
The key light was a Profoto D2, with the dome diffuser, in a Mola Seti beauty dish, camera left, approximately 45 degrees to the subject, about 5 feet away, and 2-3 feet above her eye level. I don’t recall the exact power setting, but I used a light meter to get an output of f/11 at ISO 100. Because it’s a strobe with an incredibly short flash duration, the shutter speed had no effect on its exposure, and I could be sure that it would freeze a brief moment of her movement. I placed another D2 behind the subject, pointed at the background, with a standard zoom reflector to complete the effect.
Essentially, I designed the lighting to freeze the motion on the left side of the frame, where the beauty dish was hitting her, and get motion blur on the right side of frame, in the shadows of the key light. To complete the effect, I set the camera to rear curtain sync, so that the motion blur would lead into the frozen moment, rather than following after, as it would if the camera were in its standard front curtain sync mode.
All that was left at this point was to shoot it. I mounted the camera to a tripod, and set it very low to the floor, with a wide lens to accentuate the model’s legs, and lend an epic quality to the shot. We tried the setup with a few dance moves- leaps and kicks, but found that with the flowy dress she was wearing, it worked best when she spun in place. I also had her try holding and throwing the hem of the dress as she spun to maximize the movement. Because I was working with rear curtain flash sync and a long shutter speed, the most difficult aspect was getting the timing right. When I pressed the shutter there was a nearly half-second delay before the flash fired, so I had to anticipate when the model would be in the position I wanted to freeze. After some experimentation, and some pretty great near-misses, we captured a few frames that we loved.
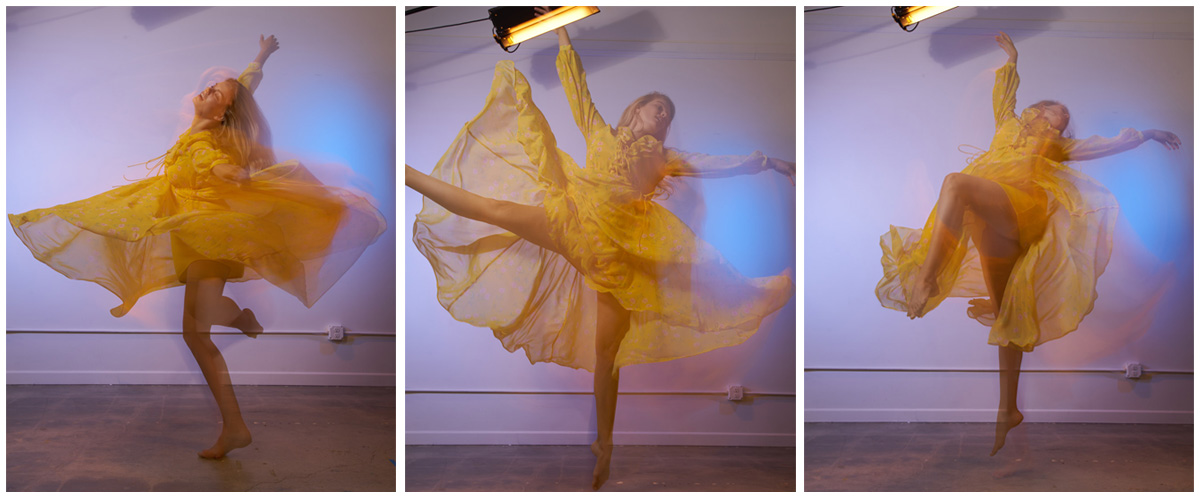
Image 2 (and 3)- Light Painting
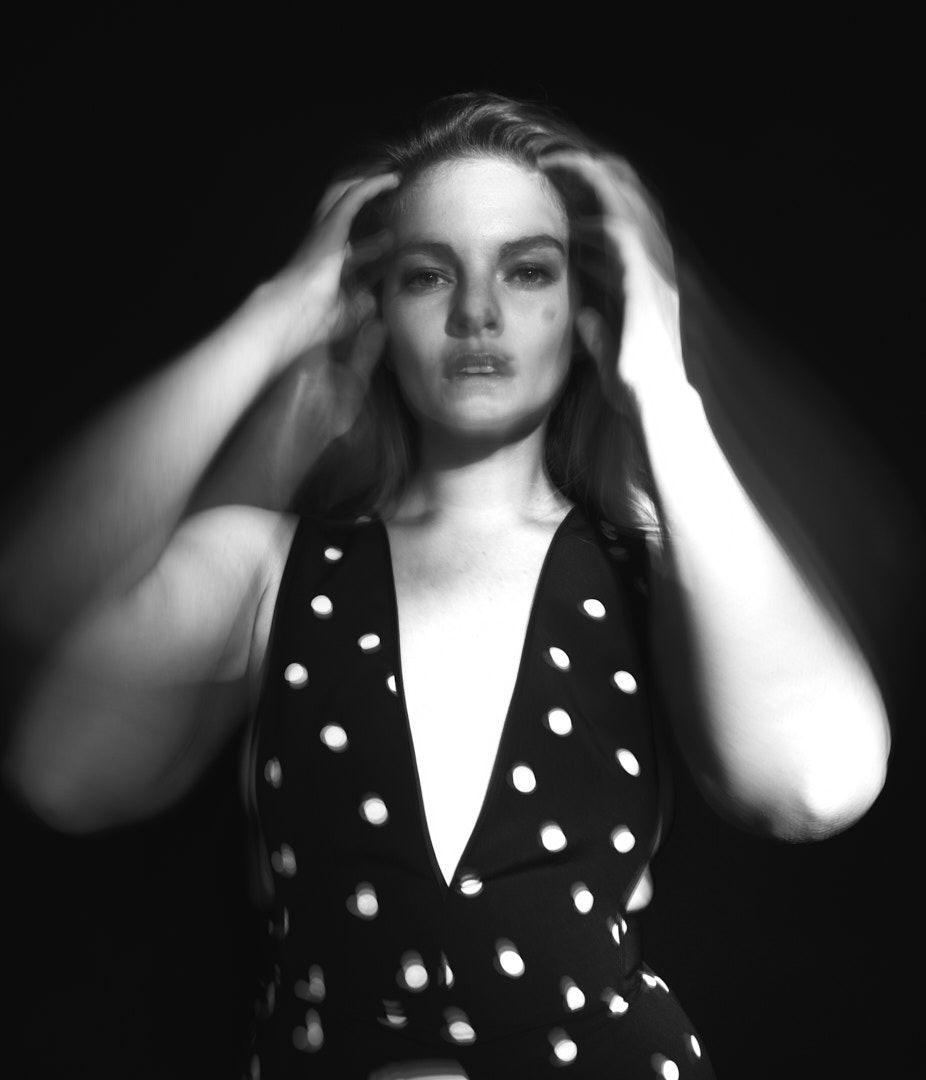
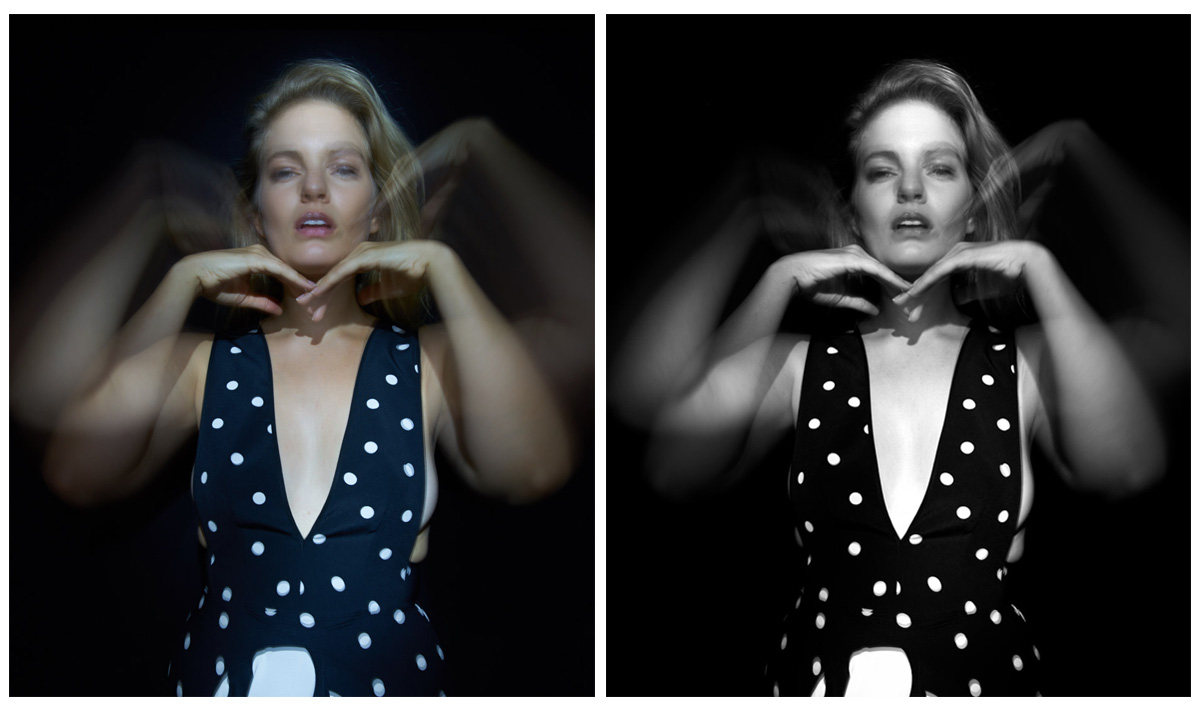
The other element of the final image is the black and white closeup. Again, I wanted an ethereal feeling, with a mix of motion blur and stillness. I decided to go with light painting. These images were shot with a single handheld LED flashlight.
Because I would need a very long exposure for the effect to work, I first needed to eliminate any stray ambient light. We were shooting in the middle of the day in a studio with a massive window, which is great for natural light portraits, but problematic for light painting. The solution was to literally surround the model and camera with black foamcore V flats. I experimented a bit with various shutter speed and aperture combinations, and found that 1.3 seconds at f/9 and ISO 100 worked nicely.
I mounted the camera on a tripod again, with the same Sigma 24-35mm lens, and held the flashlight at arm’s length above and to the right of the camera. At this point, it was just a matter of trying and trying again until we found what worked best. We settled on having the model keep her head as still as possible, while moving her arms and hands around her face. Meanwhile, I would pan the flashlight’s beam back and forth across her head and shoulders at a medium pace, to catch her arms in various positions. Two of the best of these shots ended up being used in the final image.
The Edit
As I mentioned, I was originally planning to use each of these setups as a standalone final image, so I began with my basic process of adjusting the color, and contrast to my taste. The first image with the dragged shutter also included a few elements in the studio that I opted to remove- an electrical outlet and conduit, a (very odd) sensor spot, and some crown moulding. Because the image was purposely a bit blurry, it was easy to use the clone stamp and healing brush to get rid of those pieces.
The light painting shots were much easier. I used Capture One Pro to convert them to black and white, and add contrast, and they were ready to go. If you make your subject blurry enough, you don’t have to spend time cleaning or sharpening the skin!
Then came the task of combining the photos into one cohesive image. My first idea was to simply layer the images on top of each other and use blending modes in Photoshop to reveal the various areas, but I found this method to be a bit imprecise. Instead, I ended up combining the two closeup, black and white photos, and masking out the model’s face in one of them (to add a bit of visual clarity to that area) and using those as the background. I then put the wide shot of the model dancing on the next layer, and used apply image to turn that same merged closeup into a layer mask. The color image was thereby only visible where the black and white was the brightest, was semi-opaque where the closeup was grey, and was invisible in the black areas around the edges of the frame. I fine-tuned the effect by selecting the layer mask and adjusting the levels to taste, adjusting the strength of the effect and the rate at which the opacity faded out.
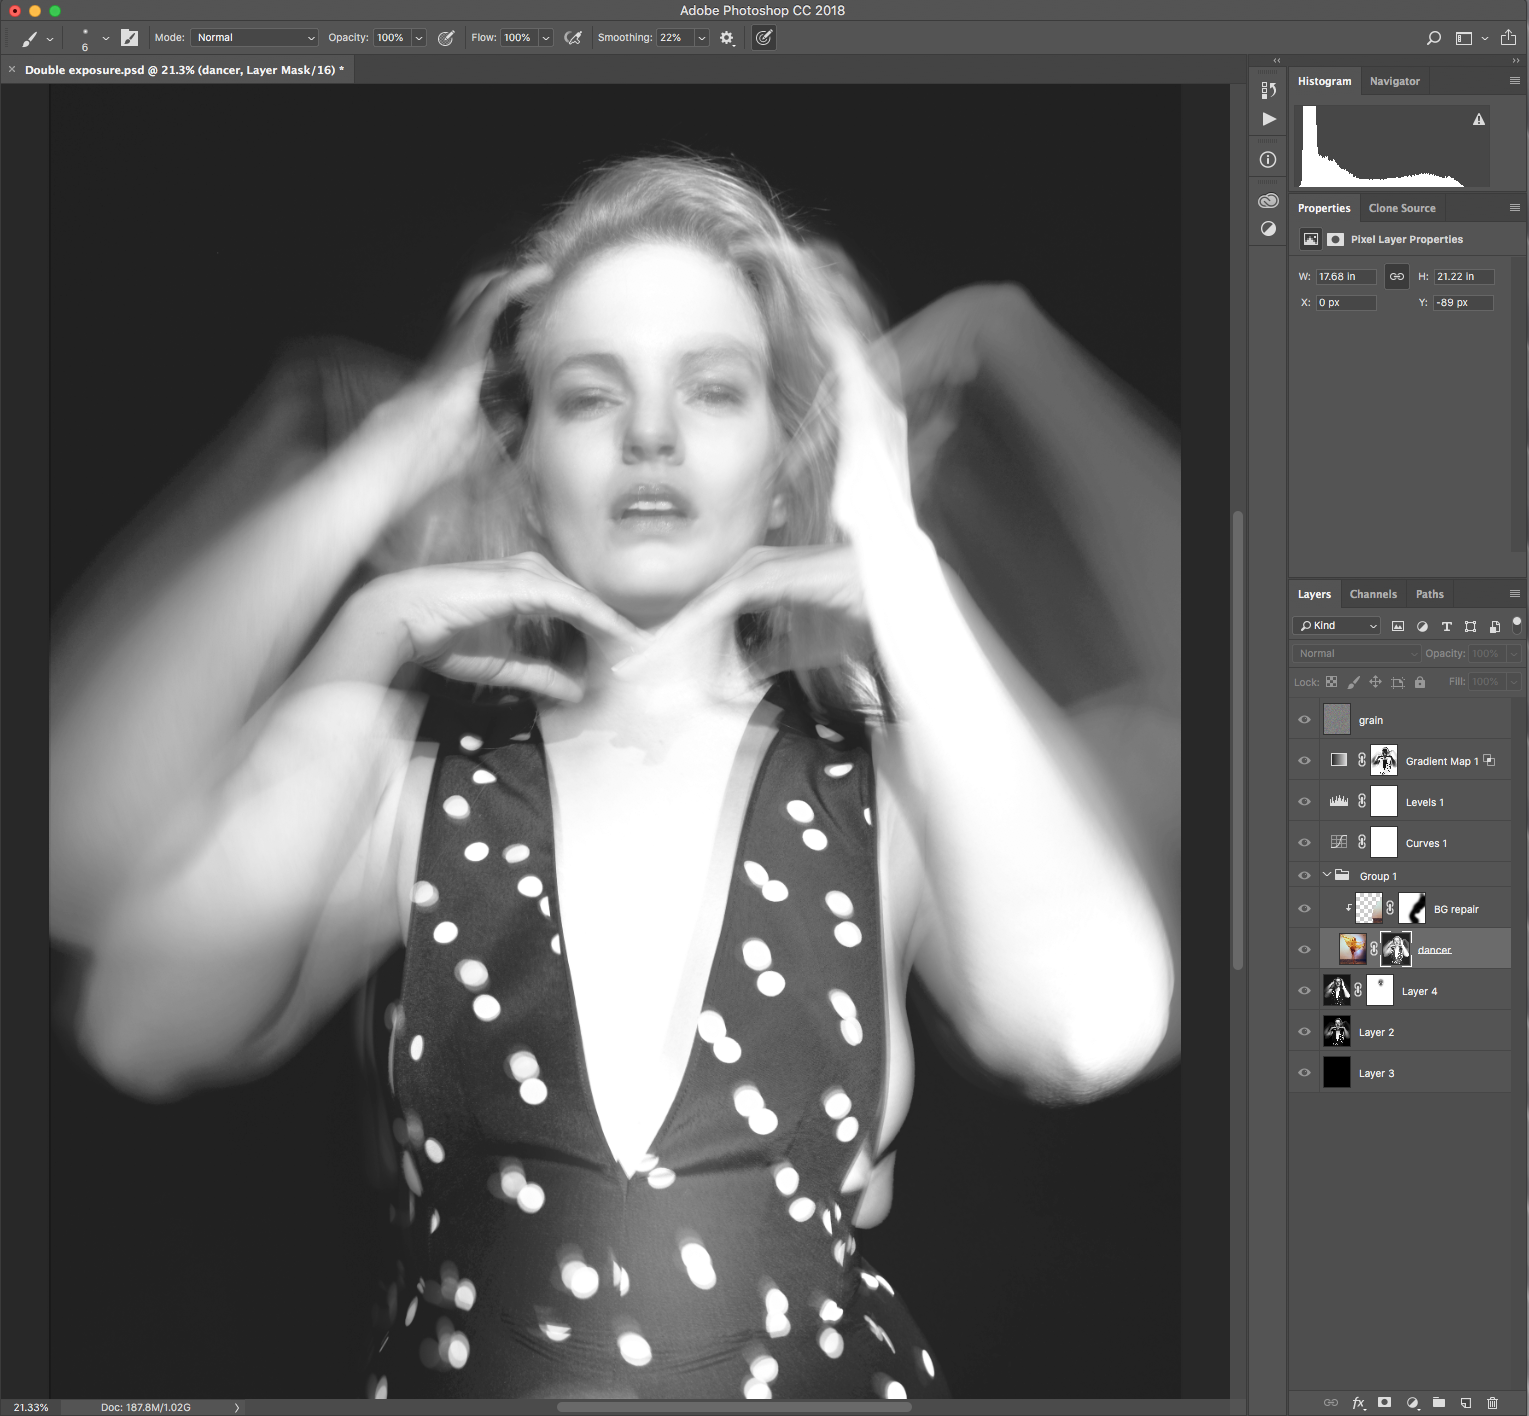
With that done, all that was left were a few finishing touches. I tweaked the overall color and contrast with a few adjustment layers- levels, curves and a gradient map set to a relatively low opacity. I then added a bit of fake film grain to maintain my hipster street cred. I created a new layer and filled it with 50% grey and set the blend mode to overlay, which essentially made it disappear. I then added a noise filter, set to monochromatic and dialed in to be a bit stronger than I would eventually want, because I knew I could then dial it down a bit by reducing the opacity of the layer, which I did, to about 80%.
End Result
And that’s it! Easy, right? Let me know in the comments below if you have any questions about the process, or any ideas on how you’ve created similar effects in the past. It’s also important to note that although I used some fairly expensive equipment to pull this off, particularly the shot combining strobes and continuous lights, you can achieve similar results with a speedlite and some work lights from home depot. Use what you have! Experiment! Don’t let gear, or a lack thereof, hold you back!


