
When we first jump into flash photography, especially off-camera flash, we’re often surprised at just how much we can transform a scene with only a few pieces of gear and a bit of know-how. What makes it more exciting is we can do this regardless of the location, whether we’re indoors or out in the field. On top of that, lighting gear continues to improve, making it easier than ever to capture incredible portraits with minimal hassle or time spent. To illustrate this point, we’re going to use a couple creative lighting techniques and MagMod modifiers to transform a basic scene into a perfect setup for creating stunning, stylized dance portraits.
Let’s get started.
Video: Advanced Lighting Tips for Creative Portraits
Gear Checklist
Here’s a quick overview of the gear used in this video/article:
Of course, you can always use the gear you have on hand to create your portraits. One of the biggest benefits of using MagMod’s modifiers, specifically, is how simple they are to use and how well they perform, making it easier to realize your creative vision during a session. If you’ve ever used them, then you already know.
C.A.M.P. Framework
It helps to know that we follow the C.A.M.P. Framework (Composition, Ambient Exposure, Modify/Add Light, Pose & Photograph the Subject) when working through a shot. Following this framework will allow you to slow down, shoot with intention, and consistently get better results. You can learn more about how to use the framework here.
Step 1: Compose the Shot
Before you start setting up your lights, you need to figure out what you want to do compositionally. Consider things like framing or cropping the shot, choosing which direction to shoot in, and so on. Starting here really makes all the difference.

For this particular scenario, our model is wearing a jumpsuit, and we’re going to create dance-inspired portraits. That said, we can go ahead and direct our subject into a pose to confirm our compositional choices, such as cropping at the thighs and highlighting a good amount of the background.
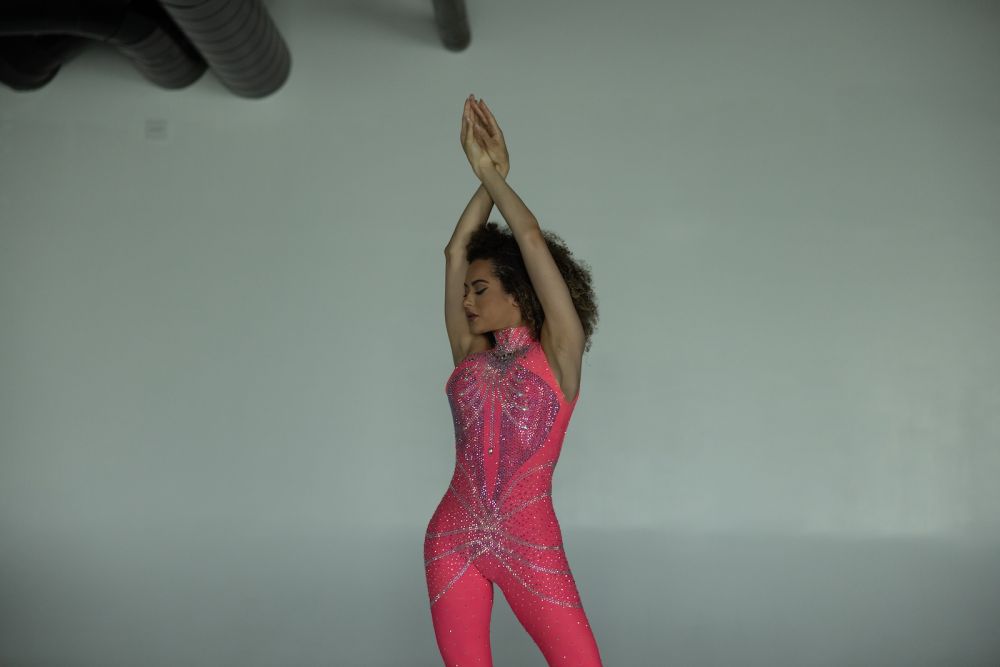
Although we can modify the final pose during the last step of the framework, figuring out the pose at this point will help you get a better idea of how everything’s going to look for your final images.
Step 2: Dial in the Ambient Exposure
Once you’ve set up your basic composition, you can dial in your ambient exposure. For this scenario, we want to completely eliminate the ambient exposure and build the light from scratch using off-camera flash.
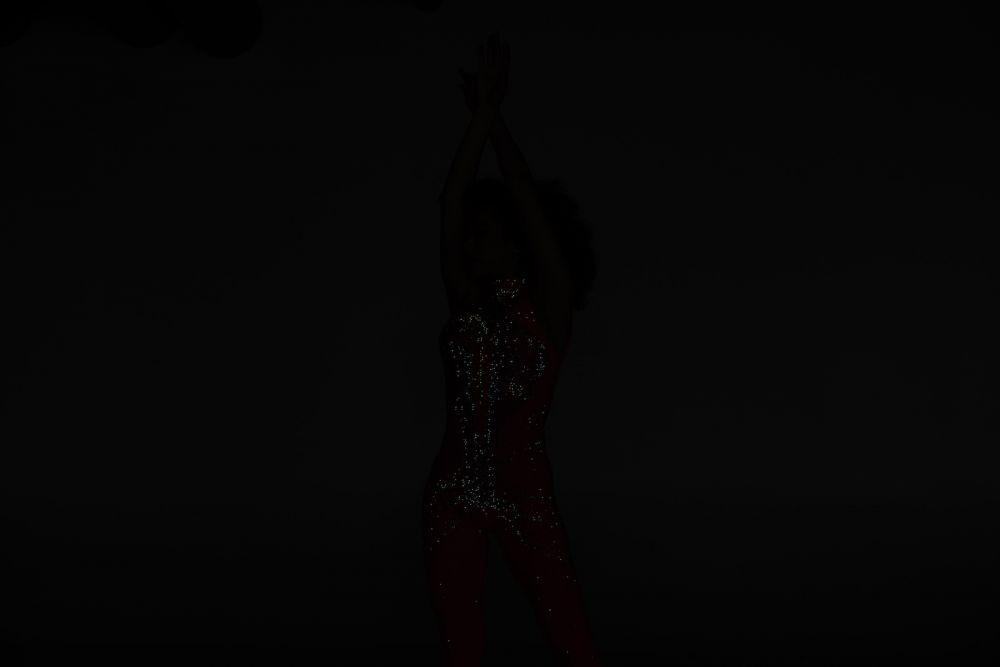
We dropped the ISO to 200, narrowed the aperture to f/4, and bumped our shutter speed to 1/200th of a second. As you can see in the image above, this basically resulted in a blacked-out shot. Now we can add and modify our lights as needed.
Step 3: Modify/Add Light
When it comes to using an advanced lighting setup, you’re going to do a lot of modifying. It helps if you think in layers and only add one light at a time when building out the setup. Once you’re satisfied with how the first light is functioning, then you can move on to the next.
First Light: Background
The first light we’re going to add will be our background light. For our first portrait, we want to make the background red to complement our subject’s outfit. The outfit is more pink than red, but if we get it close in-camera, we can always dial it in further during the editing process.
For the background light, we’re going to use a Profoto A10 and pair it with a red MagGel Pro Gel, but you can use whatever light and gels that you have available.

We’re going to place this first light directly behind our subject and angle it so that it is facing slightly upward and towards the back wall (see the image above). The goal here is to create a wash of light across the backdrop.
You don’t need a ton of light here, but just enough to add some color to the background. Our power setting of 7 on A10 translates to roughly 1/8th power on a flash with 75 watt seconds of power.
Now, let’s compare the pitch black version of our scene to the shot with the background light
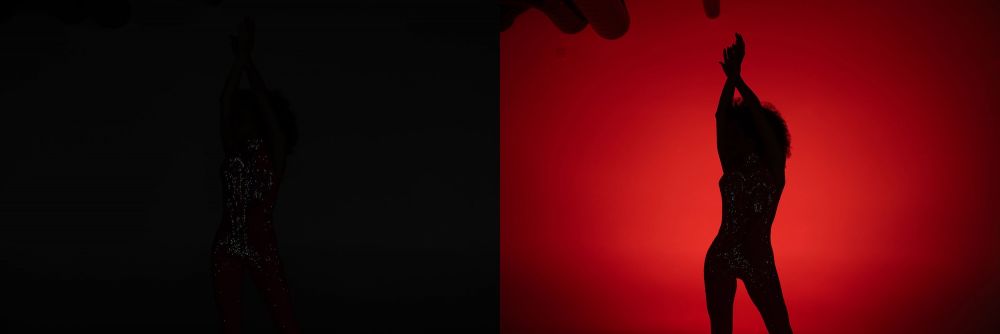
At this point, we’ve basically created a silhouetted shot. This could almost serve as a style in and of itself, but we’re not done. Now, we’re going to use the new MagBeam to put a pattern on the wall. This is where it gets fun.
Second Light: Wall Pattern
For this step, we’ll use the new, updated MagBeam, which will allow us to use a mask to create a Fresnel lens and project a pattern on the wall.
The first thing we need to do at this point is choose a pattern. We’ve opted to kick things off using a starburst pattern.

MagMod offers several mask options to choose from, making it fun to experiment with different patterns and creative styles.

Once you choose a pattern, place it on your flash. If you’re using a MagBeam, make sure the ridges on the front piece are facing inward towards the light. It’s also important to fully compress the MagBeam to get the sharpest results (see the image above).

Next, pop the modifier onto your flash and place your second light. You’ll notice in the image above that the second light is on a stand just behind the subject, angled slightly upward (to place the pattern behind our subject’s head or upper body) and pointed directly towards the wall in the background. It’s okay if you need to Photoshop the stand out of the final image. Or, you can adjust your subject’s pose to hide the stand.
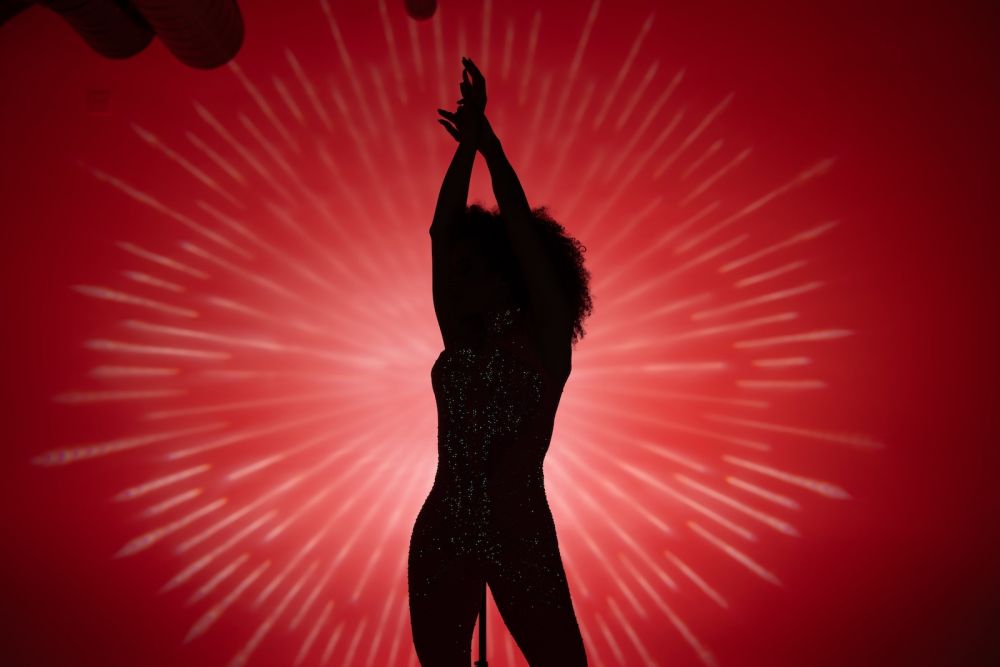
Here, you can see what it looks like two lights into the process. You can adjust your angle or the angle of the flash with the pattern to get it into the exact position you want. Once the background and pattern lights are ready to go, we can move on to adding the next light.

Pro Tip: One thing to keep in mind is to check the zoom on your flash. Depending on the zoom setting, the appearance of the mask will vary. We found that you get the tightest, most detailed pattern when you’re zoomed in close to 100%. Zooming the flash all the way out tends to yield a softer look with the pattern.
Third Light: Main Light
Now, it’s time to add our main light. For our main, we’ll be using the Profoto B10 to give us a bit more power, but again, use what you have. You’ll notice we’ve paired the B10 with the MagMod Pro 24 Octa with a grid on it.

We’re going to place the main light to the left of our subject, just behind her and angled forward. The grid will prevent this light from spilling onto the backdrop so that we don’t lose the red in the background. With this light in place, you may need to reposition your subject so that the light falls onto them in the way that you want.
Add Fill Light (If Needed)
After getting everything set up, we noticed that the shadows were still a bit too dark on our subject.

One solution involves adding another light to fill in the shadows, but we’re already at three lights. For this reason, we can opt for a simpler solution. If you have a reflector or a V-flat, set it up opposite of the main to get a nice bit of fill light kicked back into the scene.

As you can see in the images above, the V-flat makes a noticeable impact on the image. When the shadows are basically too deep and dark, the image can feel a bit less refined. We also lose some of the shape and dimension that we might want to maintain in the shot. V-flats provide an easy and effective solution.
Step 3: Pose and Photograph
This is the place where we transition from modifying the light to directing our subject into a variety of poses and capturing our images.
Before and After | Final Image
Here is a look at a before and after shot, comparing our original photo with the final image. We’ve included an additional final image so that you can see how to vary poses using the same setup.


Conclusion
We hope you found this advanced lighting tutorial for capturing stunning portraits helpful. The most important thing when using advanced lighting techniques like this is to take your time, add in one light at a time, and shoot with intention. Your final images will always turn out better when you do.


