-
Term: Time Lapse
Description: Time lapse photography involves capturing multiple frames and presenting them at a faster frequency than the rate at which they were captured.
Time Lapse
What is Time-Lapse?
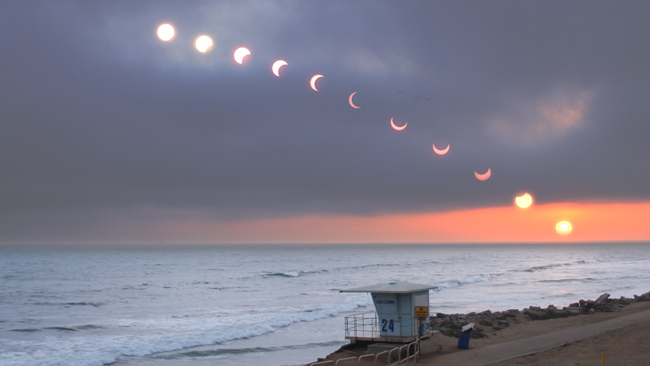
Time-Lapse photography is a way of recording a scene or specific objects that slowly change and turning it into a high-speed video. You’ll see frequent examples of time-lapse in films and documentaries. For example, in David Attenborough’s Planet Earth series, you’ll notice that the passing of time, seasons changing, animals growing and plants taking form, all happening very quickly – this is time-lapse.
The easiest way to create a time-lapse video is to point your stationary camera at something that alters very slowly, things like plants growing, clouds moving, people walking etc. and start taking a series of photographs which can go on for hours, days or even months. Then, the magnitude of photographs captured is compressed into a video that is just a few minutes in length and thus creates the desired time-lapse effect.

In simple terms, the use of this effect allows an audience to watch things happening much faster than they do in reality. Watching the leaves on trees change color would take months in real time, you’d never be able to do it! But watching the leaves changes from green to red in mere seconds is captivating.
The Basics of Time-Lapse
In standard video, each second contains 24-30 frames (photos). Converted into frames per second (fps) this means that a 2-minute video at 30 fps would be made from 3600 frames (photos) that are playing at high speed.
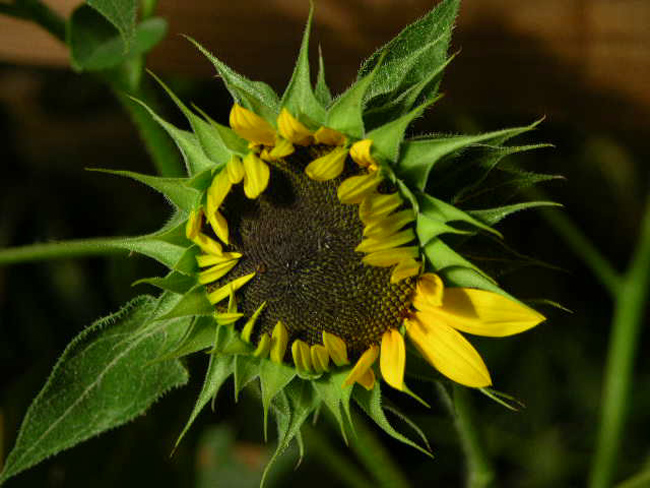
In order to create the desired time-lapse video effect, you need to reduce the gap for each shot and then merge the photos into a 24-30 fps video. E.g. if a flower takes two weeks to change from a bud to full bloom and you took a photo every hour you’d have 336 photos. This means that if you compress these frames into 24 fps, you’ll be able to watch a flower bloom in just 14 seconds, which is pretty incredible!
Choosing Your Subject
Here are some basic suggestions to get you started, but be creative and see what different time-lapse videos you can create.
- Flower Blooming/Plant Growing
- Clouds Moving
- Ice Forming/Melting
- Sunrise/Sunset
- Movement in a busy high-street
- Spider Creating a Web
- Plants Decaying
Interval Length
When you’ve chosen your subject the next thing to decide upon is the interval of each frame (the time between each photo). This will usually depend upon your chosen subject and what effect you want to create.
Short Interval (Smooth Video)
To create a smooth video output, you’ll need to use a short interval between each photo. This is usually used when shooting subjects that change quite quickly, for example, clouds moving and ice melting. A shorter interval usually has a range of 1 minute to 1 hour per image.

Longer Interval (Blocky Video)
Depending on the subject, the interval between frames for subjects that take a long time to change can be much greater. For example, a construction project or a plant decaying can take anything from days to years to complete. Therefore, the delay between each frame can be much greater. It could be 1 hour per photo, 10 hours per photo or several days per photo, simply depending upon the change speed of the subject.
Creating Time-Lapse Using a DSLR Camera
Once you’ve chosen your subject and you’ve settled on the length of interval that you’d like to use, you need to understand how to create time-lapse video with the different types of camera available.
A DSLR camera is the best choice when creating time-lapse video because they feature a high output quality and great control.
 To film time-lapse, you’ll need a Tripod and an Intervalometer. The tripod is required to keep your camera stationary and to ensure that your camera is pointed at the exact same location without moving.
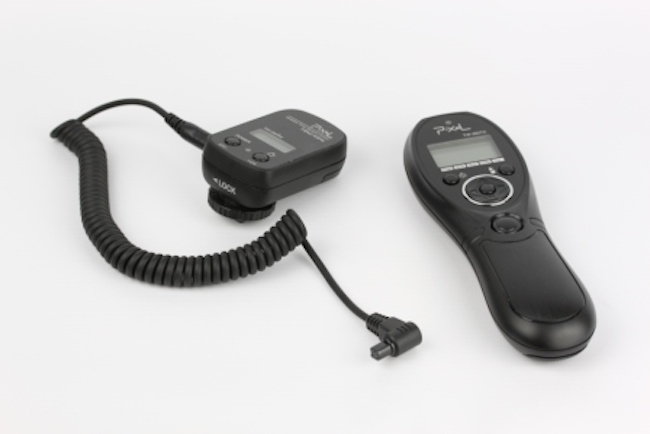
An Intervalometer (also known as a remote control) is a fantastic add-on tool for your DSLR camera that allows you to remotely set your DSLR to click the shutter at the interval of your choice e.g. every second, every minute, every hour and so on.
An Intervalometer is an essential tool because you can’t ensure that you will manually click the shutter yourself at the right time, without disturbing the position of your camera over lengthy periods of time. Intervalometer prices vary from around £30 – £60 ($50-$100) depending on the brand. Remember to check the compatibility of all add-ons with your DSLR camera before making a purchase.
Things to Consider
Don’t worry if your first attempt at creating a time-lapse video doesn’t go exactly to plan, the key is to practice and remember these important points for success.
- Carry Extras – this is a must for all types of filmmaking. Carry extra batteries and memory cards to ensure that you’re never caught out mid-shoot.
- Test Shoot – to ensure that you have the best angle and composition.
- Choose Your Spot – be sure to set up your camera in a secure position where it will not be disturbed or knocked over. Remember to keep an eye on your equipment to ensure that there’s no chance of it getting stolen.
- Manual Mode – is recommended with a manual shutter speed, aperture, exposure and white balance to prevent the camera from automatically adjusting with the change of light as time progresses.
- Use Basic JPG – set your camera to take photos in JPG quality to ensure that you don’t run out of storage space too quickly.

The Final Step – Combining Photos into Video
When you’ve finished shooting, you’ll find yourself with hundreds, maybe thousands of photos. This final step will see the creation of your finished time-lapse video.
To help you achieve this, there are many free software programs you can use. Alternatively, if you buy an Intervalometer from Fast Forward Time it will come with a free software CD to help edit your photos into that fantastic final time-lapse video.

Morten Rustad, a professional time-lapse photographer based in Norway explains how he achieves time-lapses covering up to 100 meters in length with the help of the Syrp Slingshot. The 25 minute tutorial guides you all the way through the entire process starting with conceptualization & planning and ending with post-production finesse.
Syrp’s mobile app is fully compatible with the Genie Mini, making it effortless to set-up time-lapses in hard-to-reach locations. Rustad delves into the nitty-gritty details of setting up the Slingshot to avoid movement over the 100 meter distance to yield a smooth final product, something that is incapable of being produced from a slider shot.
Related Articles to Time Lapse Definition
SYRP Genie II Review – Pan, Tilt, Linear 3-Axis Motion Control For Video & Timelapse
For all you content creators out there looking to take your video production value to the highest level, this is one of the best motion-control systems around.
Joe DiGiovanna: One NYC Timelapse Photographer’s Mission to Capture The City as Never Before
What’s the longest timelapse you’ve ever created? It’s possible that Joe DiGiovanna has you beat! Join us and have a look at his incredible ongoing 30 year project timelapsing the New York City Skyline.
Time Lapse, Real Time Eye AF, & Animal Eye AF Come With New Sony Firmware Update
In a new update, Sony announced some fascinating new AI-Driven AF capabilities along with a built-in timelapse feature.
South America 8K Timelapse by Morten Rustad
Time-lapse photography has proven to be a very unique way to capture breathtaking landscapes in the outdoors,
Milky Way 4K Timelapse Montage | Mauna Kea Heavens 4
Mauna Kea Heavens is Sean Goebel’s 4th and final timelapse film that features night and daytime timelapses of Mauna Kea and its various telescopes, on the Big Island of Hawaii.
Time Lapse Video Shows Extent of Photoshop Retouching on Model
Just how much make-up and Photoshop magic is involved in a photo shoot? We’ve shown the before and after photos…


Get Connected!