Good news, everyone! The SLR Lounge Preset System has been updated and verified fully compatible with Adobe Lightroom CC 7.3. They are now availalable for download to current owners, and for purchase if you are a new customer.
If you are already an SLR Lounge Preset System user, please save/backup all of your existing presets, remove them, and then download & install the updated presets, making sure to follow the install instructions for LR CC 7.3 first.
MORE good news! With the Lightroom CC and Classic CC update, as well as a coinciding Adobe Camera Raw and Adobe Photoshop update, Lightroom (Develop) presets have all been converted to .XMP files which has the effect of making them now visible from within Adobe Camera Raw, via Bridge or Photoshop. This means that whether you wish to use presets in Lightroom, Bridge, or any ACR-capable application, Creative Cloud subscribers now only need to purchase one set of presets.
Adobe Lightroom CC 7.3 Update
Adobe released a major update to Lightroom CC, available for both the “Classic” version and the new all-cloud “CC” version. This update focuses mainly on an all-new set of raw Profiles, which are far more robust than the previous profiles that were offered.
This update is very exciting because it definitely appears to offer a noticeable and welcome improvement in the overall color and tone response of raw files. For many generations of raw processing applications, users have complained that images appeared dull compared to what they had seen on the back of their camera, and Adobe has delivered a potentially great solution.
 (From The Adobe Press Release)
Unfortunately, the update was not without bugs, as is apparently par for the course with software updates of all kinds these days.
Here at SLR Lounge, we quickly dove in to uncover the root of the issue and see if we could fix the problem immediately. What we discovered was very interesting, and the fix, although tedious and time-consuming, is simple enough that we thought we would share it with you, the Lightroom user.
Many photographers have innumerable Lightroom presets of their own, and have expressed no small amount of frustration over this bug. It is indeed a shame that many folks quickly rolled back to Lightroom 7.2, since the Lightroom 7.3 update brings with it such a hopeful new tool to play with.
Adobe Lightroom 7.3 Preset Sort Order Bug Fix
So, how do you fix this bug? It’s a little complicated, or at least it can be if you choose to do it in the most reliable, future-proof way. However, it may still beat waiting for Adobe to release a fix or new update.

Option 1.)
Dig into the code of the Preset file
Unfortunately, the best solution to the preset sort order problem is to actually dig into the code of each preset file, using a text or code editing application, (anything from TextEdit to Komodo Edit will do) and change the embedded names of the presets so that they match the actual, desired name.
Editing an Adobe Lightroom (7.2) Preset .LRTEMPLATE File Code
If you have not yet updated to Lightroom 7.3, you can actually preemptively fix this error by editing the code of the “old” Lightroom preset file format that LR 7.2 used, the .lrtemplate files. Even if you do eventually update to Lightroom 7.3, your preset files should remain in the correct order.
Close Lightroom, and right-click on a Lightroom preset file that has the .lrtemplate extension, then open the file in a text editor of choice. (To do this in large batches, you may be able to drag-and-drop a whole selection of presets into the text editor to open them all at once.)
 (Can YOU spot the problem? Adobe couldn’t, or chose to ignore it…)
At the very top of the code, you will see two lines that contain the text “internalName” and “title“. The second one, “title”, is the one that usually is the correct one, however, double-check first to make sure that this title field, which appears in quotations, is exactly the same as the actual file name itself. If it is, then simply copy this title field (again, within the quotation marks) to the internalName field, thus overwriting the old internalName.

Repeat this procedure for all of your presets. Then, save the file, close it, and re-open Lightroom 7.2. Your entire set of presets should now be in the correct order!
NOTE: Unfortunately, if you do update to 7.3, Lightroom will place a tilde character at the beginning of all old .lrtemplate files, to indicate that they have been converted to .xmp files. In this case, you will need to edit the file code of the newly created .xmp files if you wish to have your presets in the correct order in 7.3.
Editing an Adobe Lightroom (7.3) preset .XMP File Code
If you update Lightroom from 7.2 to 7.3 already, then Adobe has automatically converted your old .lrtemplate preset files to new .xmp preset files, and stops using .lrtemplate files. The code-digging is just slightly more time-consuming because the things you’re looking for are a bit deeper.
Right-click on a Lightroom preset file that has the .xmp extension, and open the file in a text editor of choice. To do this in large batches, dragging and dropping multiple preset files at once into the text editing application may also work depending on your operating system.
Once an .xmp file has been opened, use your operating system’s search function (CMD+F, CTRL+F, for example) to find the word “SortName“. This name will be the name retained at the time you first created the preset, so it will sometimes be different from a new name you give it.
Simply look a few lines higher in the code, for the other name, (crs:Name) and copy that other name into the “SortName” field. Double-check to make sure this name actually matches the main file name, and then save and close the .xmp file.
When you close and re-open Lightroom, your presets will appear in the correct order.
Option 2.) Rename all presets within Lightroom
This next option should also work. However, because it does not appear to solve the problem in the actual code of the preset file itself, it may only work on your computer. So we only recommend this solution if you are fixing just a few of your own personal presets, and are averse to using a text editor to dig through lines of code.
With that said, renaming all of your presets within Lightroom appears to bump them to the bottom of the list in whichever preset folder they are, and it also re-alphabetizes them.
Simply right-click each preset, select “Rename” and then change the name in an innocuous way. Add “-7.3” to the end of the preset name, for example. Once you have performed this renaming to all of your presets in a folder, the presets within that folder will appear in alphabetical and/or numerical order again.
NOTE: Again, beware: We investigated this solution, and found that it may not actually change the two names in the code of the preset file itself; the “Name” and “SortName” may remain different. Because of this, it is uncertain how permanent and universal this solution will be. However, it should be enough for small, private collections of presets that are not being circulated to other users.
Adobe Lightroom 7.3 Black & White Preset Bug Fix
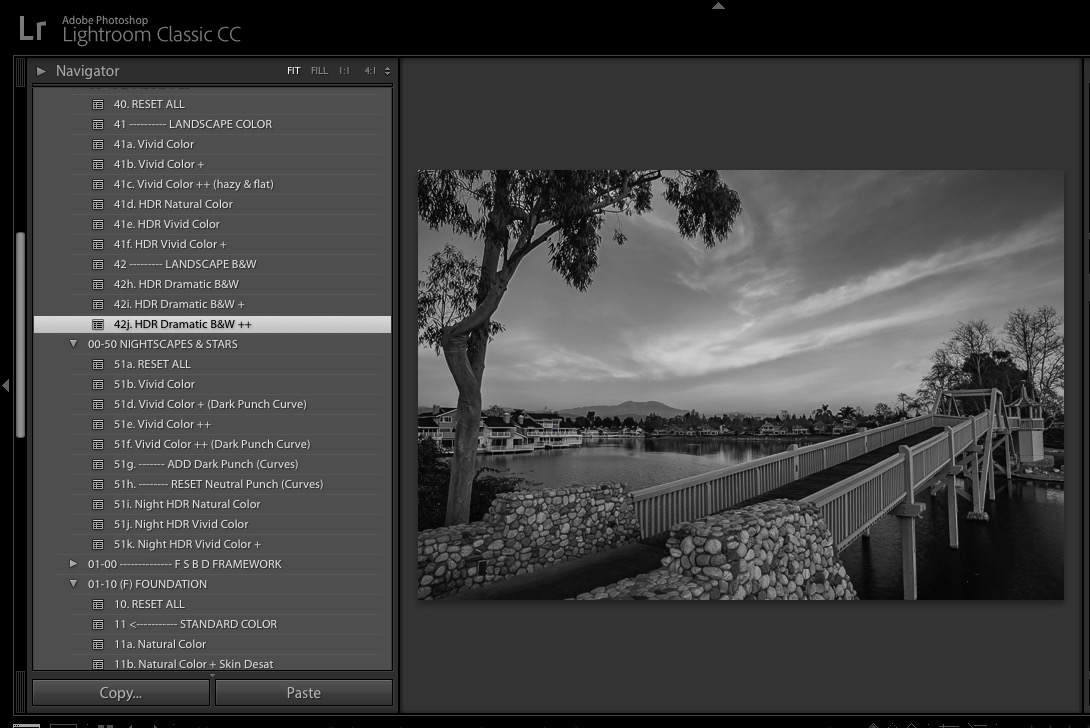
If you have any black & white presets that were created in Lightroom 7.2 or older, when you click on these presets in Lightroom 7.3, any other preset you use after it will revert the image back to color, even if that preset is only intended to affect unrelated things such as highlights or shadows, etc.
The fix is simple: Update your presets to take advantage of the amazing new B&W Profiles Lightroom 7.3 offers!
Step 1.
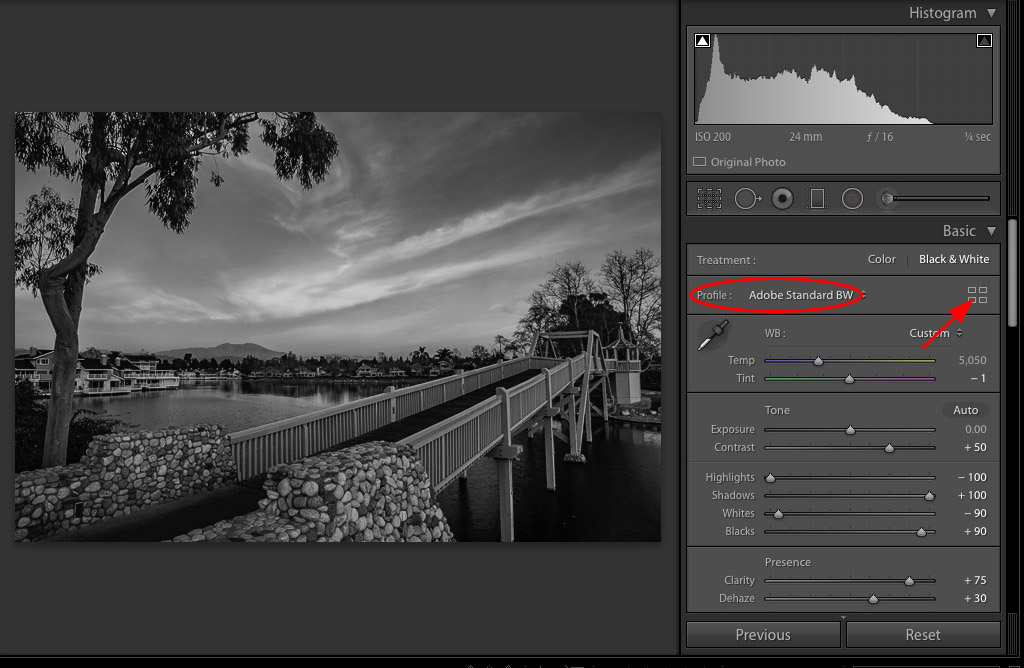
Click on one of your old B&W presets, and then look in the upper right Develop Module:
Step 2.
Select whichever new B&W Profile matches and/or enhances the existing look of your preset. There are numbered Profiles from “BW 01” thru “BW 12”, plus a few color filter presets.
NOTE: Using these latter Color Filter B&W Profiles may reset (zero) any custom Black & White Mix (HSL) sliders you were previously using in your B&W preset!
Step 3.
Just beneath the Profile selection box in the Basic Tab of the Develop Module, adjust the Amount slider either to 0%, if you want your preset to stay exactly the same, or to your taste, if you like the way the new B&W Profile looks.
Step 4.
Update the preset by right-clicking on it, and selecting “Update With Current Settings“, making sure that the very first box is checked, “Treatment & Profile” plus any other boxes you had previously checked to customize that preset.
*We often leave settings like Exposure and White Balance un-checked when saving presets, for example.
There you have it, your black & white preset will now work correctly in Adobe Lightroom 7.3!
Please comment below if you have any other questions regarding the latest Adobe Lightroom CC update, and if you haven’t already, be sure to check out the SLR Lounge Lightroom Preset System which is now fully compatible with the Lightroom 7.3 update!


