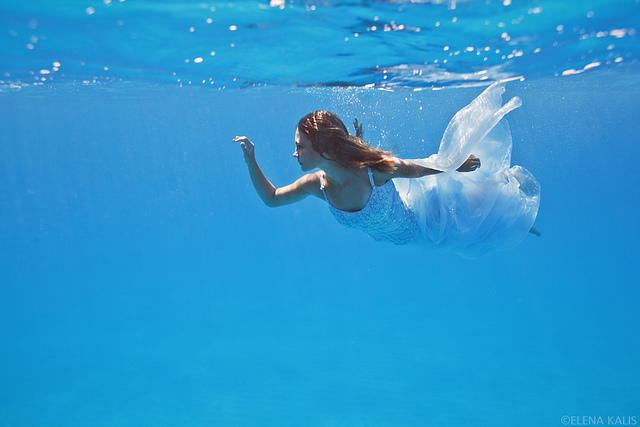
Underwater photography is a specialized art in itself. While proving to be one of the most difficult fields within the realm photography, it can also result as one of the most creative. Not many photographers take the plunge into underwater photography, but there’s so much room to capture rare and vivid images.
For photographers that like a little bit of a challenge dealing with waves, currents, perhaps a few odd facial expressions from your model, and holding your breath for long periods of time, this one goes out to you.
There’s a variety of gear you can use to photograph under the blue, and it doesn’t have to get too complicated, everything from film and digital watertight casings to a GoPro, underwater cameras to underwater smartphone cases. It’s really up to you as to what medium you chose, but before you jump head-on, here are a few quick tips to get better resulting and creative underwater photographs.
[REWIND: Nauticam Launches New RX100 M3 Underwater Housing]

1. Stay Close to The Surface
The deeper you go under water, the more light you tend to lose, so try to stay between 1-5 feet. It’s best to do underwater photography between 8am-11am, as you’ll get some nice natural light on the surface. By staying close to the surface, you have plenty of room to get added atmosphere in those shots – sunbeams, reflections, perhaps some good texture in the background.
2. Props, Props, Props
Adding props will help your photograph tell a different story. Whether they blend well with an ocean tale or not, grab an old book, perhaps a musical instrument, ribbons, a lantern, or something with a nice solid geometric shape.

3. Close-up Anyone?
By staying close to your subject underwater, you not only get natural looking skin-tone and more accurate overall color, there’s also room to capture all the details.
4. Practice Makes Perfect
You’re not going to get the perfect shot on your first handful of tries. It takes a little getting use to the whole floating, doggy-paddling, holding your breath, composing a shot and communicating with your model via bubbles. Talk to your model above water before the shot, and set-up cues beforehand, also practice those cues a couple times underwater and learn to communicate first, that way you can go with the flow.
5. Shoot From Below
Shooting your subject from below towards the surface adds a more dramatic effect to the photograph. It’s a nice way to get contrasting shadows, and rays of light hitting at different angles – backlighting at its finest.

6. Switch-Up That White Balance
Since your camera is designed to work in daylight–on dry land, I mean– and water has a filter of its own, you tend to lose a lot of color as soon as you jump in. Red, orange, and yellow are the first colors to go right out of the bucket. The deeper you go, the bluer the images. The way to deal with this is either changing the white balance to “underwater”– if your camera has it, or switch to the “daylight” setting when close to the surface. If you are shooting from below, you can then change the setting to “cloudy.” Something that might also help is using an underwater color-correcting filter, and of course, make sure to always shoot in RAW underwater.
7. To Focus, Or Not To Focus
It will work in your favor if you set your camera’s focus priority to release, over focus. It will be hard for your camera to get a focus grip underwater, so its best to take the shot, otherwise you will miss a lot of good captures. Manual is also your pal, and along the way bump up the exposure to +1 before putting your camera inside the waterproof housing.
Do you have any underwater photography tips you’d like to share with other photogs? Any gear preference? Leave them in the comment section below!
CREDIT: All images are copyrighted and have been used with permission for SLR Lounge. Do not copy, modify or re-post this article or images without express permission from SLR Lounge and the artists.


