In this video, we will go over how to use the Adjustment Brush Tool in Lightroom. In addition, we will explain the different settings found in the Adjustment Brush Tool Menu. The Adjustment Brush Tool works almost exactly like the Graduated Filter Tool, but we have a few additional options because we are now painting in with the Brush Settings as opposed to dragging across an entire area of the image when using the Graduated Filter Tool. The Adjustment Brush Tool gives you a little more control over what areas you are actually affecting.
Watch the Video
The Adjustment Brush Tool Menu
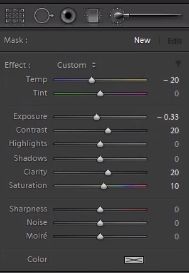
To access the Adjustment Brush Tool, hit “K.” You can also select the Adjustment Brush Tool by clicking on the last icon in the Adjustments Toolbar. The Adjustment Brush Tool is located to the right of the Graduated Filter Tool. Once you have selected the Adjustment Brush Tool, the Adjustment Brush Tool Menu will appear, displaying the Brush Settings. As you can see below, we have the same exact options as we did with the Graduated Filter Tool in the Adjustment Brush Menu, starting with “Mask” and down to “Color.” In this tutorial, we will not be going over these settings since we have already covered them in the Graduated Filter Tool tutorial. If you want to see how these settings were used with the Graduated Filter Tool, then go through that tutorial first.
Adjustment Brush Size and Feathering
We can change the size of the Adjustment Brush in a few different ways. First, we can hit “[” or “]” to make the brush size bigger or smaller. We can also use the mouse wheel and scroll on our mouse to change the size of the brush. Lastly, you can change the brush size with the “Size” slider. Go down to the second set of settings in the Adjustment Brush Menu. There is a slider for “Size” that you can use to change the size of the Brush. In addition, you can also type in a specific size for the brush.

Underneath “Size,” we can also adjust the Feathering of the Brush by using the “Feather” slider. Feathering is the edge you see on the Inside Circle, all the way to the Outside Circle. The Inside Circle is the Feather Value and the Outside Circle is where the effect will feather to. So for example, if we have our Feather set at 100%, that means that the Inside Circle is going to be 100% opaque and the Outside Circle is where the 100% will feather to. Below is an example of the Feathering Value at 100%.
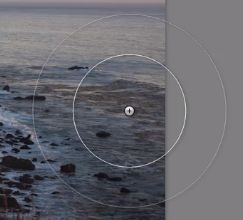
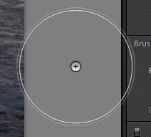
The larger the feather area, the more subtle the effect will be. Therefore, if you need to have control over a little area, we need to pull the Feather Value down to make the effect look correct. Below is an example of the Feathering Value set at a lower value. As you can see, the Outside Circle is much closer to the Inside Circle than when the Feathering Value was set at 100%.
Flow and Density
We also have the options for Flow and Density, which are located underneath Feather. You can consider Flow as how fast the water is coming out of a hose. In other words, Flow controls the flow of the brush or how strong that brush is. If we adjust the Flow to 40%, then the brush will basically be painting at 40% of the normal opaqueness. To adjust the value for Flow, simply use the “Flow” slider in the Adjustment Brush Menu.
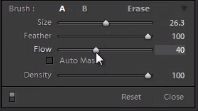
Now, Density works a little bit differently. Density controls how much of the area can be affected. So for example, if we adjust Density down to 50%, that means we are painting in with a Flow of 40%, but the maximum Density, which can actually be applied to any specific area, is limited to 50%, so the effect will not get any stronger than that value.
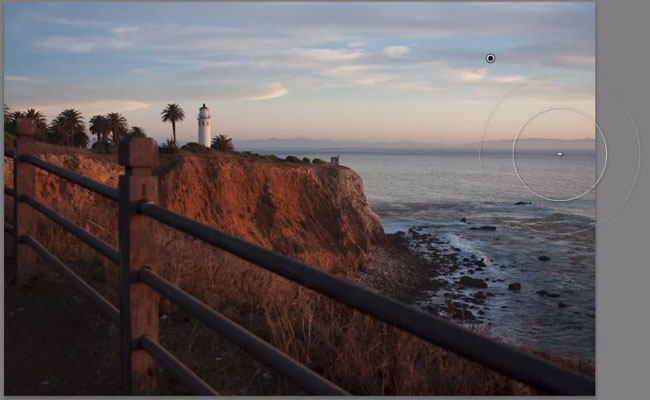
This is the original image without any Adjustment Brushes applied to it.

As you can see below, the black button indicates that we have painted over that area with the Adjustment Brush. There is not a big noticeable difference in our image but that is because the effect is limited to 50%.
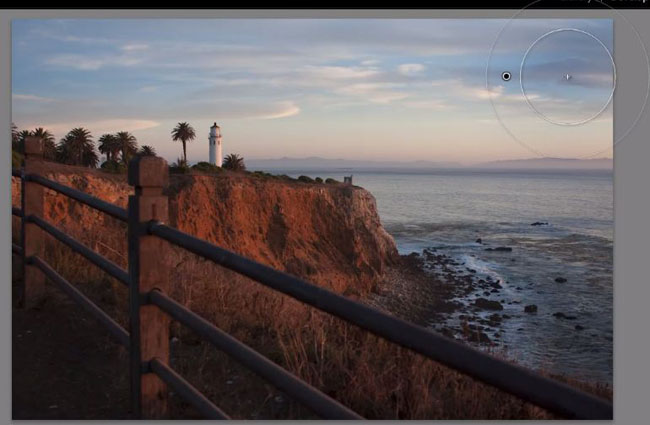
If we adjust Density up to 100%, then we can keep painting in an area until the effect is basically applied to 100%. However, we are painting at the speed of the Flow value (40%). As you can see below, the top right corner of the image has a noticeable change compared to the previous image. This is because we have changed the Density to 100%.
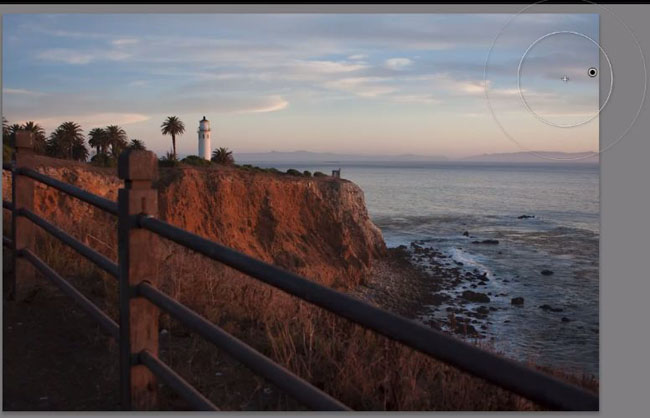
Keep in mind that if your Flow is at 100% and your Density is down to about 15% or 20%, you will be limited to the Density Value as you start painting in the effect. Below, you can see that the effect is not as strong as the effect when we had the Density at 100%.
Just remember that Flow controls the speed whereas Density controls the overall amount of an effect that can be applied to a specific area.
Auto Mask Feature
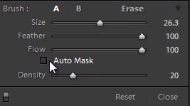
The Auto Mask feature is located right below “Flow” in the Adjustment Brush Menu. The Auto Mask feature tries to have Lightroom guess what areas you want to adjust. To select this feature, simply check the box next to “Auto Mask.” The Auto Mask feature works in certain situations, but not in all situations. Whenever you are making a stronger adjustment effect, Auto Mask can actually create little edges along areas of contrast. These edges are similar to how an edge on a Mask would look if the Mask was applied incorrectly. For the most part, we do not need the Auto Mask feature.
Creating a New Brush and Resetting Settings
To create a new brush, simply hit “New” in the Adjustment Brush Menu. Once we have created a new Adjustment Brush, we can use different settings to paint over another area again.
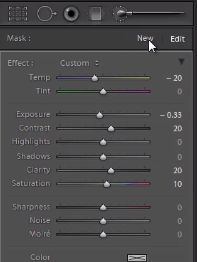
We can also edit any one of our Adjustment Brushes by clicking on the button. Then select “Edit” in the Adjustment Brush Menu. As you can see below, the black button indicates that we have selected an Adjustment Brush to edit and our mouse is hovered over “Edit” in the Adjustment Menu.

We can also delete an Adjustment Brush by clicking on the button of the brush and hitting “Delete” on our keyboard. If we want to delete all of the Adjustment Brushes in our image, go down to the Adjustment Brush Menu and click on “Reset.”

If you want to reset all of the specific areas of an Adjustment Brush, hold down “Alt.” You will see the option to hit “Reset” to set all of your settings to 0 again.

We hope you have enjoyed this tutorial on how to use the Adjustment Brush Tool and have gained a better understanding of the different settings of the Adjustment Brush Tool as well. Stay tuned for our next tutorial on how we can use Adjustment Tools as Views in Lightroom.


