Learn More About the Lightroom 4 A-Z Guide
The following tutorial is Lesson “External Editing Tab” from Chapter 3 – 3 from the Lightroom 4 A-Z DVD Guide. We will be releasing 1-2 tutorials per week from the LR4 A-Z DVD. The full DVD including 130 tutorials and nearly 14 hours of Lightroom 4 training is available in the SLR Lounge Store.
In this Lightroom Tutorial
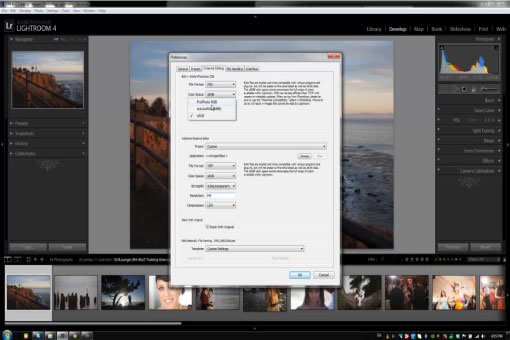
In this Episode of the Lightroom 4 DVD Training we will be going over which settings when carrying files from Lightroom into Photoshop. Why using a higher bit depth might not necessarily be for you, and what color space you should be working with. We will also go over how to setup Lightroom to use other external editors if Photoshop isn’t the only editor you use. Enjoy!
External Editing Tab Video Tutorial
External Editing Tab Written Tutorial
There are times when Lightroom won’t be enough for your editing needs. Fortunately Lightroom has equipped itself with a solution to quickly export to an external editor.
Edit in Adobe Photoshop CS5:
If you have Photoshop the first default editor you see should be Photoshop. It says on the top “Adobe Photoshop CS5” because that’s what we have installed on this computer.
File Format: The file format we choose to use is “PSD”, even though TIFF’s can be smaller at times.
Color Space: You have 3 options for color space; ProPhoto RGB, Adobe RGB, and sRGB. The sRGB Color Space is your safest choice because it shows all the range of colors within Lightroom.
Bit Depth: Although saving at a hire bit depth will give you more accurate colors, we typically have our bit depth at 8 bits/component. The reason being is because inside of Photoshop many plugins and filters will not work with 16bit images, so they have to be converted to 8bits anyways.
Resolution: The resolution comes defaulted at 240, because many printers are defaulted at 240. We set our resolution to 300 because there are printers that can benefit from a higher resolution file.
Additional External Editor
Lightroom also has the option of adding an additional external editor. You can choose what program you want to open your photos and set up the settings accordingly.
Stack with Original:
With this box checked, when you’ve edited your photo in the external editor, Lightroom will stack the edited photo on top of the original. We like to keep this box unchecked because we like to be able to see the original image with the edited image side by side.
Edit Externally File Naming:
When you’ve edited your photo, you can choose what the file will be renamed to when it comes back into Lightroom. From a photo managing point of view, if you have a very specific procedure when renaming your edited photos this will be very useful.
Conclusion and More Info
We’ve discussed Lightroom’s Built in Limitations, and how sometimes you need a little more power than what Lightroom has to offer. Lightroom has streamlined the process and made it easy for photographers to utilize both Lightroom and any external editor you would want to use.
The Lightroom 4 A-Z DVD Guide will turn any Lightroom novice into a complete master of Lightroom 4 in no time! The DVD which can be played on a Mac or Windows PC includes the following:
– 130 Video Tutorials and nearly 14 hours of content!
– Over 6 hours of tutorials dedicated to developing techniques
– Full Menu System for easy navigation through the tutorials
– Bonus DVD Content that includes Advanced Lightroom 4 Techniques
– Full HD 1080p Resolution for all Video Tutorials
– On-screen Shortcut Tooltips for Lightroom 4
– Exercise Files + Final Catalog so you can follow along during the tutorials
– No Advertisements
 1) Purchase Adobe Photoshop Lightroom 4 through Amazon. Click any of these links to take you to the offer.
Click here to purchase Adobe Lightroom 4 from Amazon.com
2) Student and Teacher Editions of Adobe Photoshop Lightroom 4 is available through the Adobe Educational Purchasing Site.
Article by
Post Production Pye
Managing Editor


